Full-Size Head Candle
What if Andy was made of wax?
Timespan: March-April 2024, future-?
Published: 2024-06-23
A while back, I told someone about my head candles and they were unimpressed — they claimed that they would only be interested if the candle was actually the same size as my head. Well, Serena, this one's for you.
Big Head Candle
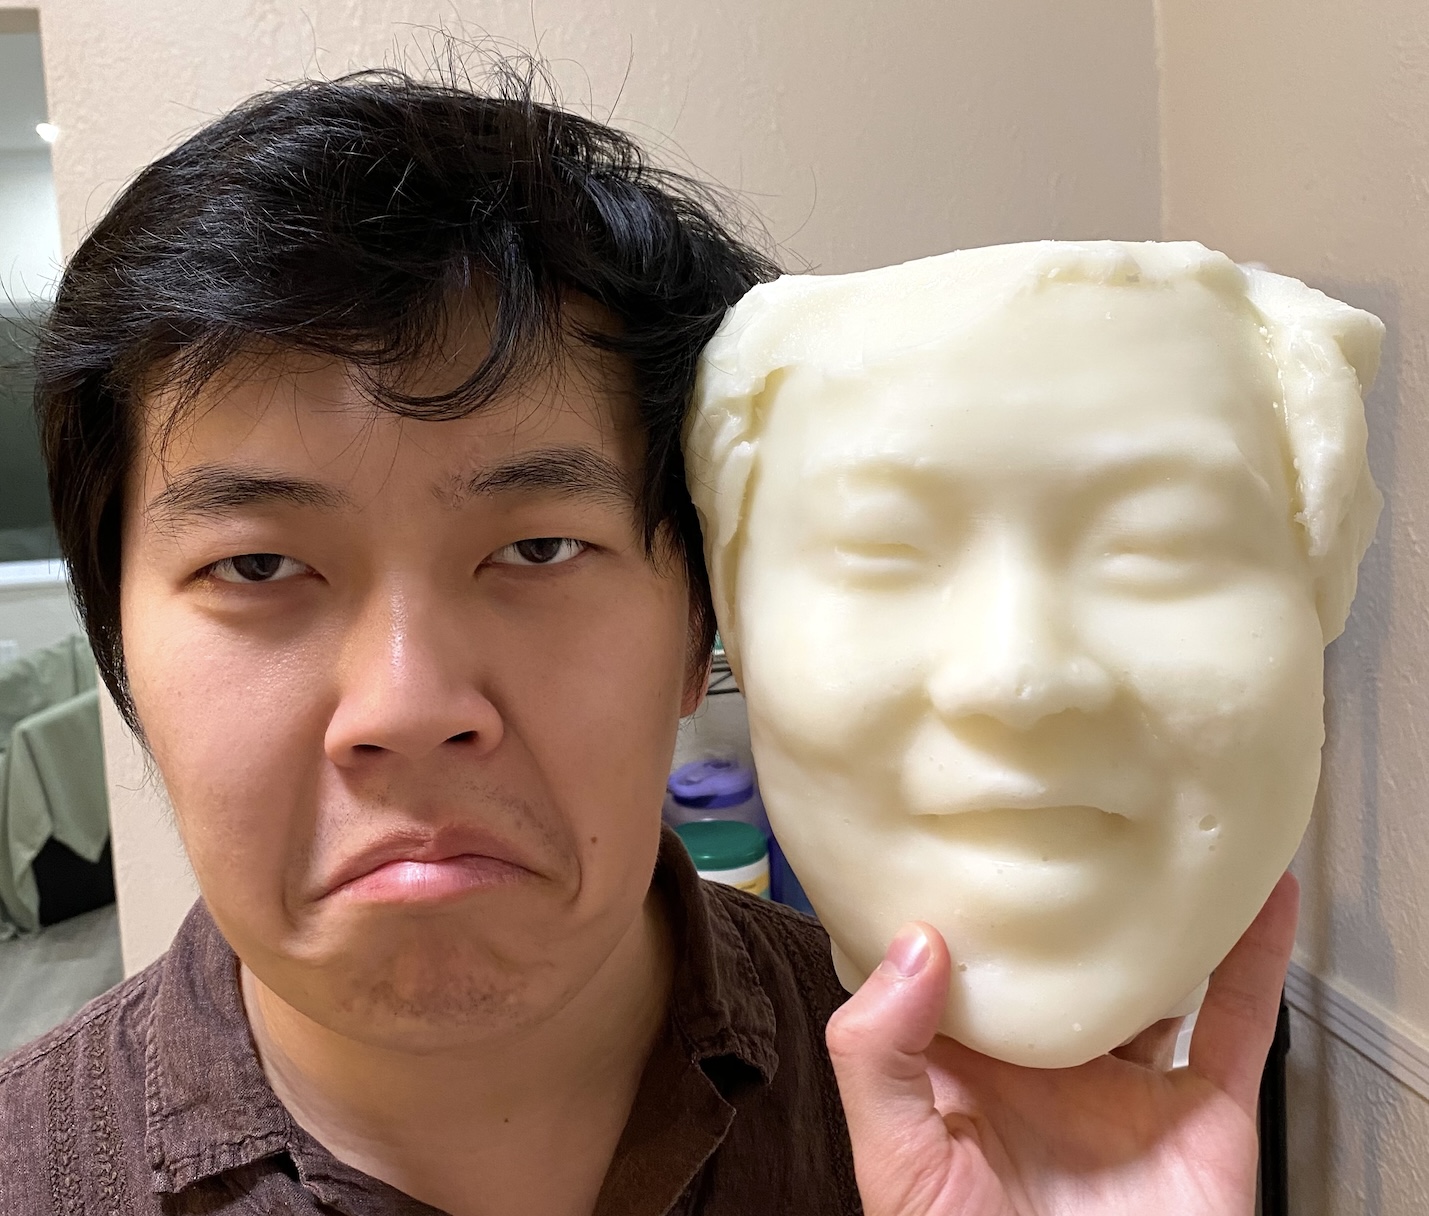
Table of Contents
1. Overall Process2. 3D Model
3. 3D Printing
3.1 Mold Hardening
4. Supplies
5. Casting
6. Demolding
7. What now?
Overall Process
I made this candle approximately the same way I made the smaller ones. Get a 3D model of your head, 3D print a negative mold, melt down a lot of wax, pour it in. But the size of the candle complicated the process.
3D Model
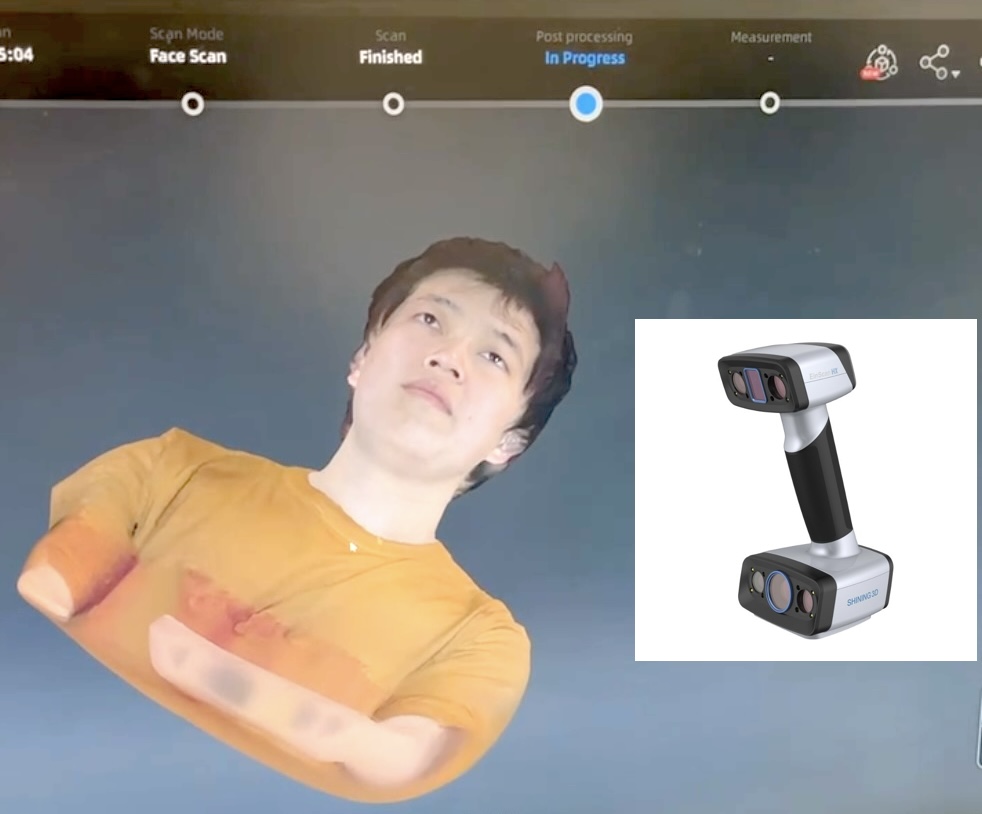
The first challenge was getting a better model. I got enough feedback over the years from showing people my head candle and hearing them ask "who is that supposed to be?" to know I needed a higher-resolution scan. Luckily I was at CMU, so I could pop into my old club and use their Einscan hand-held 3D scanner.
Head scanned using an Einscan, courtesy of CMU Roboclub
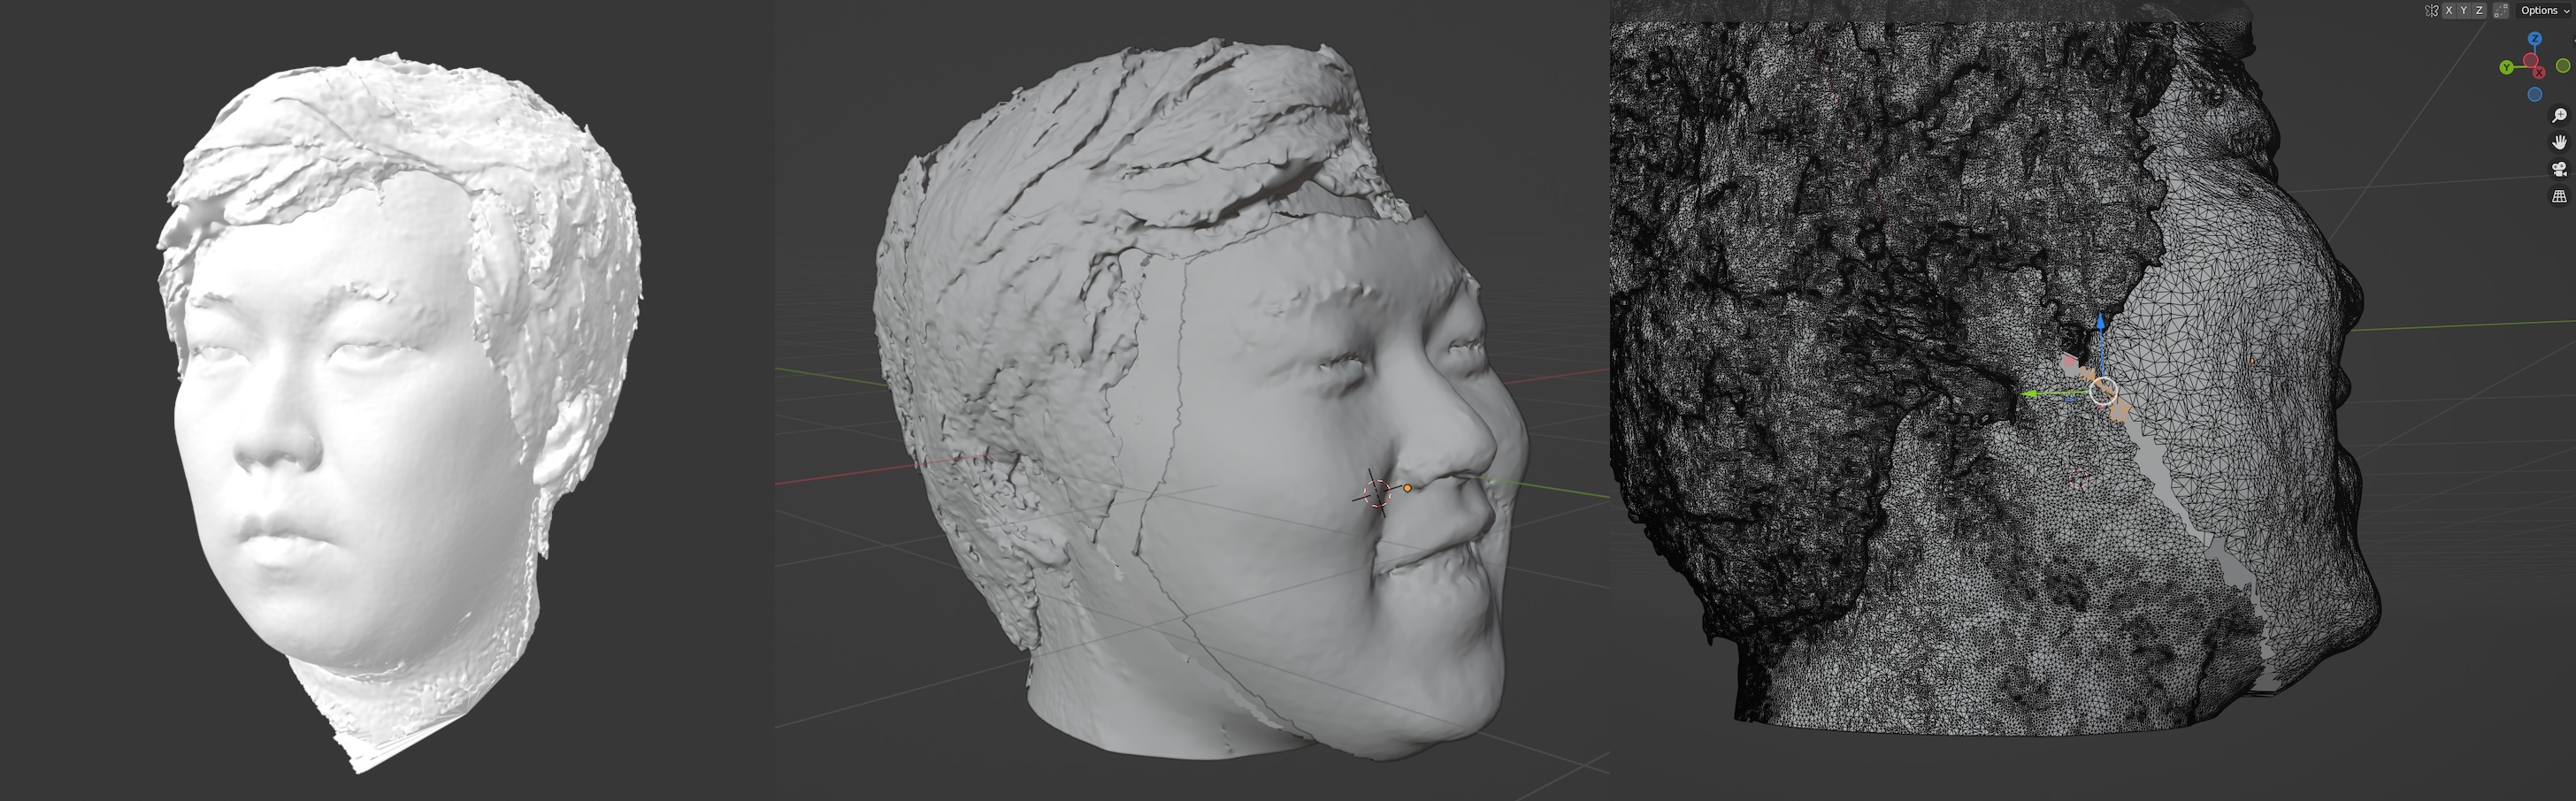
Due to social capital requirements, I was only able to get 1 partial scan of my smiling face and 1 full scan of my unsmiling face. This left me the annoying task of subtracting my face from my head in order to transplant a smile onto my other head. After 3 hours in Blender, I asked my roommate if there was another way to do this, and he replied that mesh correction is more of an art than a pre-determined process. This gave me the confidence to push through, and with 5 more hours in Blender I succeeded in making a smiling Andy head model.
Unsmiling and smiling united with a choppy seam
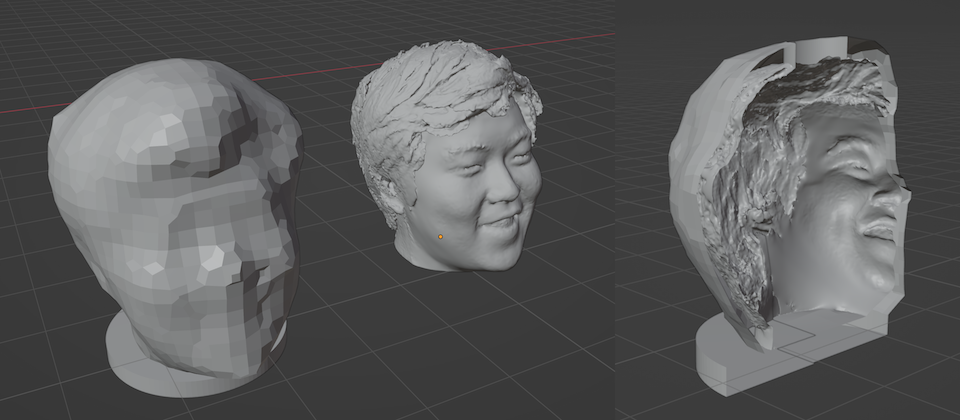
After I had the model, I made a coarse pixelization of the model as the outer shell, and subtracted my head from the inside to make the molds. I also added a base and a hole at the top for the wax.
3D Printing
Previously I used a resin 3D printer to make my molds — this was mainly because the resolution is much higher, and at small sizes I wanted all the detail I could get. Also, I have the impression that resin is tougher than PLA/ABS, and holds together better under heat (like from melted wax).
I spent a few weeks hunting around for a resin printer large enough to fit my head. While I found one, it belonged to a lab whose members I could never locate, and I did not want to spend 800$ for a big printer just for this one silly project.
Head size measurements
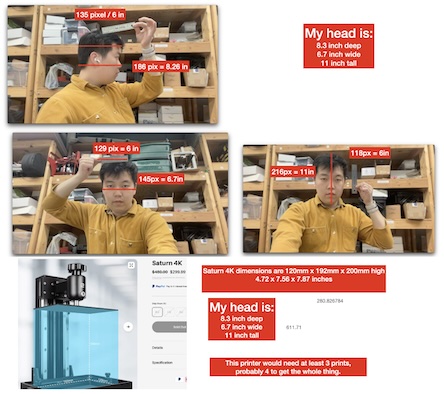
At some point, I realized that by going full-sized, I actually could use FDM printers to achieve a good enough level of detail despite their lower resolution. This proved much easier to locate, and I had a print going within a few days. Each print took around 11 hours and most of a roll of filament (~700g). I printed it in two halves, front and back.
3D printed mold, inside and outside view
Mold Hardening
PLA is not a good material for candle molds because it melts/weakens at pretty low temperatures. While molten wax cannot melt PLA beams, it can definitely weaken the structure until the hollow mold collapses, ruining the candle.
PLA heated past 90C gets stronger. From the Prusa blog
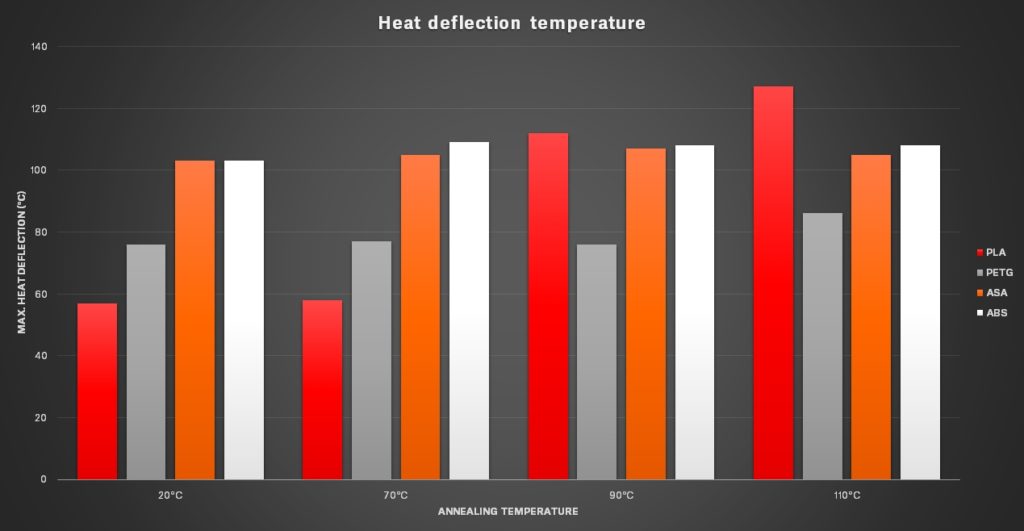
To guard against this, I found a few papers and blog posts which claimed that heat-treating PLA can increase its glass transition temperature (where it goes from solid to deformable) and tensile strength. All you need to do is heat the plastic to 100C and let it cool slowly. I accomplished this using a workshop heat gun and an infrared thermometer to check different parts of the mold.
Supplies
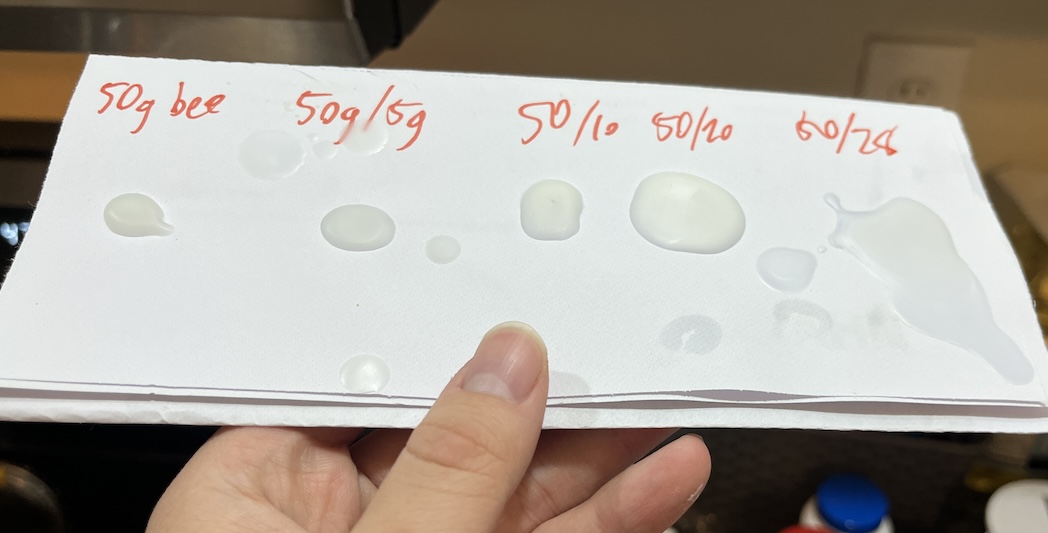
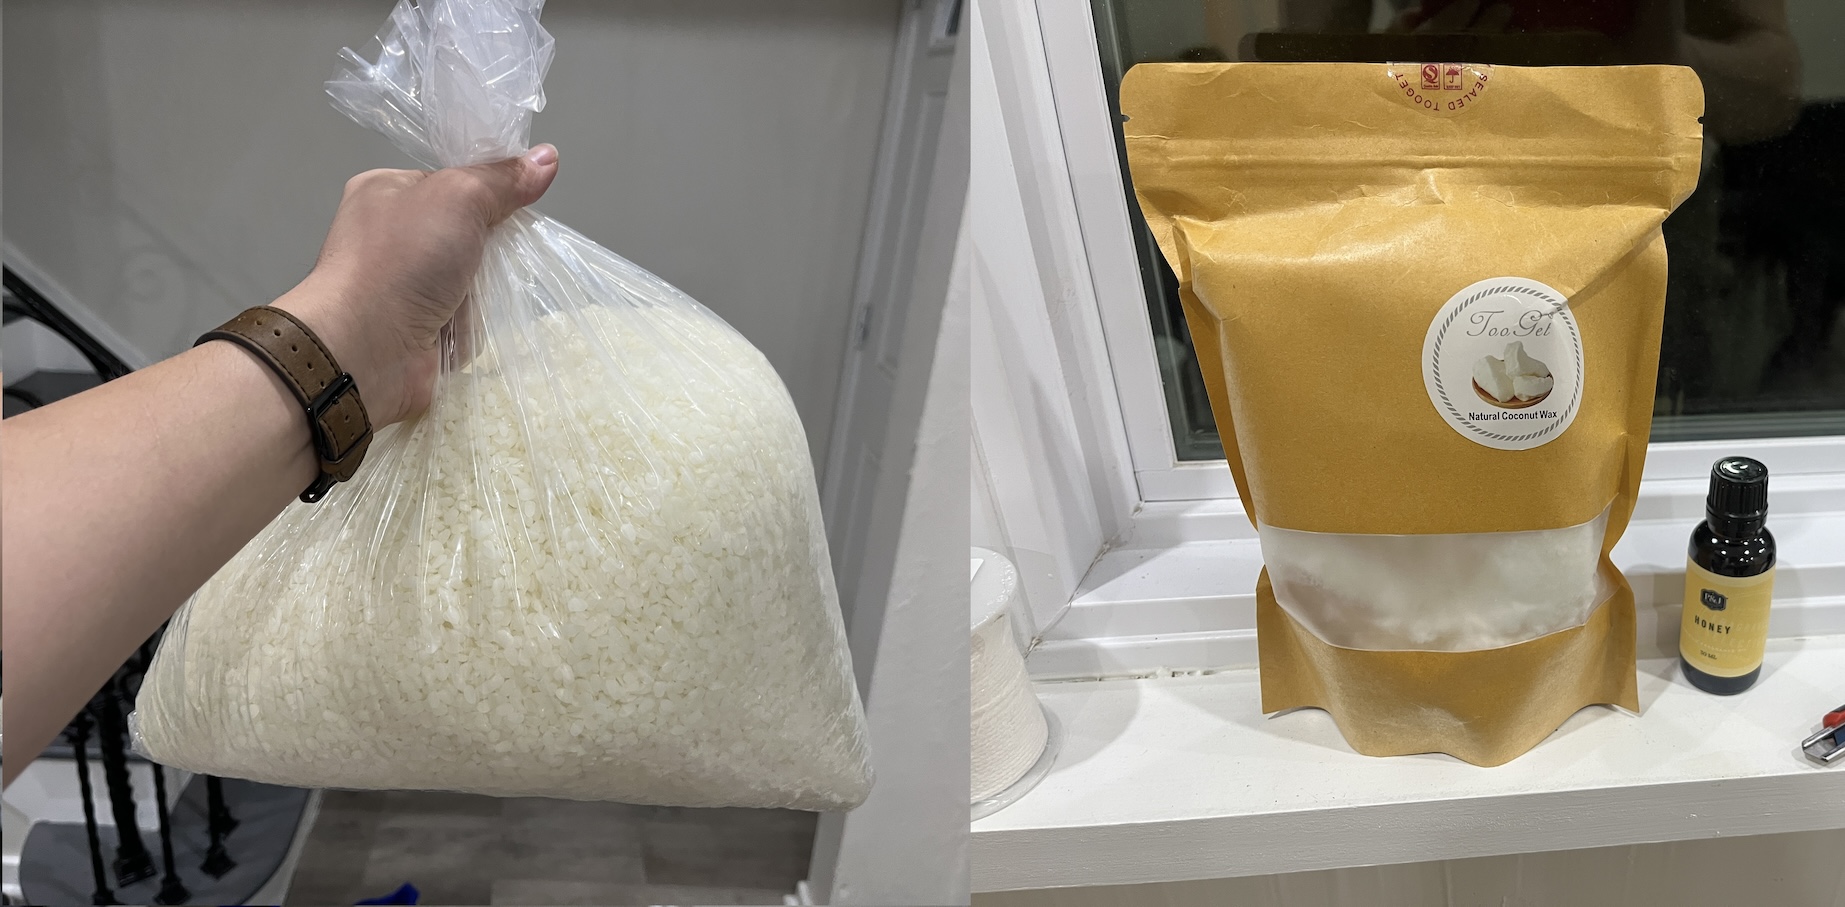
In anticipation of the back half completing, I went ahead and purchased the other supplies. I got 10 lb of white beeswax, 1 lb of coconut wax, a vial of honey-scented essential oil, and a long spool of wick. I wanted both coconut and beeswax because A) natural, B) beeswax doesn't hold scent well and needs some assistance, and C) beeswax is a really hard wax and coconut is too soft, which means their mixture has a perfect texture (I went with 10% coconut).
Test palette to balance the waxes
Unforutunately, the back half of the mold failed and I didn't have more PLA on hand, but had I already budgeted the time. Luckily, I calculated that I could cast a face candle using just the front mold and still have enough wax for the entire thing, so that's what I did.
Beeswax and coconutswax, honey scent, and wick
Casting
The process of candle casting contains a lot of minutiae which I will only mention briefly. Heated molds warp less when poured, you need mold release for large molds, wax shrinks a lot so keep some reserve, wait longer than you think you need, don't forget the wick, etc. etc.
The main challenge for me was finding a way to liquify a few kilos of wax. The difficulty was mainly my fault — I had only one pan in my house at the time. To estimate how much wax was required, it may help to know that wax and humans have similar densities (human is averaged across all tissue types) and both are lighter than water (which is why both float). Also the average human head is about 5 liters in volume (This is actually hard to google because people online assume you're asking about cranial capacity (inside volume) when you really want to know outside volume).
In order to not burn the wax, you must use a double boiler to keep temperatures under 100C. The full mold required a 5L double boiler, but for just the face, I thought I could get away with 2L. I was dreading the idea of buying a second pan just for this purpose when suddenly I remembered!
Yogurt containers, I was on a Fage kick at the time
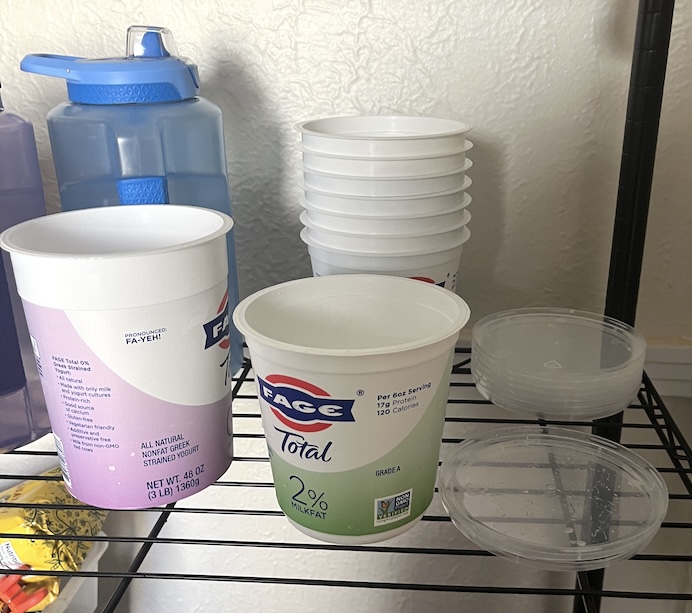
I love yogurt, and I had been hoarding a large stack of yogurt containers which were made of high-temperature plastic that could withstand boiling water. It was perfect — my pan could only fit 2 containers, but that could hold 1.8kg of wax which is ~2L. Amazing!
Melting wax in my yogurt container double-boiler
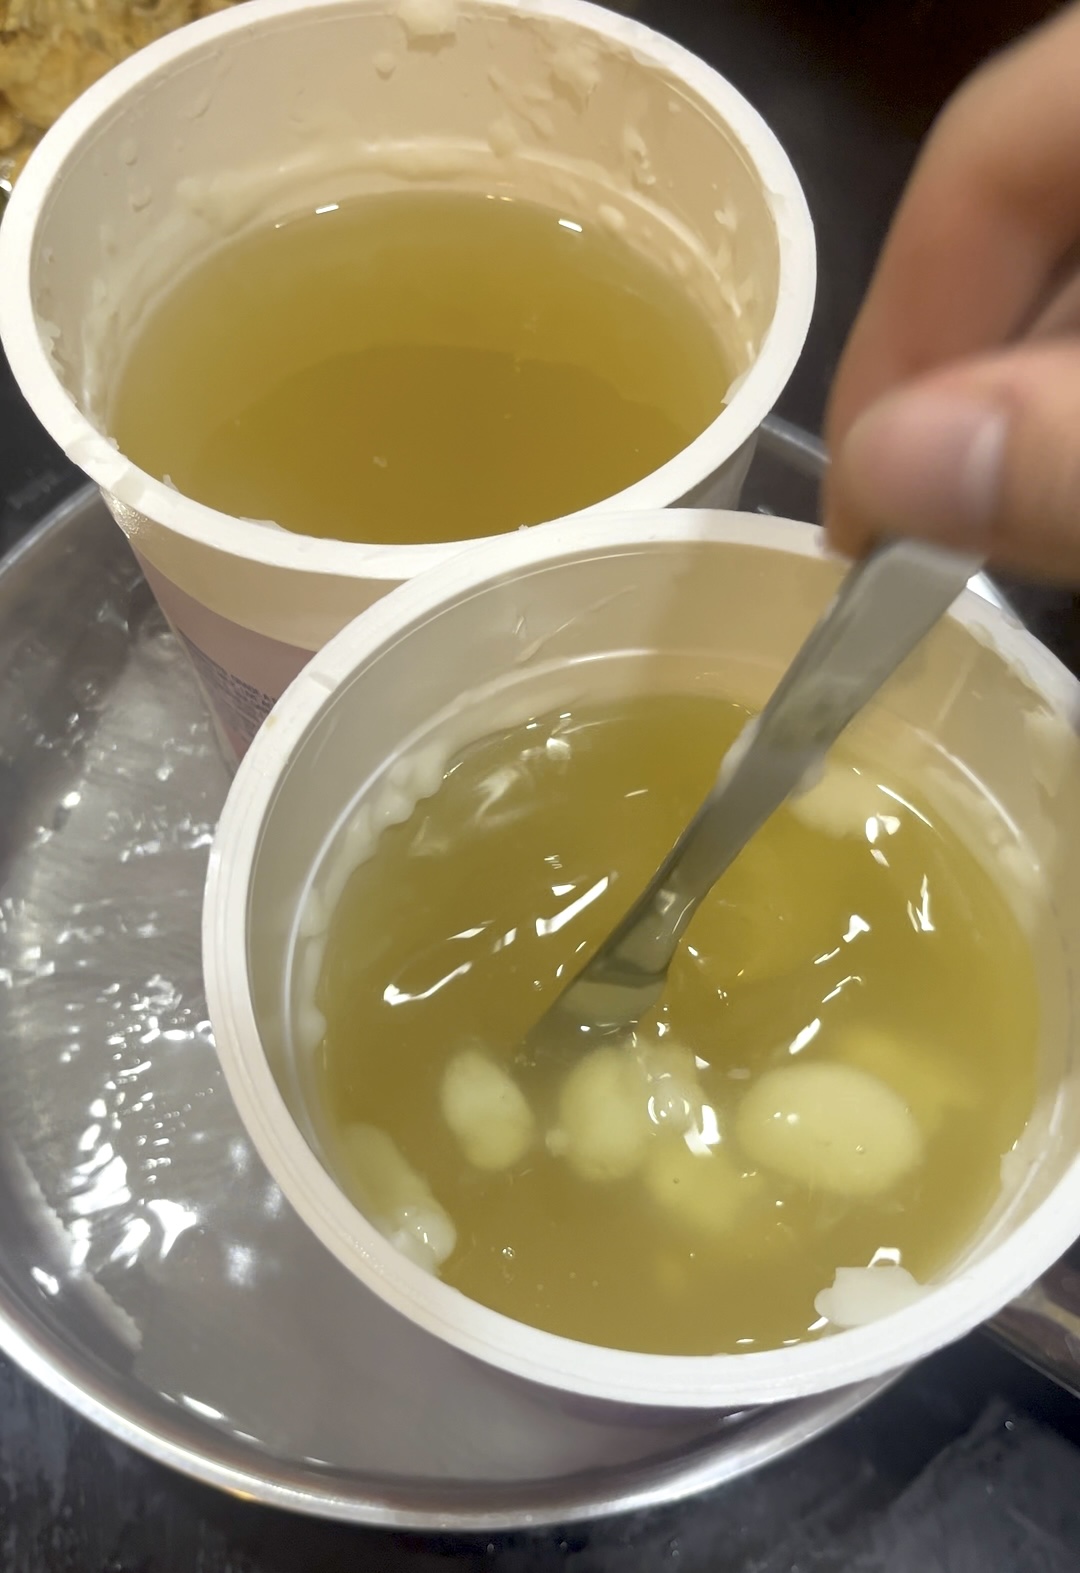
Melting the wax took over an hour. I had this clay-like window sealant which I used to rest the mold face-down on the counter. To minimize post-pour shrinkage, I actually turned off the heat and waited a bit after the wax all melted for it to cool down. Then I got a friend to help hold the mold and just poured the wax in.
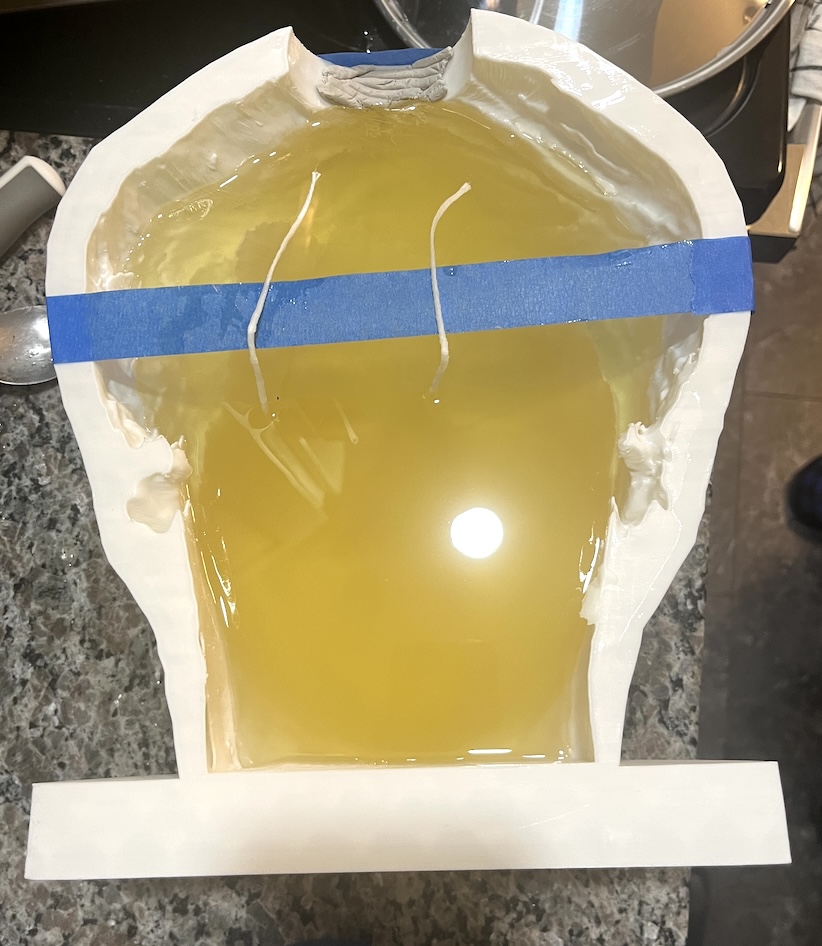
The candle pour
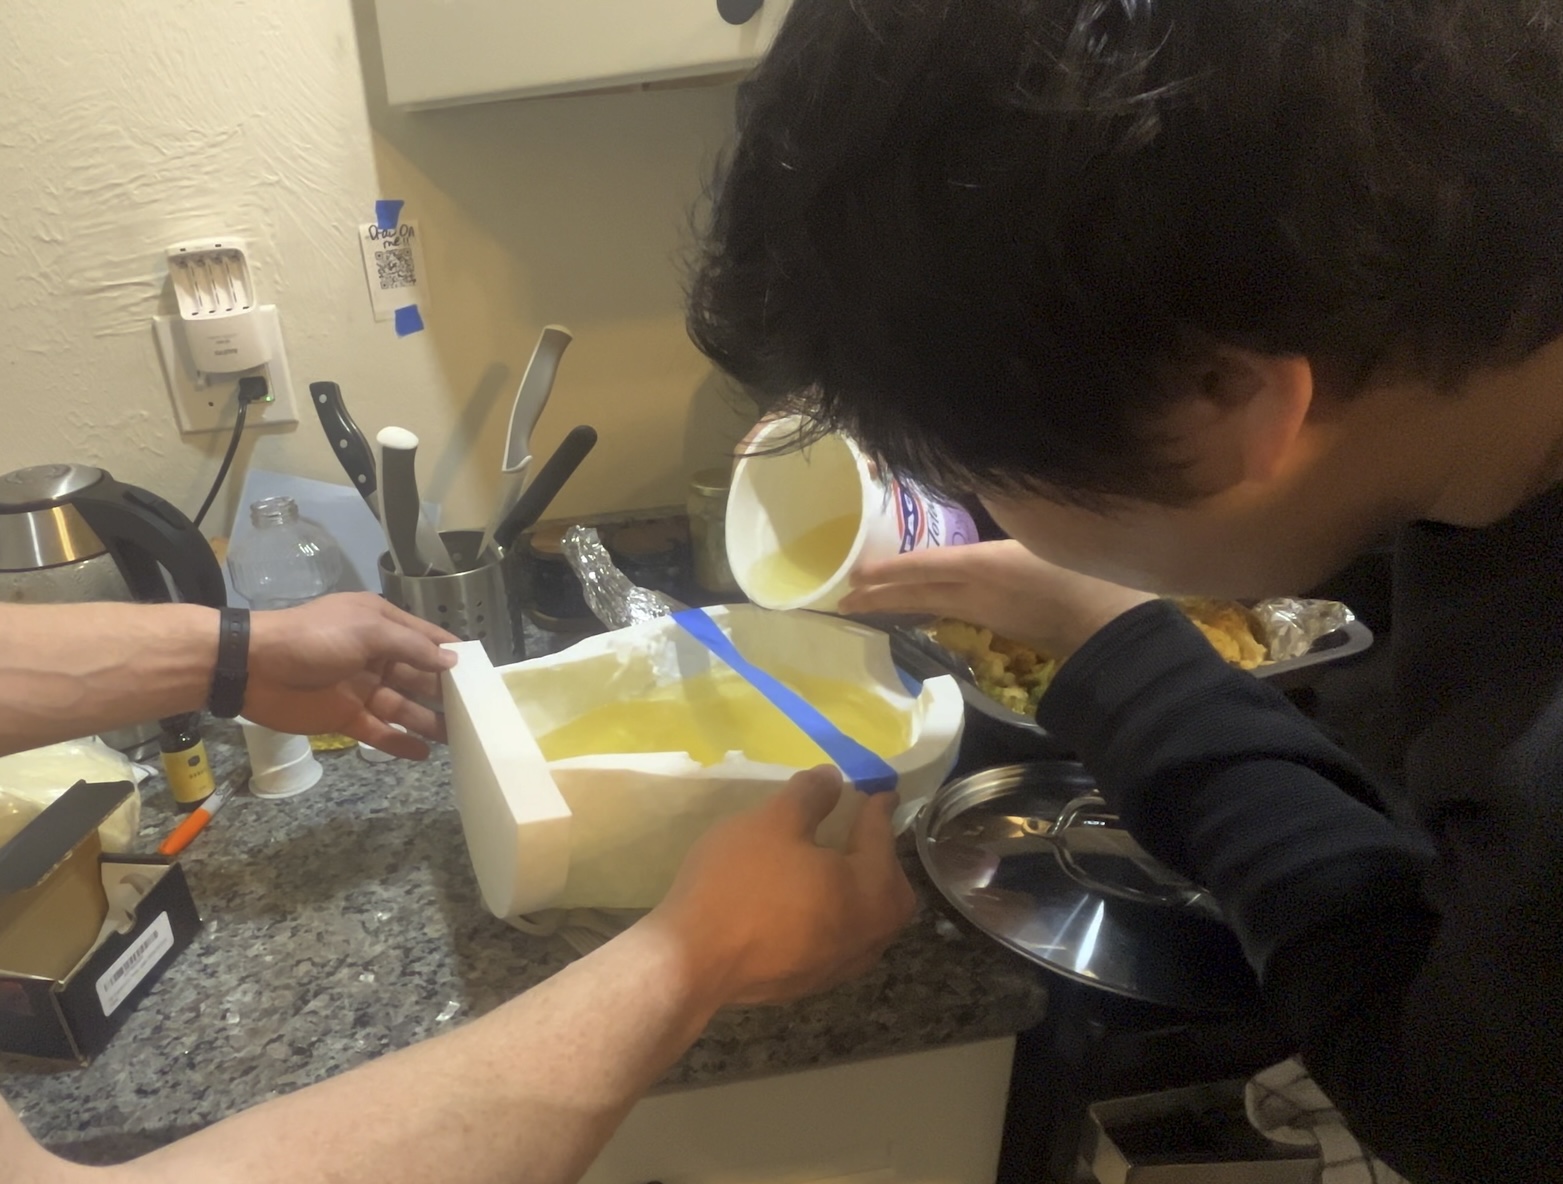
The blue tape across the mold held the wicks upright while the wax cooled. After the pour, I checked the temperature a few times but otherwise left it alone for ~36 hours.
Solid gold clear wax after the pour
Demolding
I've previously used cooking oil as a mold release to ok effect. With this larger mold, that was insufficient. All I knew before de-molding was that the wax was NOT coming out easily. But after de-molding, I found it had pooled in my nose area instead of evenly insulating the wax from the PLA.
Demolding took ages
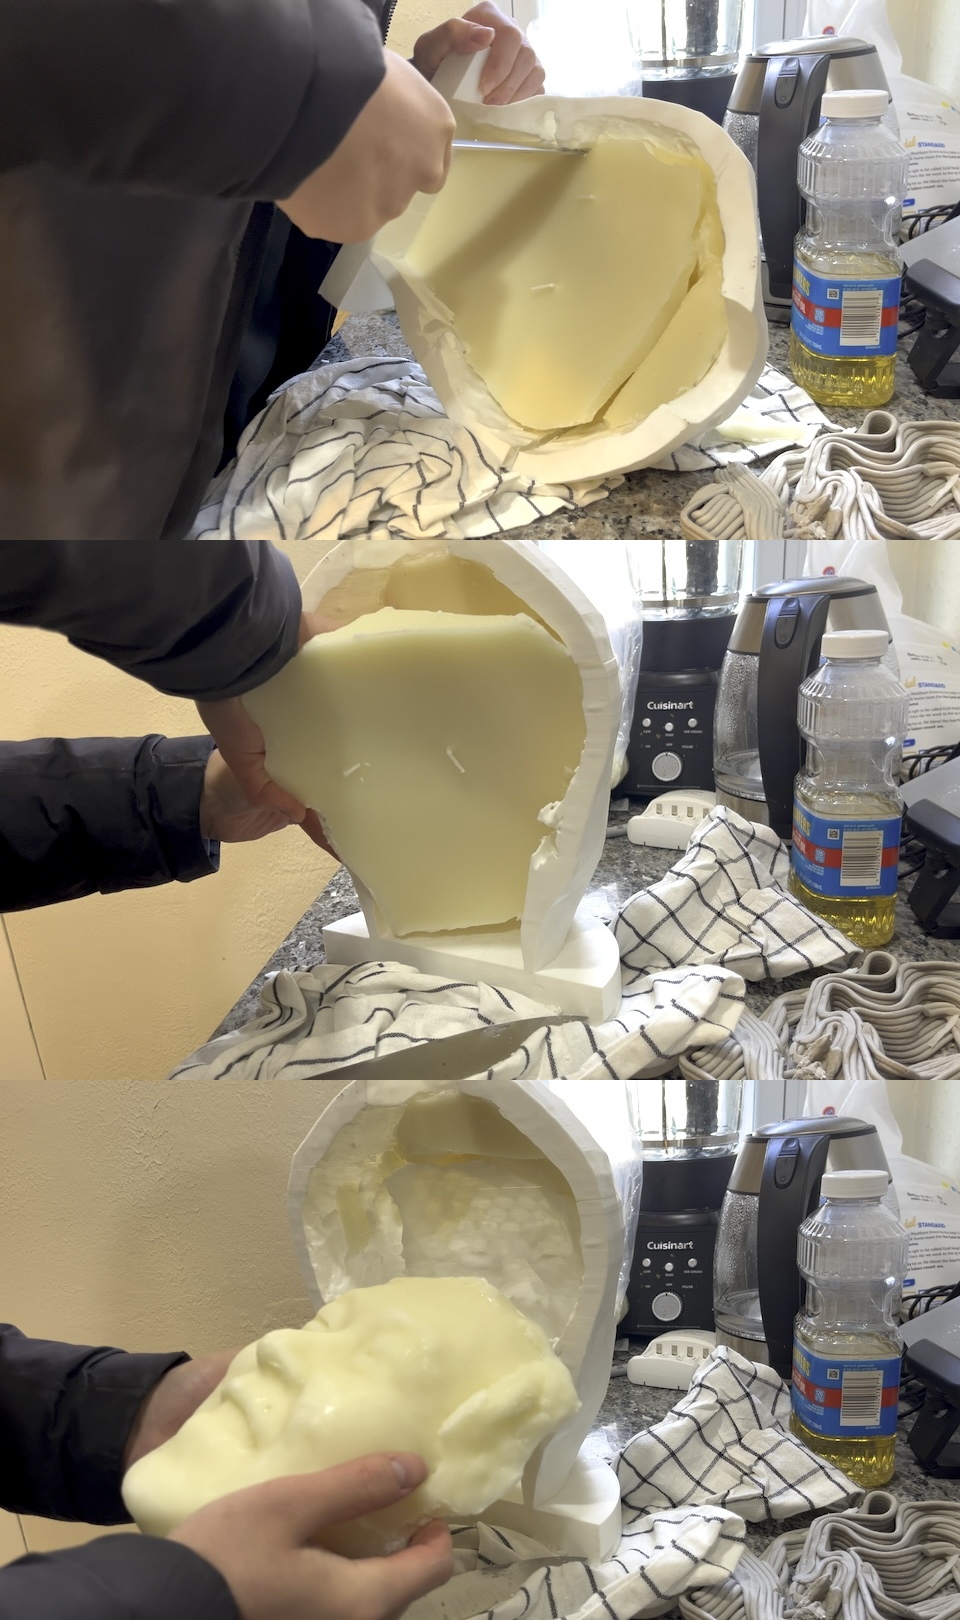
During the removal, I cracked the mold and left a large scar on the candle's face from scraping it on my 3D printed ear cavity. In total, it took 10 minutes and made me feel a bit like a mother giving birth with all the pushing and the post-hoc peace.
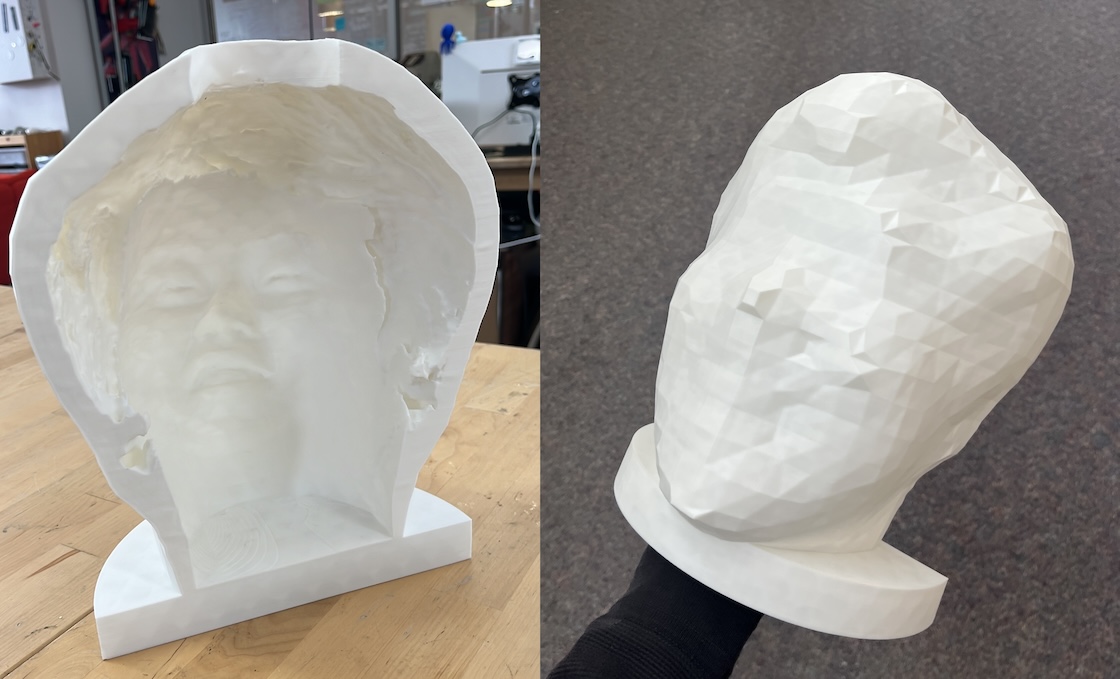
Face candle
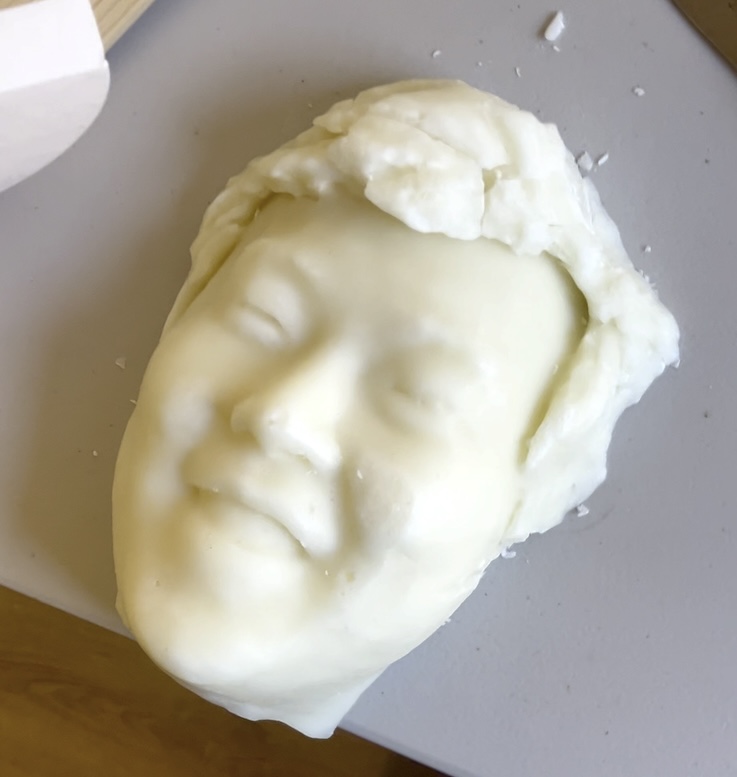
Face candle standing

What now?
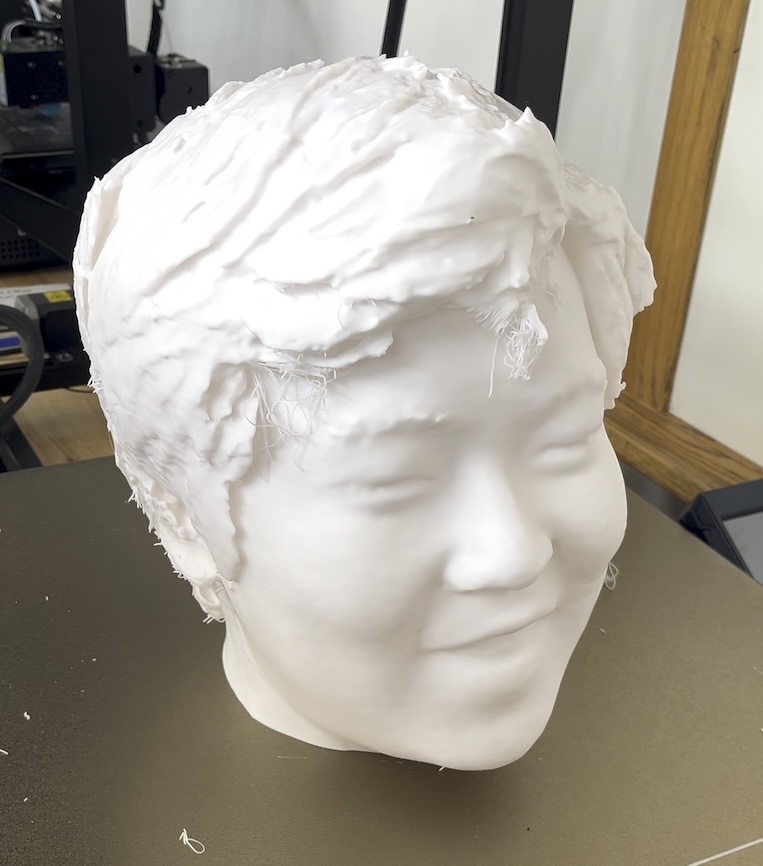
Casting the face was just a trial run, and I still need to tackle the challenge of casting my whole head. Due to the difficulty of de-molding the face, I decided not to try to cast the whole head using the same process. Instead, I 3D printed a full head positive and bought a bunch of silicone so I could make a proper, stretchy negative. This time I'll also use proper mold release.
Full head 3D print
I left all the parts in Pittsburgh when my lease ended, so for now this will be a fun future project.
To be continued...