Laser Holograms
Trapping 3D objects in a 2D sheet of glass
Timespan: Oct 2022 - now, on and off
Published: 2024-10-20
Overview
In this post I'm going to talk a lot about laser holography, a bit of a "lost art" of photography which many people and companies (Polaroid)heralded as the successor to analog film. Alas, holograms lost out to digital photography, and today it's rarely practiced. Anyway, I'm going to tell you a bit about them, and then share all my tacit knowledge that I've learned from trying to make them 10+ times across two years.
New holograms! pic.twitter.com/2m3mCtCnpR
— Andy Kong (@oldestasian) August 3, 2024
Background
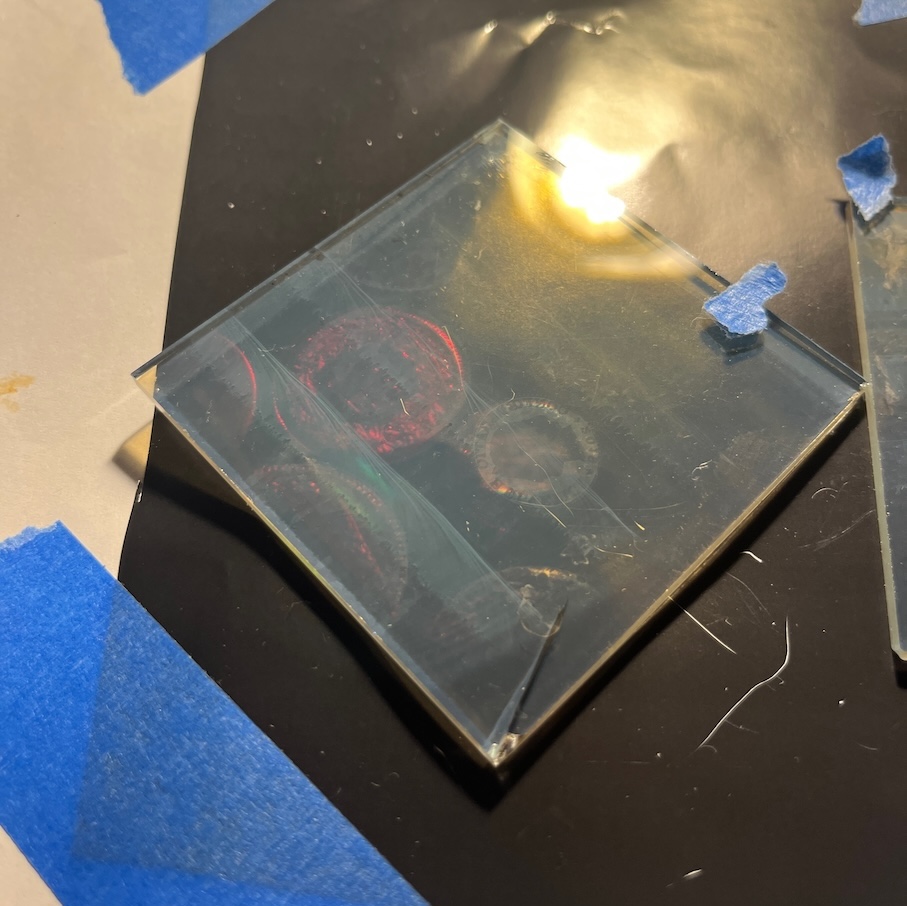
In 2021 I went to the Oak Street Gallery in Pittsburgh and saw something I thought was impossible — a piece of glass with a drum inside of it. I was captivated. I spent a long time searching about this technique to see how I could do it also.
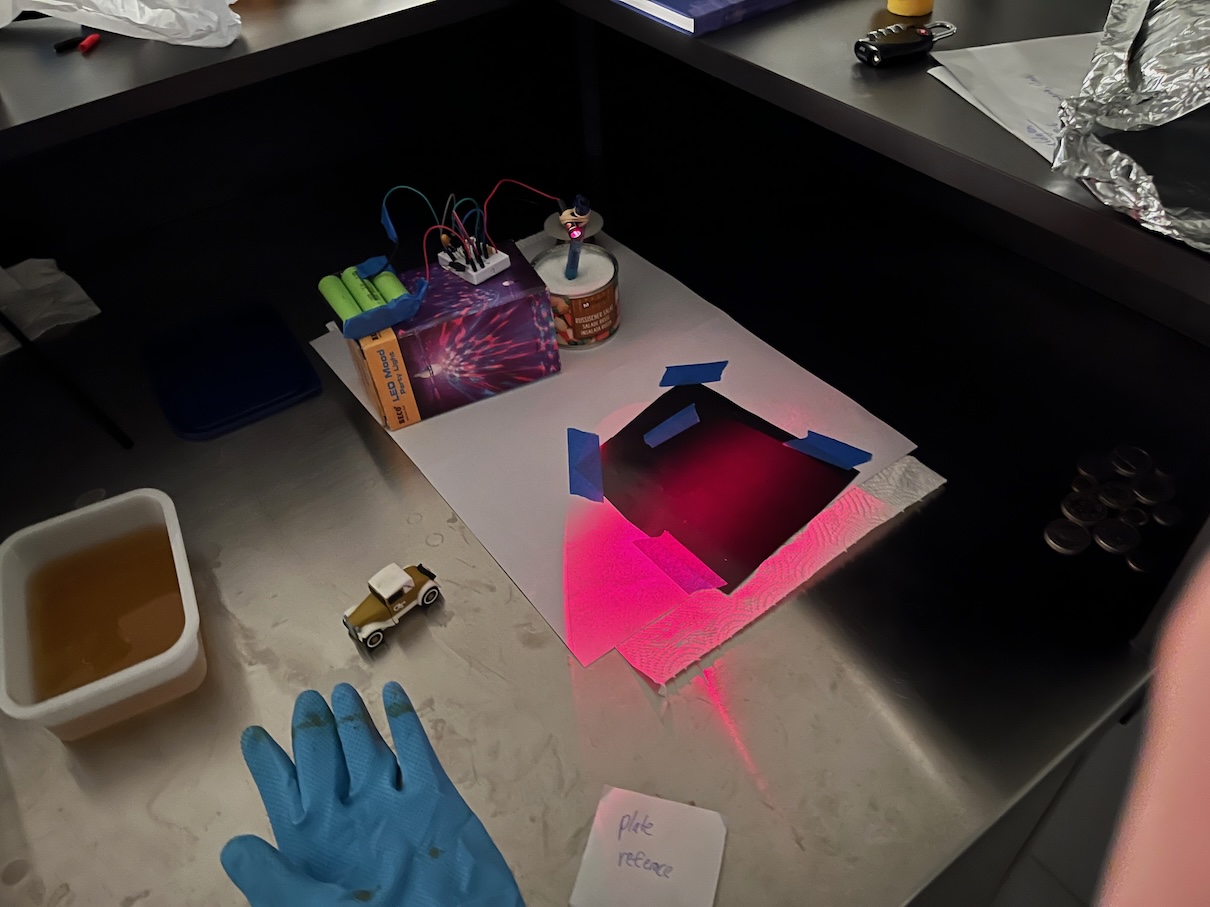
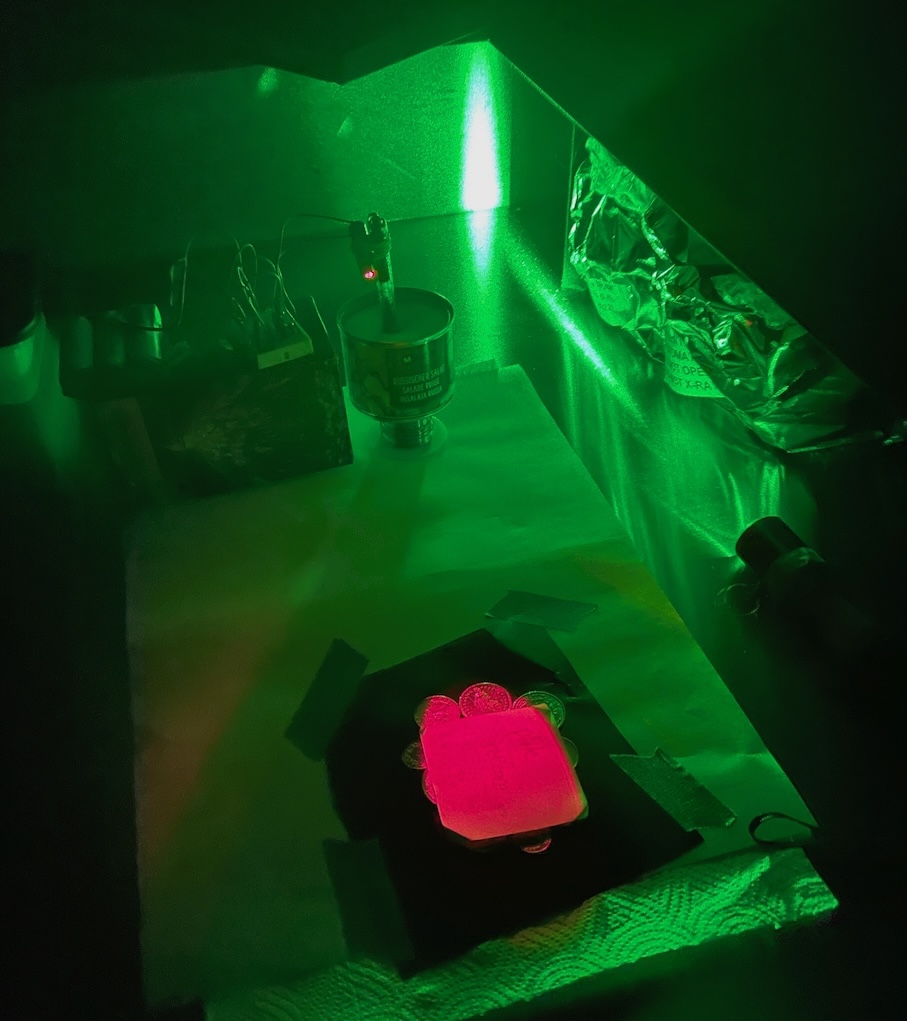
Broadly, you need to purchase some hologram plates. These are special photographic film plates with a very small particle size which allows you to capture the interference fringes from lasers interfering with themselves. For more details on how this works, I link you to 3Blue1Brown's excellent YouTube video: How holograms work.
To expose them, you use a coherent light source, a laser. Diode lasers like those found in presentation pointers are acceptable, but their coherence length is too short to capture anything deep (>1cm). Really, you want to get an old helium-neon gas laser / tube laser off eBay (also called a HeNe, usually from SpectraPhysics or Melles-Griot), this will run you about $150-$300 for the laser tube and the power supply. Make sure you get one with a power supply, because it's kind of hard to DIY. These generally have a coherence length in the 10s of centimeters, more than sufficient for your holography needs.
You set up the plate over your objects, then expose from the top. Later when you show people, you'll have to illuminate the hologram from the same direction that you exposed it from, so make sure it's not an uncomfortable angle.
Wash, Cure, etc. Please email me if you want me to add more steps, otherwise, it's going to take a few months for me to get back to this...