Igneous
A morphing landscape of colored wax melting for hours, reflecting visitors' actions
Timespan: Nov-Dec 2021
Published: 2022-06-23
Guess where we got this!
My third and final project for Electronic Logics && Creative Practice, an IDeATE course at CMU.
-
Our final writeup contains more photos + detailed process of constructing the mountain and assembling the candles.
-
Our project check-in has prototype pictures of our work that we did to validate before making anything permanent.
-
And our brainstorming post has the other ideas that we juggled around before thinking of this one.
Archive links: (Final) (Check-in) (Brainstorm)
Check 'em out!
Howdy folks, long time no project! More info linked above, and this here is a timelapse of the exhibit. Keep reading for more pictures!
In my 2nd to last semester at CMU, I took an artsy class called Electronic Logics && Creative Practice. If you don't know CMU, we have an entire tech + arts department called IDeATE shoved into a library basement. The department gave me creative technologist vibes, and I wanted to see if I'd like that kind of environment. And I did!
Fun parts included messing around with materials
I read once that artists require some downtime; all production and no consumption make Jack a boring, static creative. ELCP embraced that ethos wholeheartedly.
Timelines for projects were 3-4 weeks, with room for slip. Class hours alternated between open shop hours and fun summer camp activities like guiding an eye-closed partner through the building using only verbal instructions. Did I feel silly running into doors or guiding my partner into a wall on accident? Yes. But I also realized how heavily we depend on our eyes.
The "uselessness" of the activities felt like their use, as if the activities were fertilizer during our brain's recovery period. A fallow period is necessary for a successful crop rotation, and our brain does well with a similar concept.
Anyway, our third project had a few differences from the earlier ones. It had the theme of Emergent Behavior, had to be a group project, and would be showcased to the general public at an exhibition! I didn't want to do another electronics project; I already did a couple in-class and out, and I wanted to see if I could create something impressive that I didn't already have experience in.
Post-brainstorming + reality check, we were left with only one project: Igneous. Let me tell you about it!
Igneous
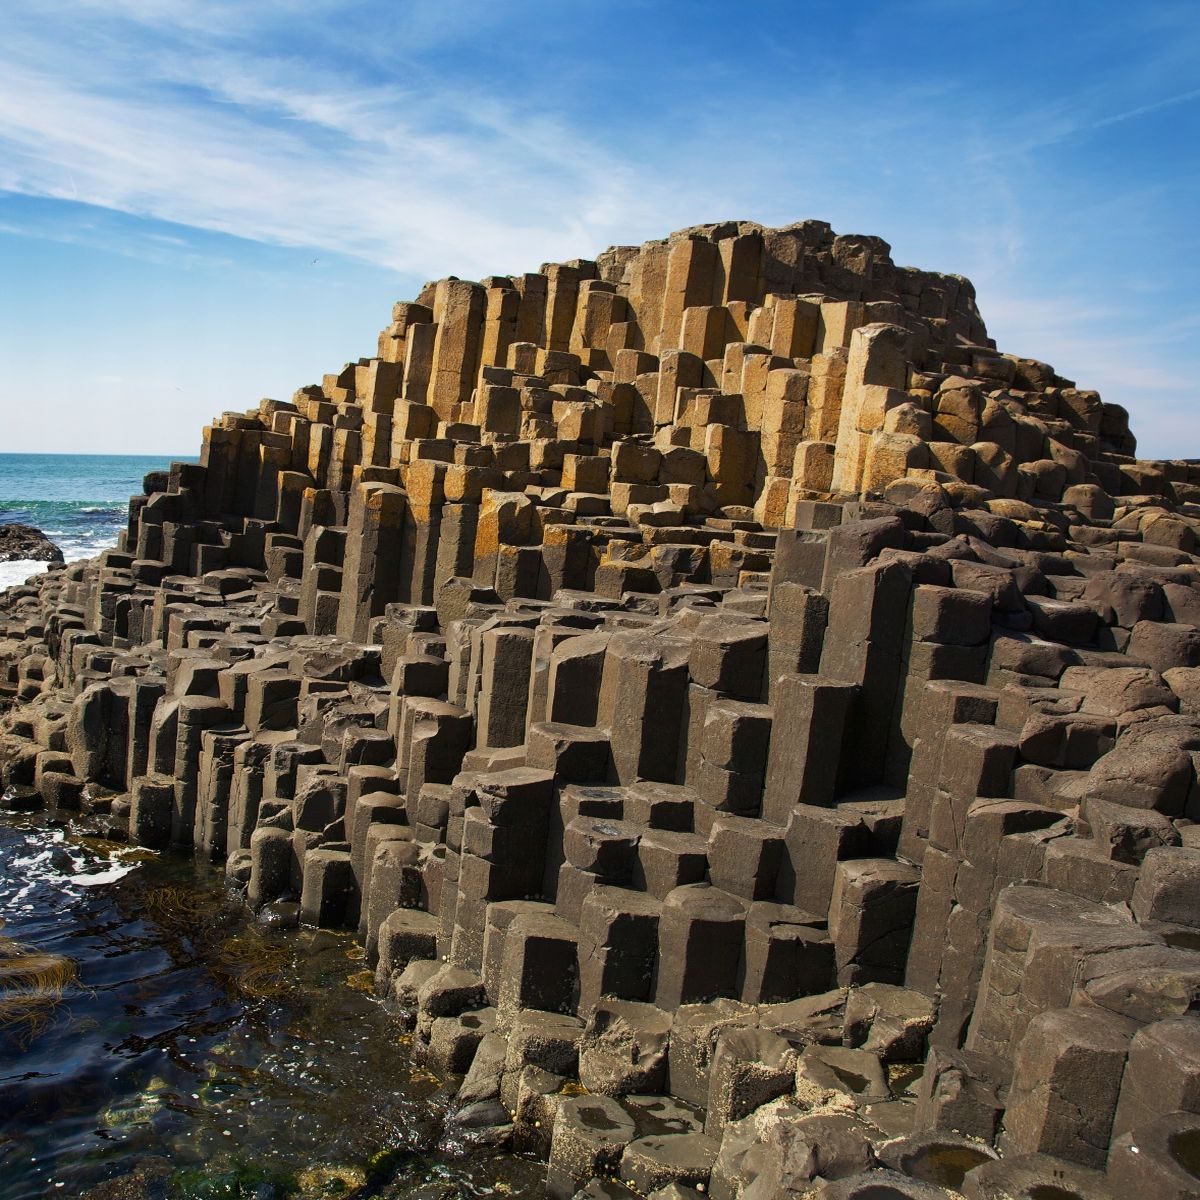
This is the Giant's Causeway, a natural basalt formation found in Northern Ireland. The columns are believed to be formed by the cracking of cooling magma, which takes on hexagonal shapes as the cracks descend deeper. Something about minimization of surface energy... Unsure. I wanted to parallel this with hundreds of candles, creating a small scale version that visitors would be able to light and watch m
Narrative Description
"Inspired by the Giant’s Causeway in Ireland, we’d like to create a natural landscape composed of tiled hexagonal column candles. As the candles are lit, the melted wax will pool and drip organically, eroding the landscape over time. Event visitors can choose which candles to light or put out, collaboratively altering the terrain over the course of the exhibition. As they pass the candles later, they can see the marks and pits that their choices have made upon the landscape.
Additionally, the data output from another group (sound, color, etc.; we don’t know what the other projects are yet!) will be mapped onto our arrangement of candles; the data we receive will also determine which candles will be lit, working with/against the human audience input. For example, we could set up fans to fan the flames or blow certain candles out. Beyond electronic input, we’ll also want to have the candles exposed. This way, the breeze that people generate by simply walking past will get the flames dancing and potentially even put some of them out. "
Initial assembly
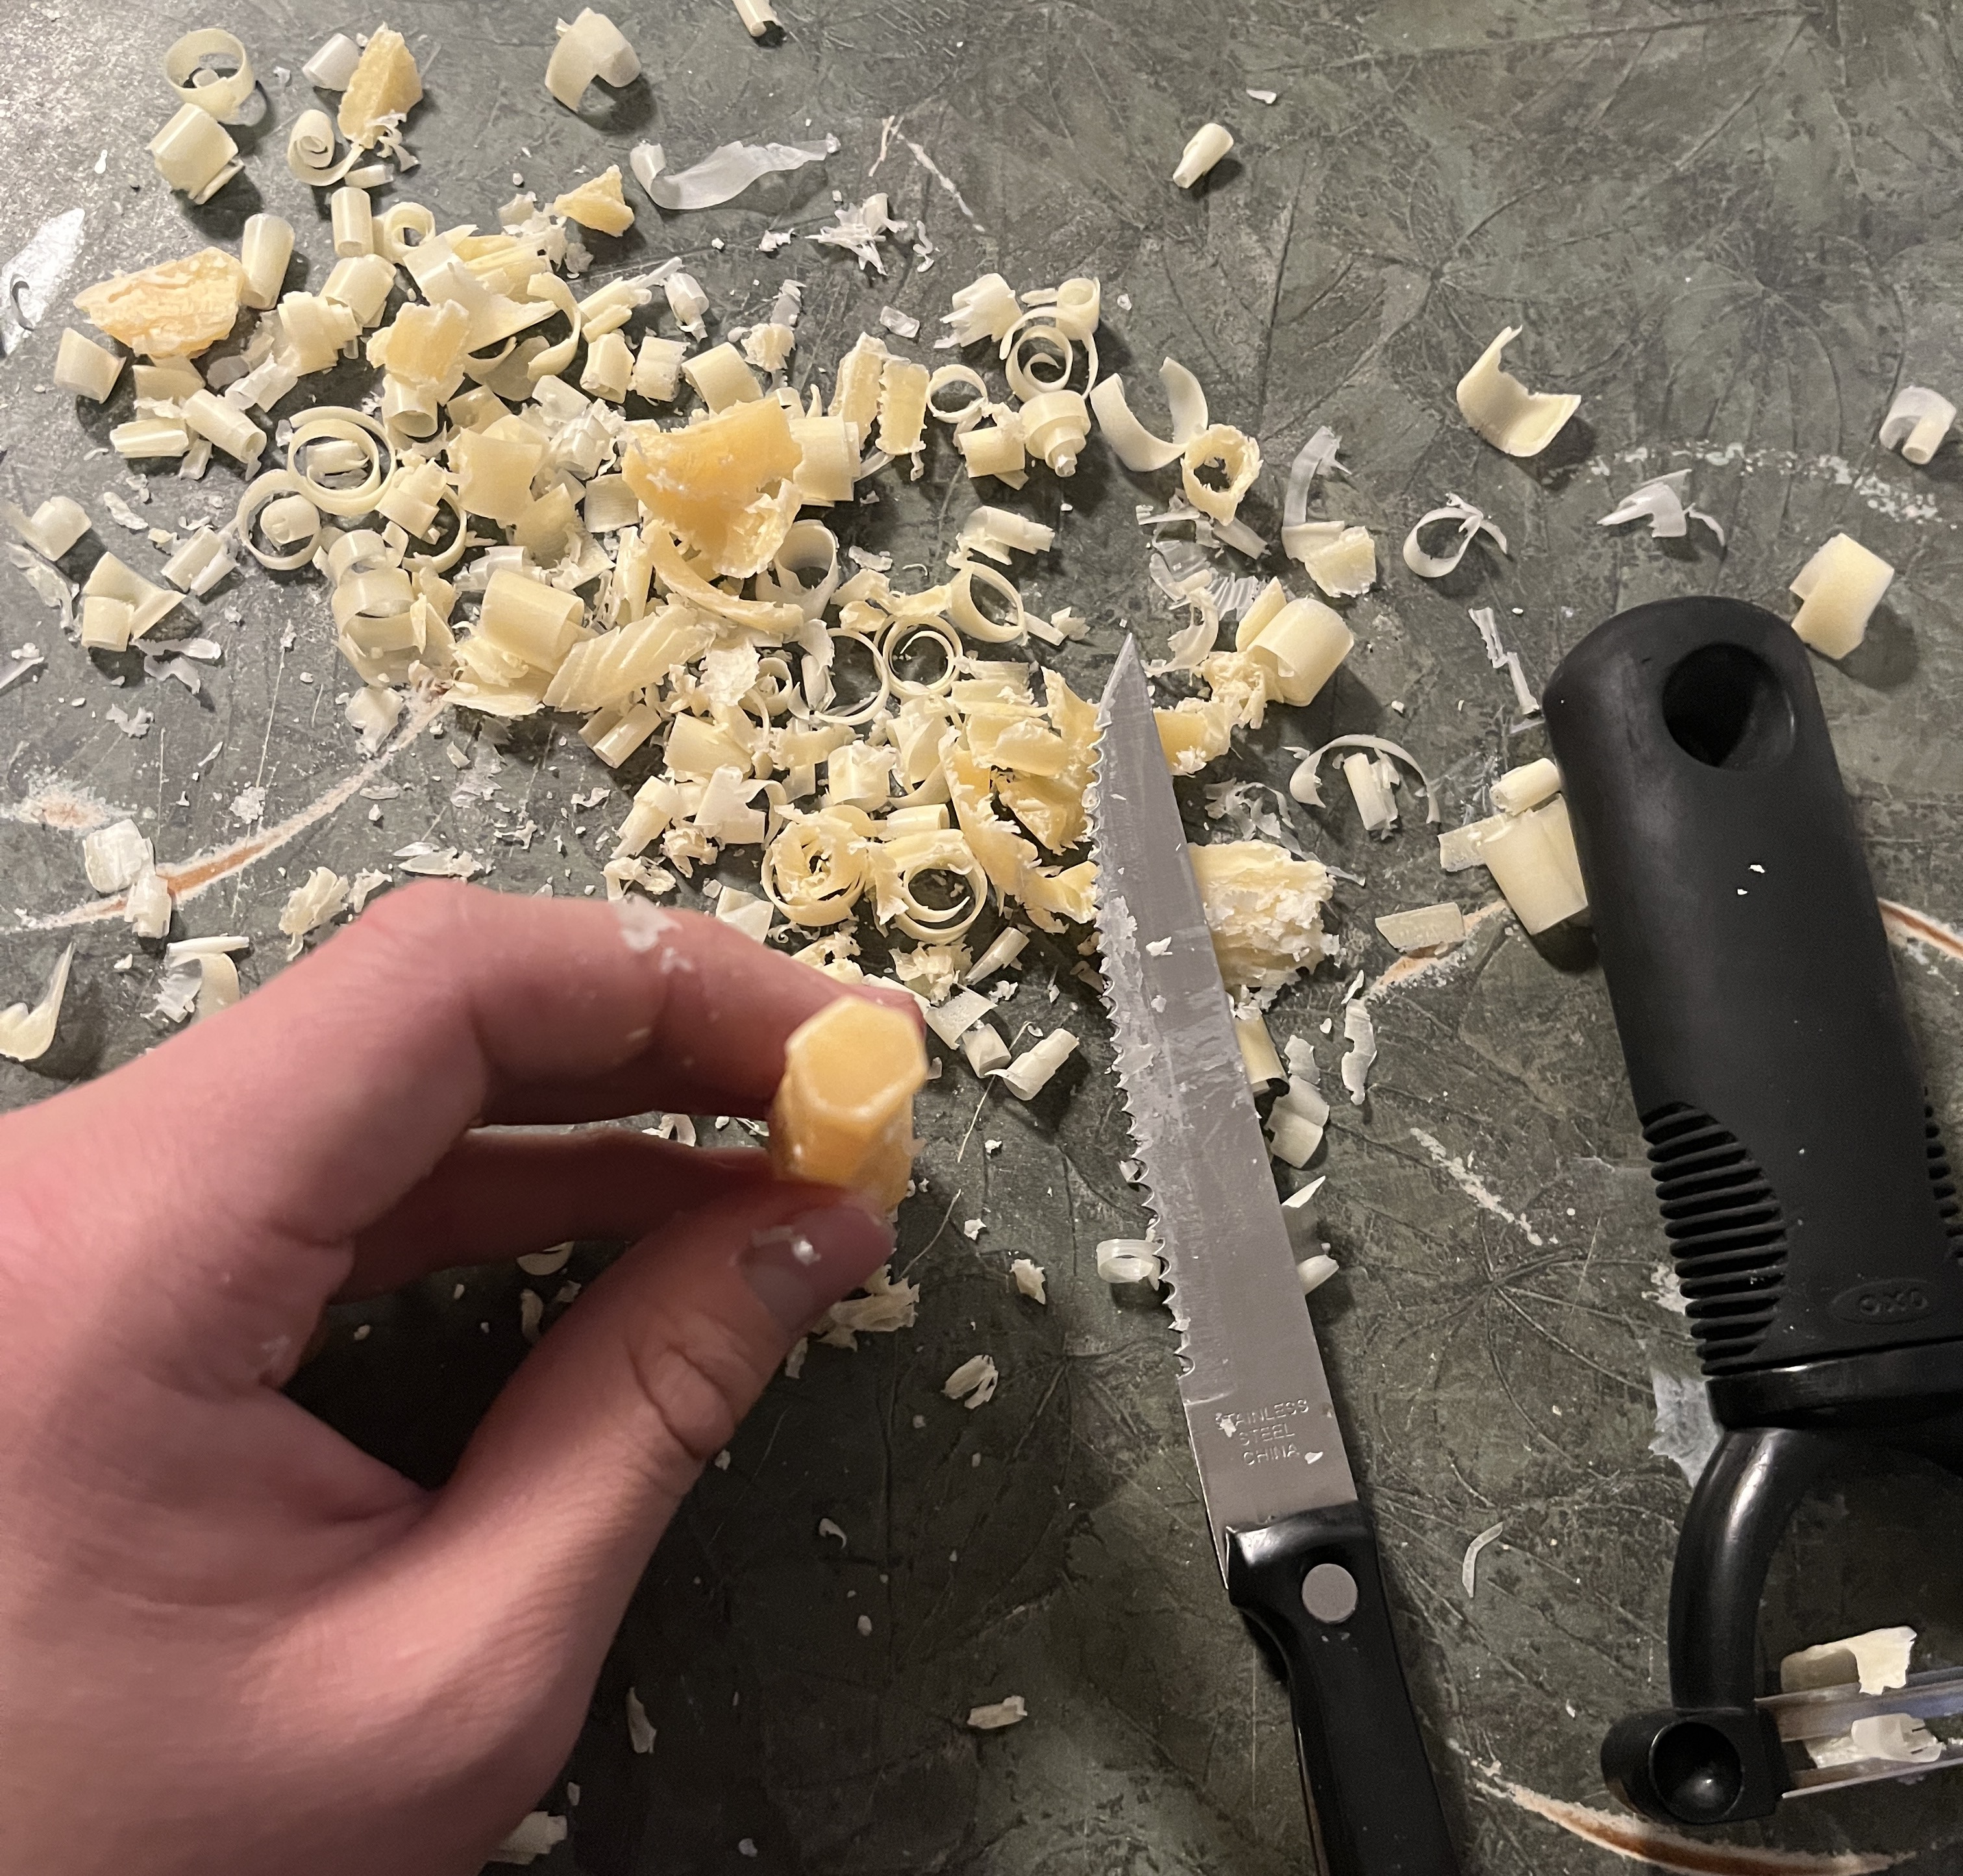
Because we decided to use candles to emulate the hexagonal columns, I felt very strongly that they needed to be hexagonally shaped. However, nobody sells hexagon candles in bulk, since they take a ton of extra work and don't look much better. We thought about casting them ourselves (lots of wicks and experiments to get right) or cutting them (turns out to be really hard. Eventually we conceded that small detail of the project and got on with the main bit.
Cutting with a knife
Took too long, and the final shape isn't consistent.
A stick of beeswax I had, with a hexagon outline traced out
Manually shaved beeswax stick with steak knife and vegetable peeler. Does not look very hexagonal and took a lot of effort :(
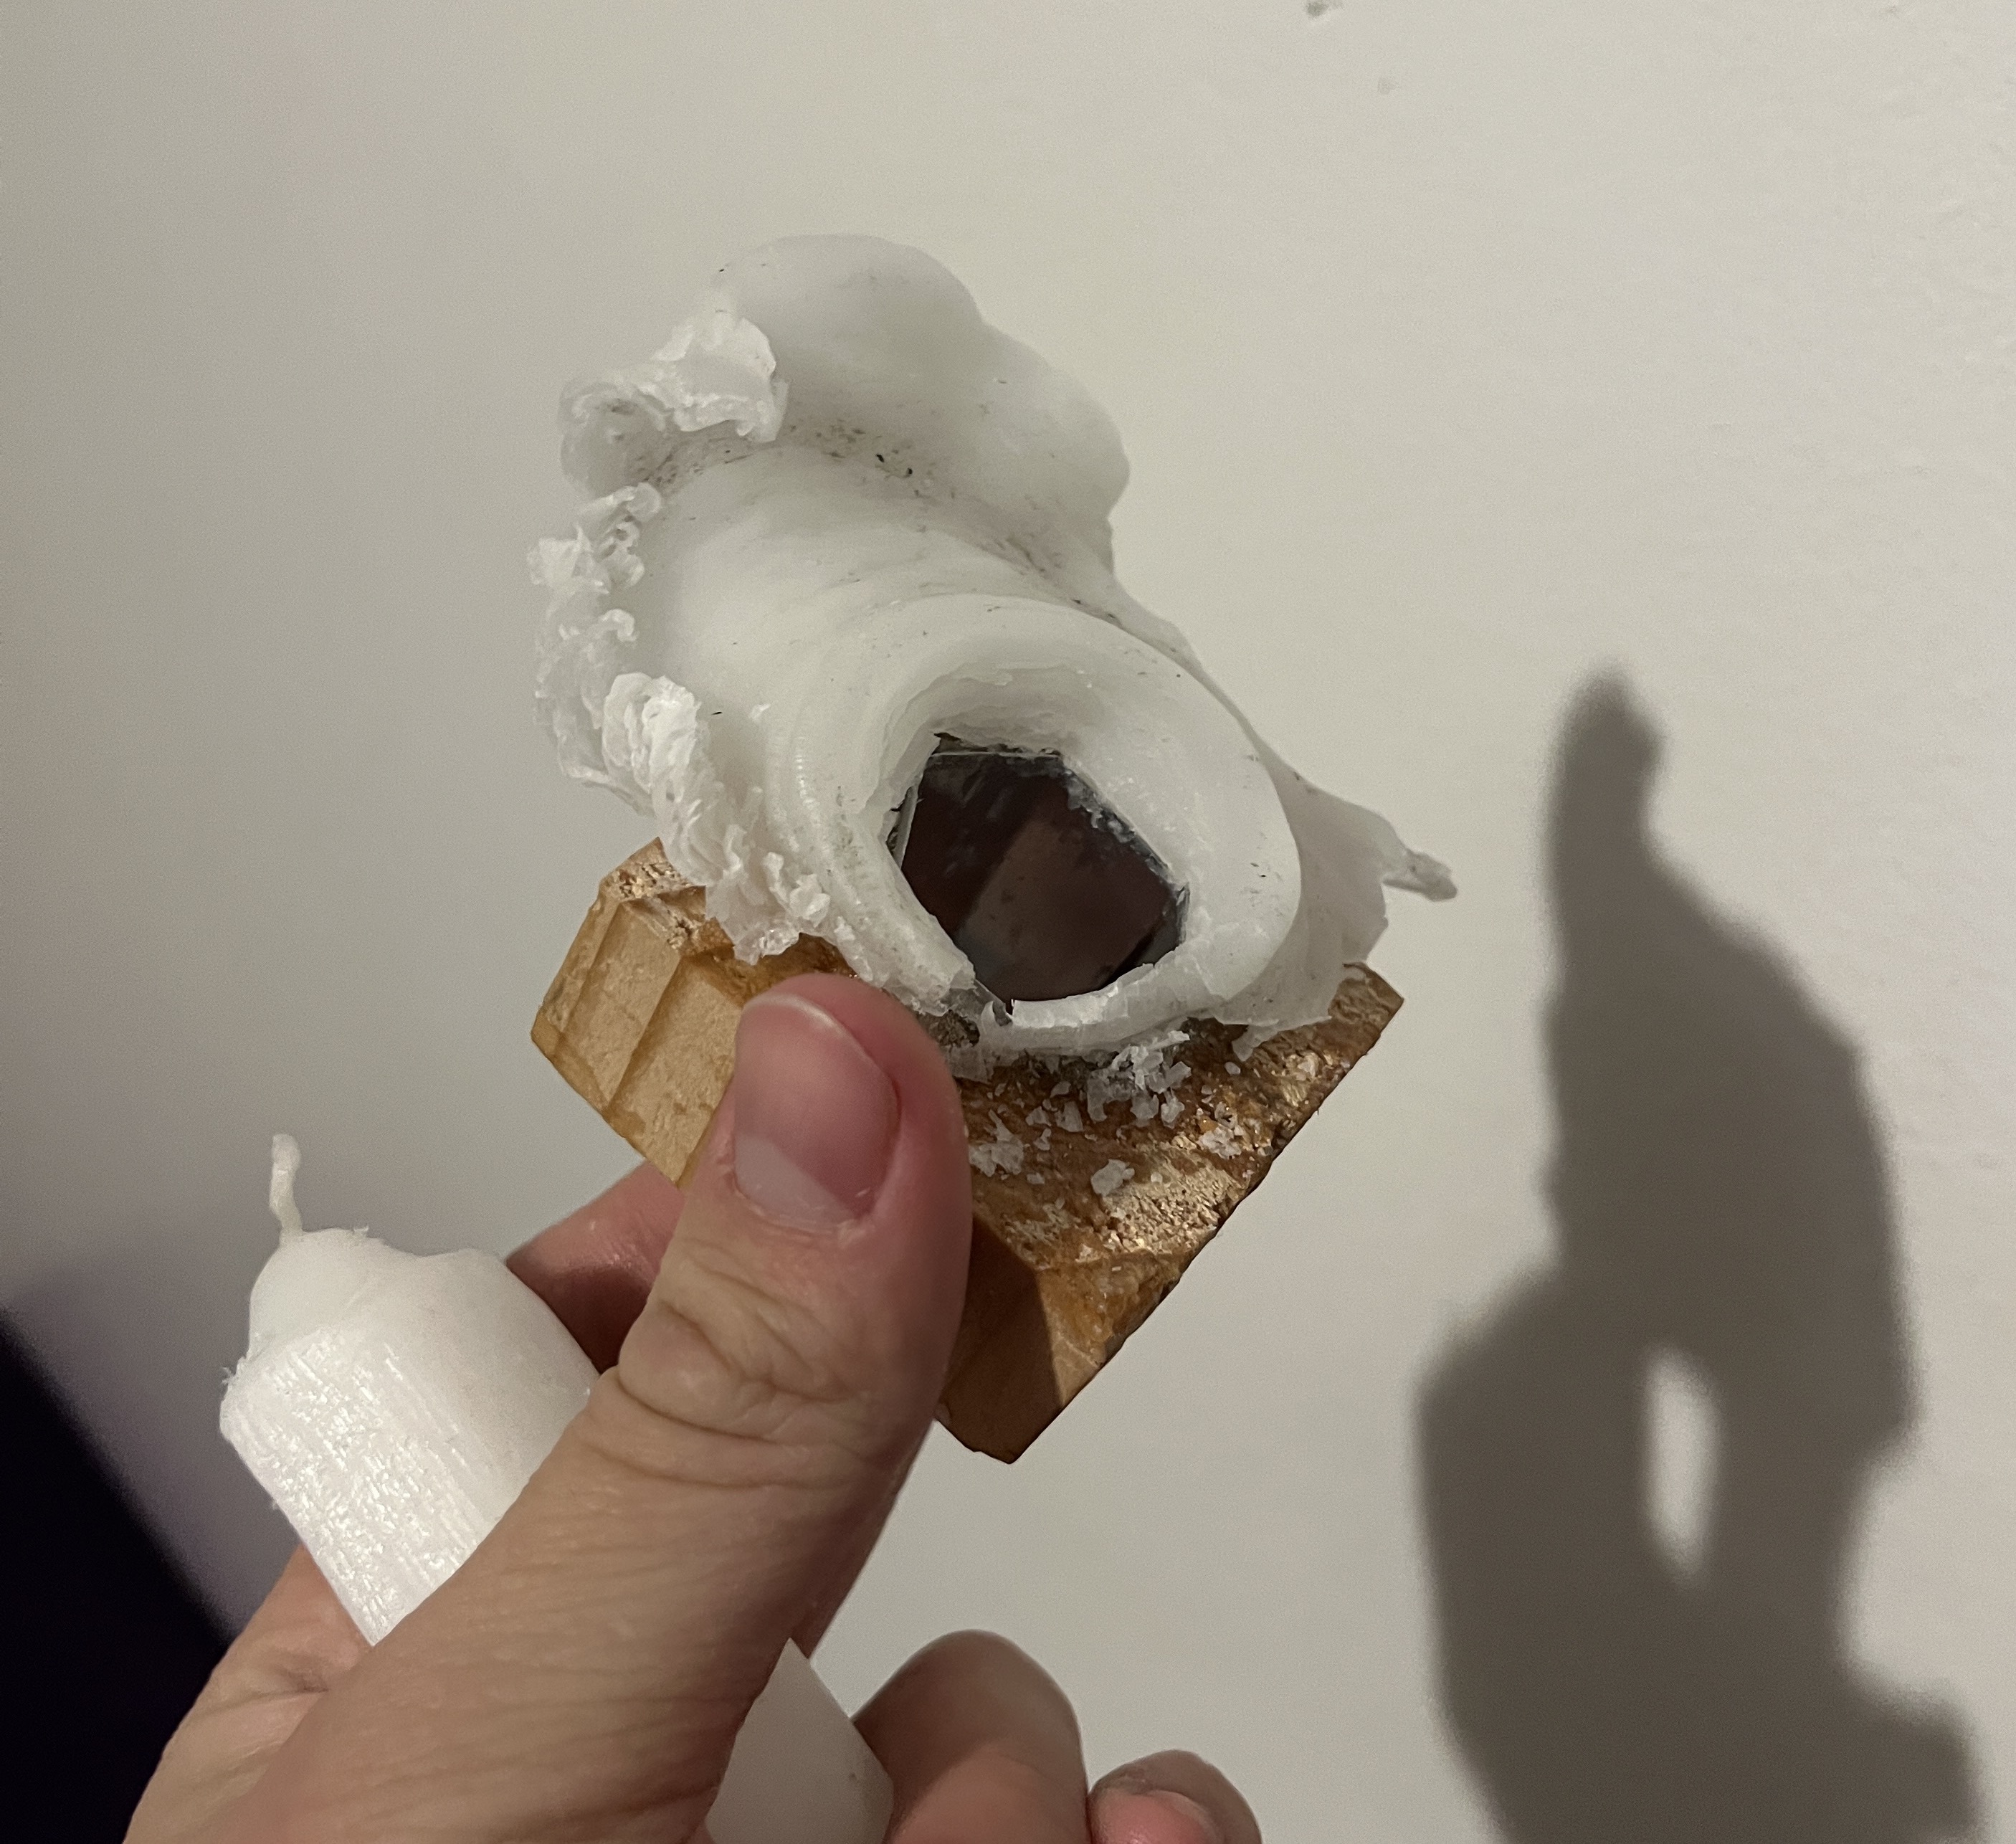
Cutting with a mold
I sharpened a small bit of sheet metal, then bent it into a hexagon. This cutter bent outwards when cutting due to the wax being hard to cut. I sharpened it and embedded it in a block of wood, still no good.
Hexagonal candle mold made with bent sheet metal

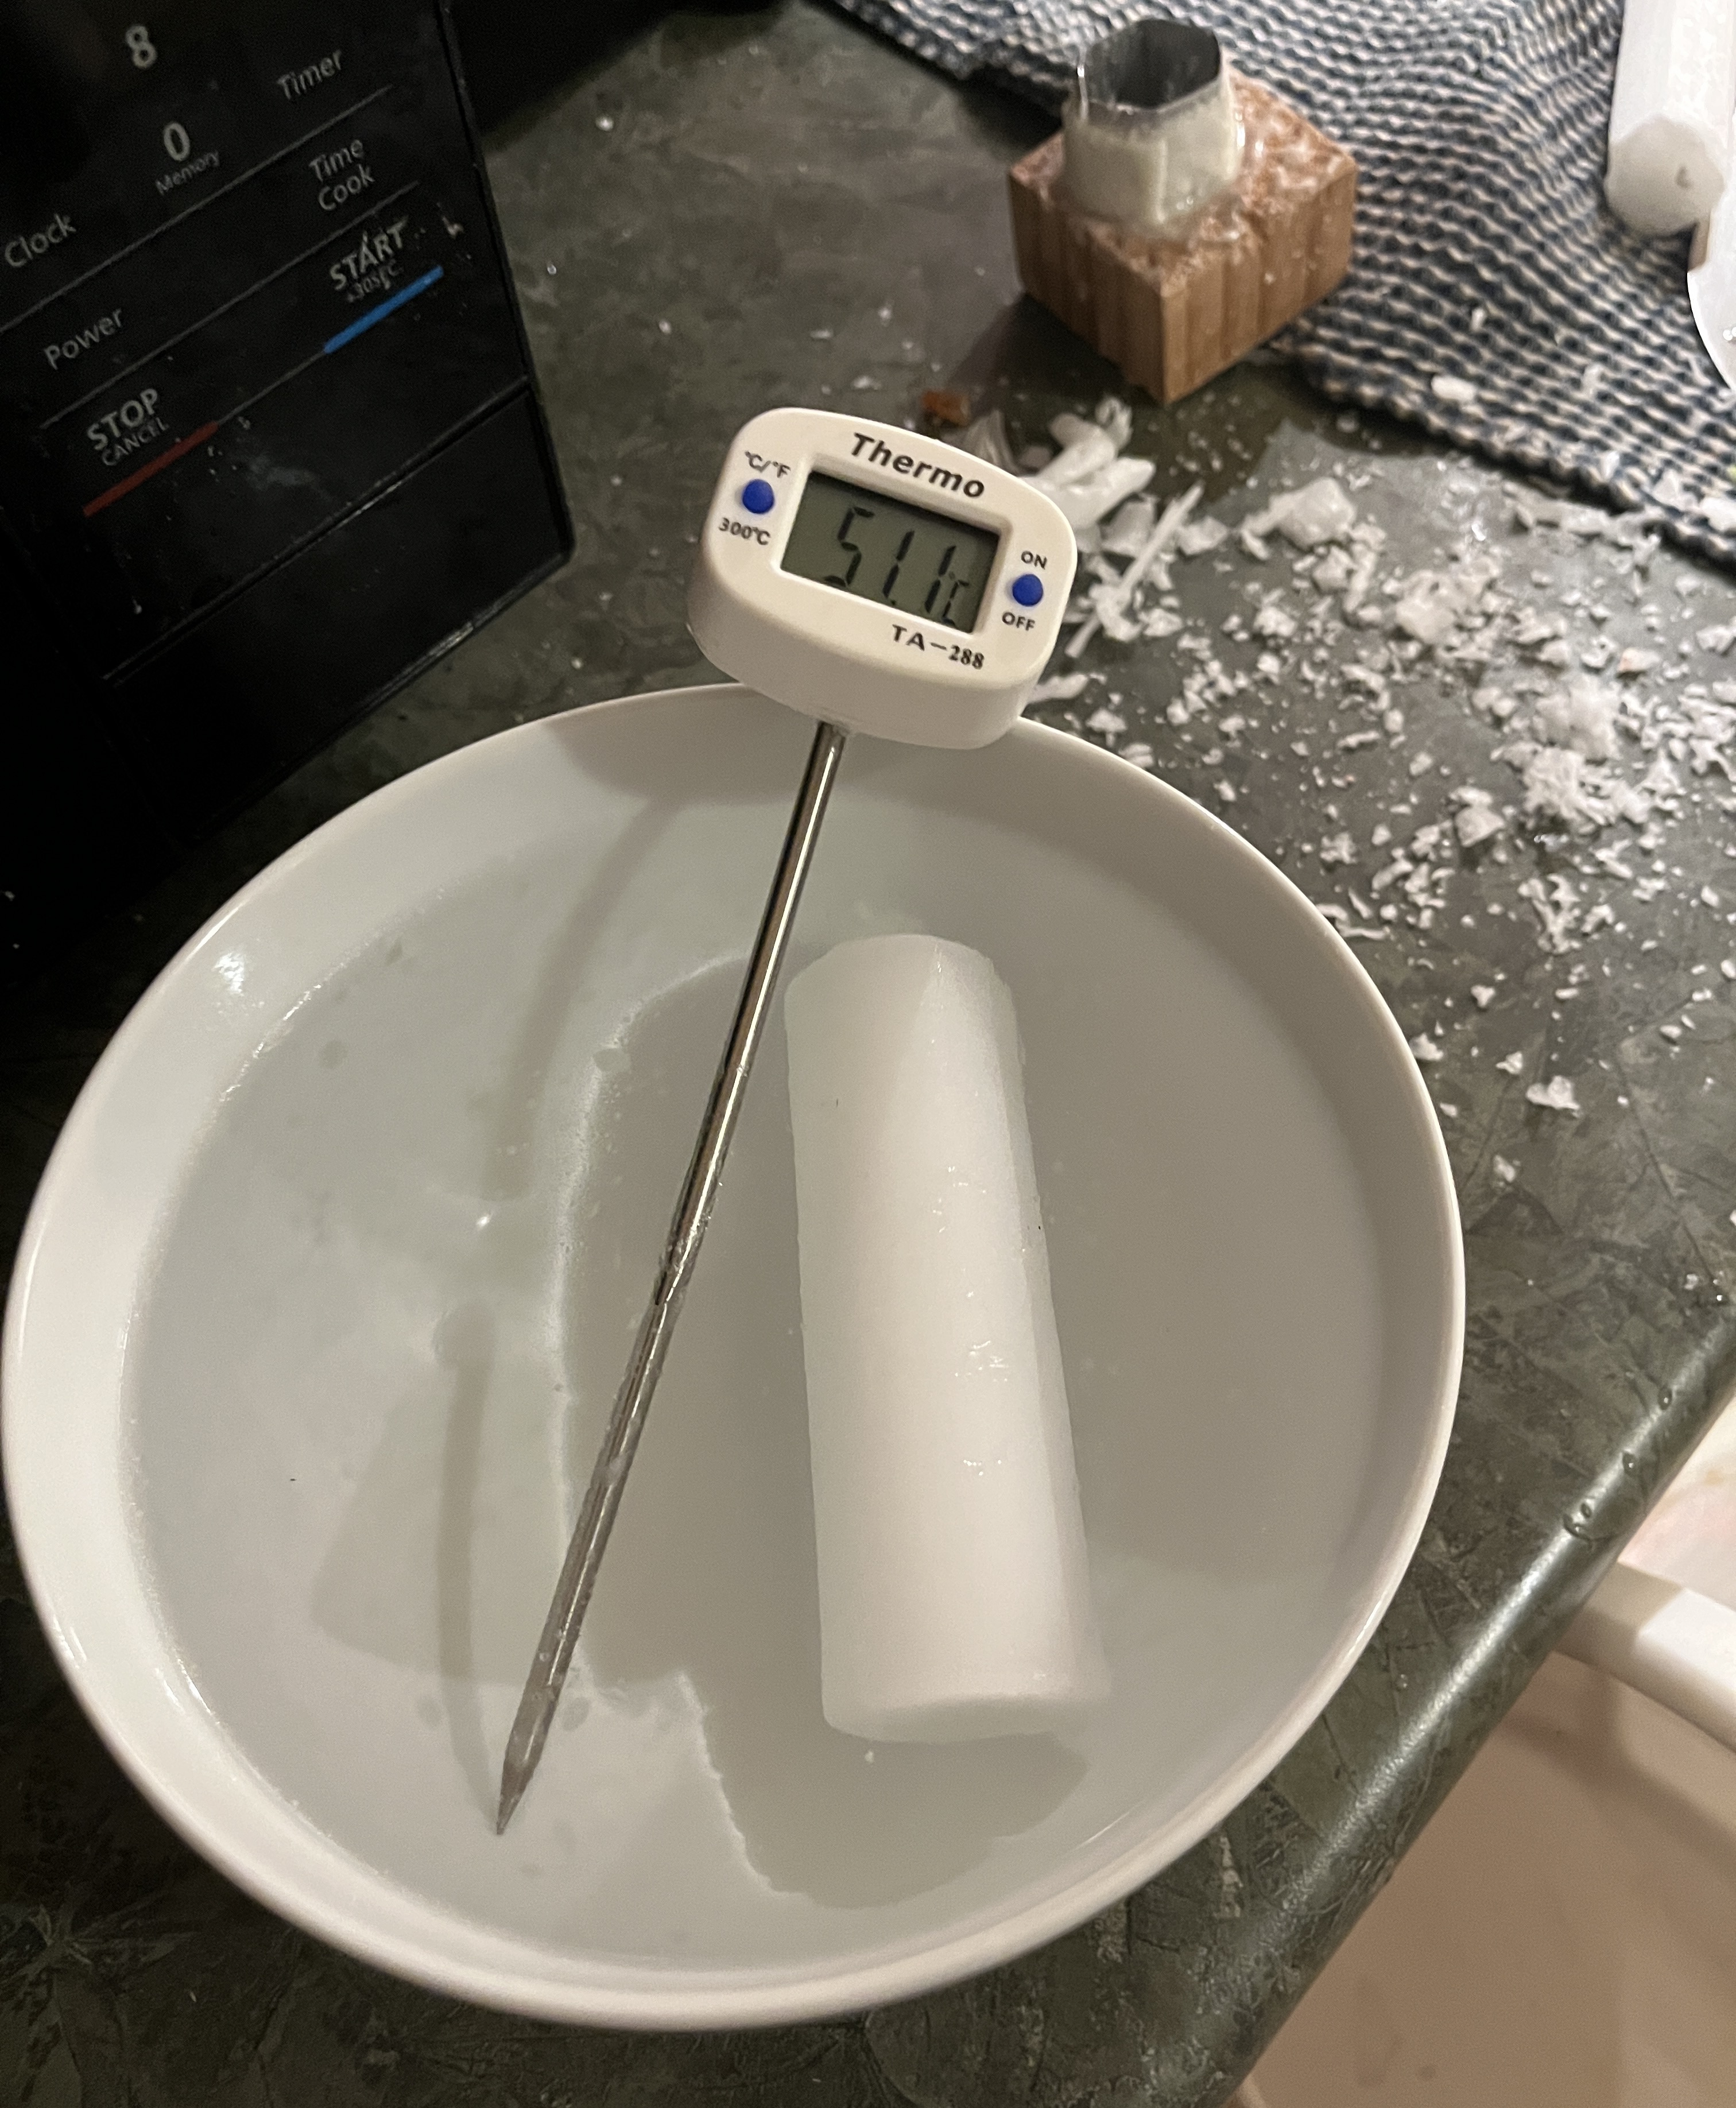
Softening the wax candles in hot water
Leftover wax after cutting. The mold is now in the wood block for support purposes
The resulting candle. Pretty hexagonal, a bit lumpy, and super hard to push it through.
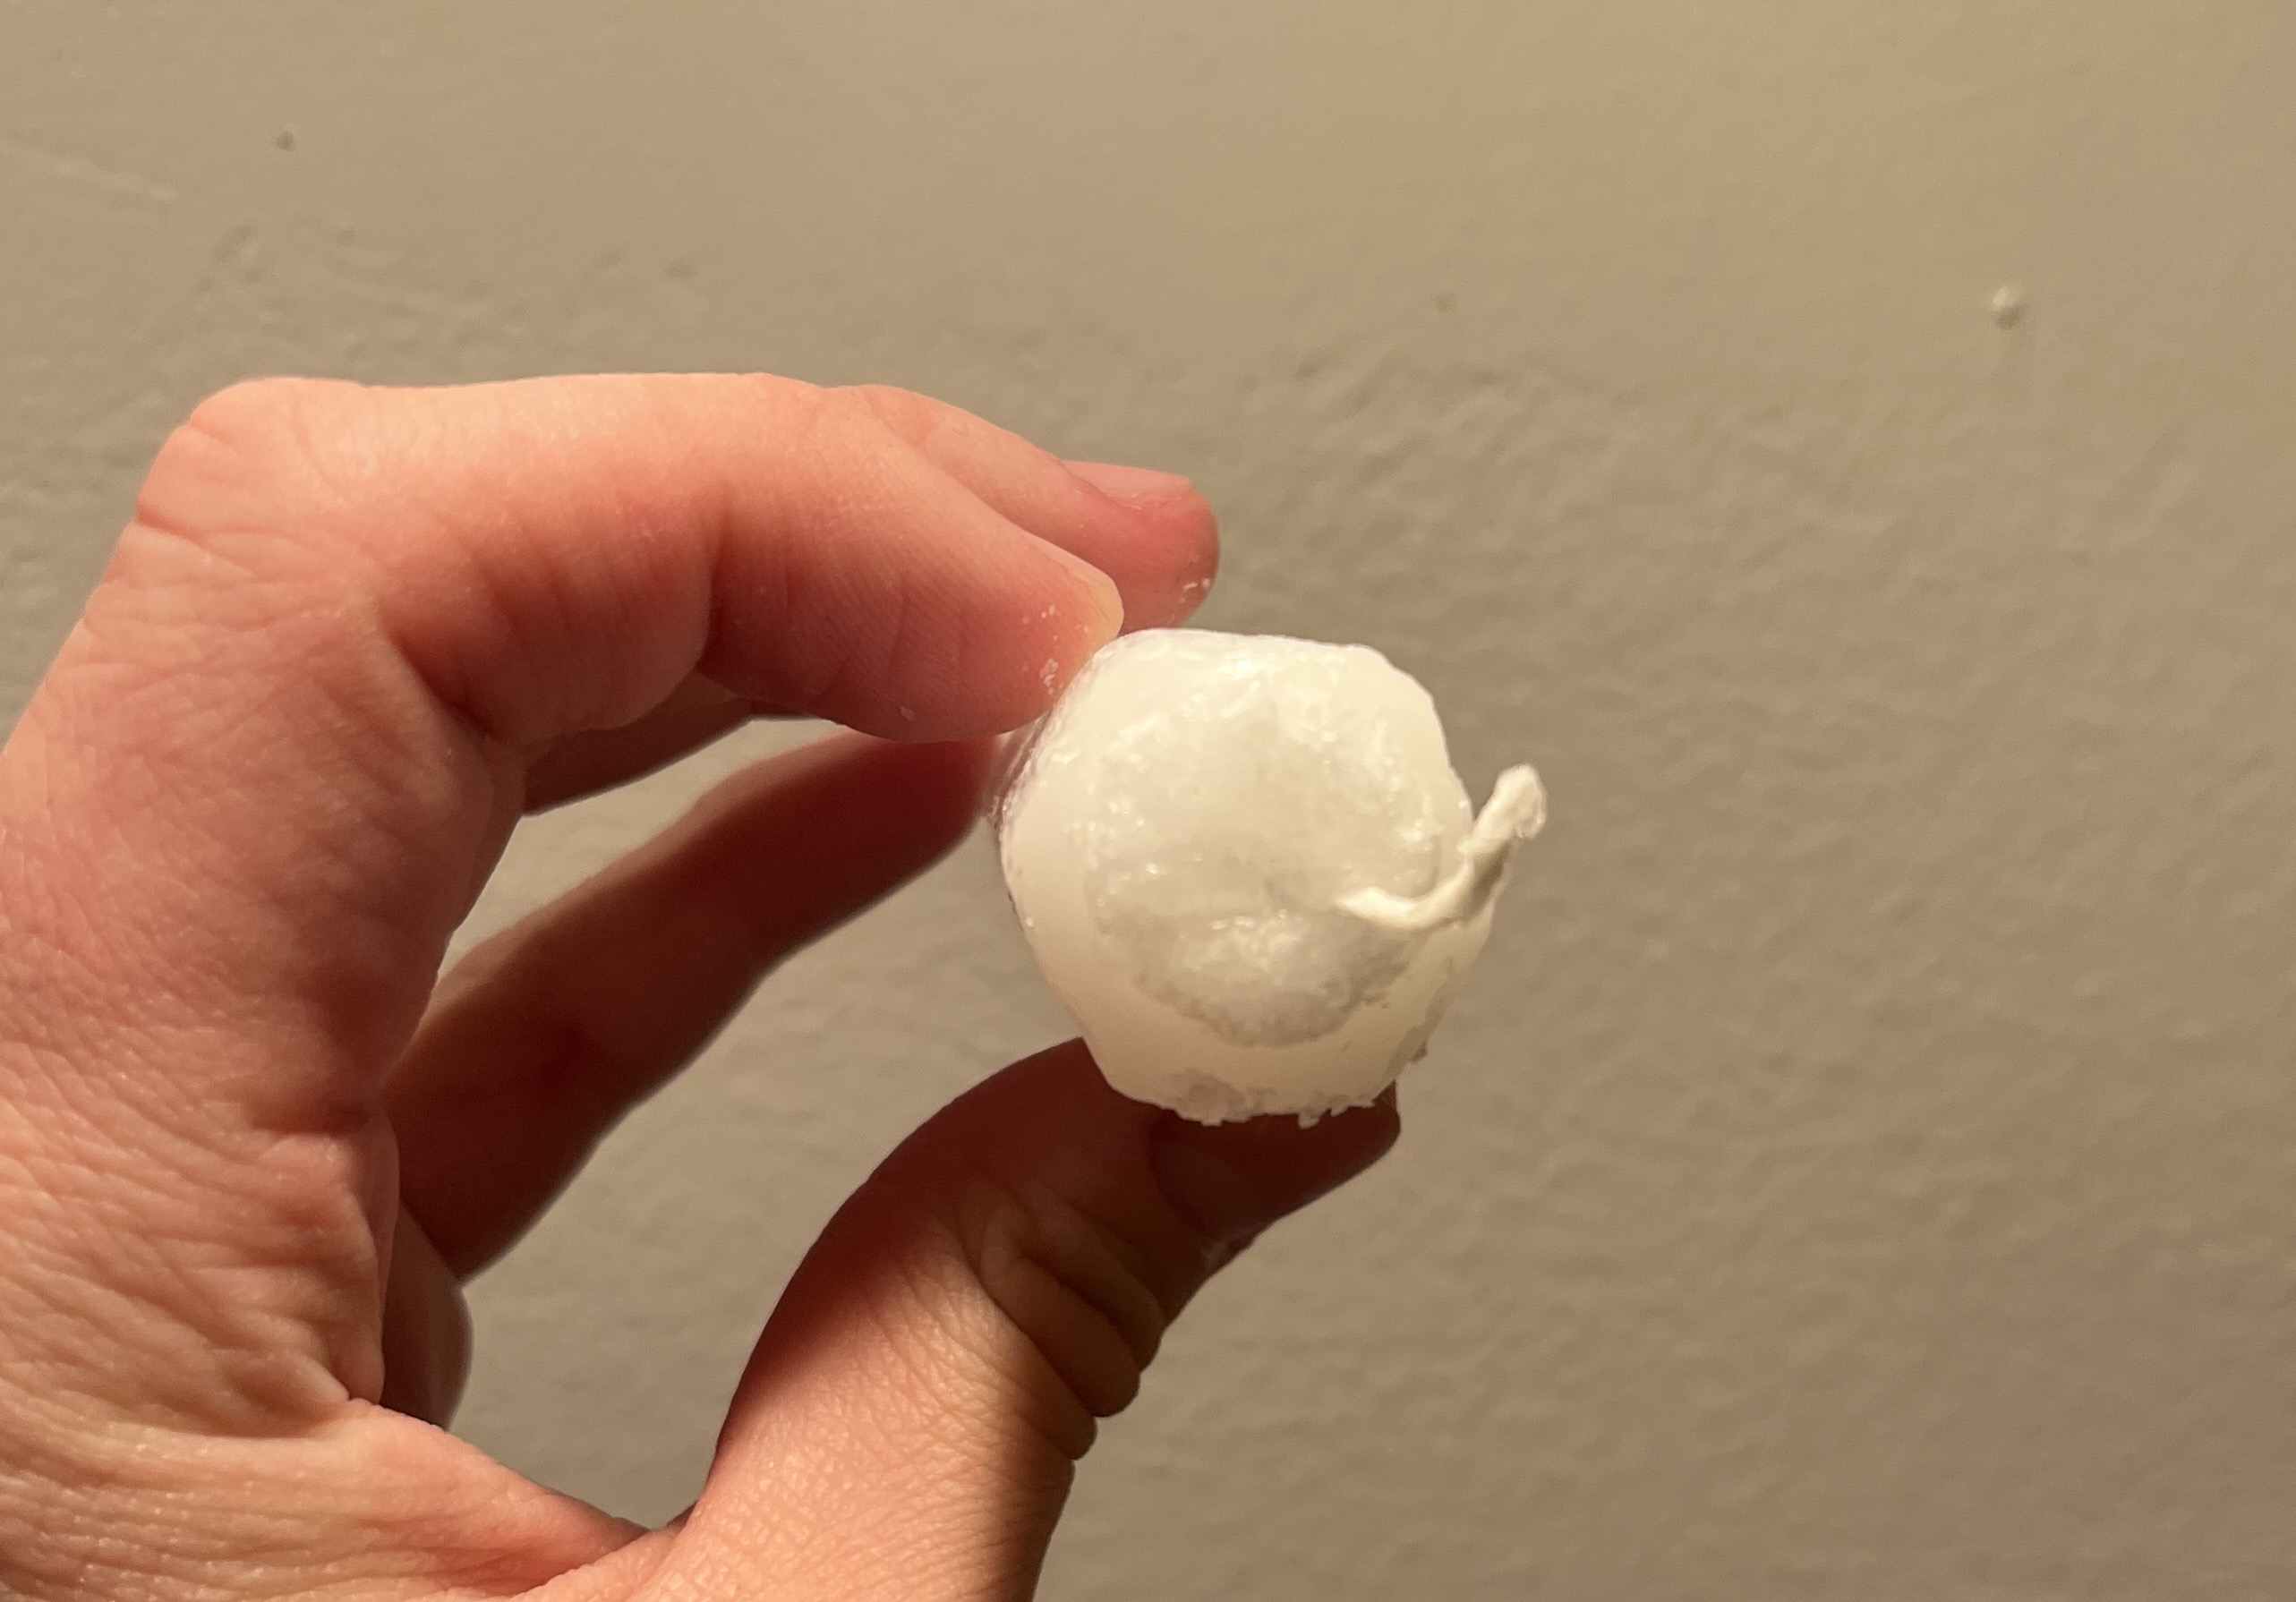
Giving up on the hexagon part
They're hard to cut, reduces our surface area; who even likes hexagons anyway? We decided to just stick with the cylindrical candles for our mountain for simplicity due to time constraints. We also found out the company had shipped us around 100 fewer candles than we expected, so we needed all the surface area we could get!
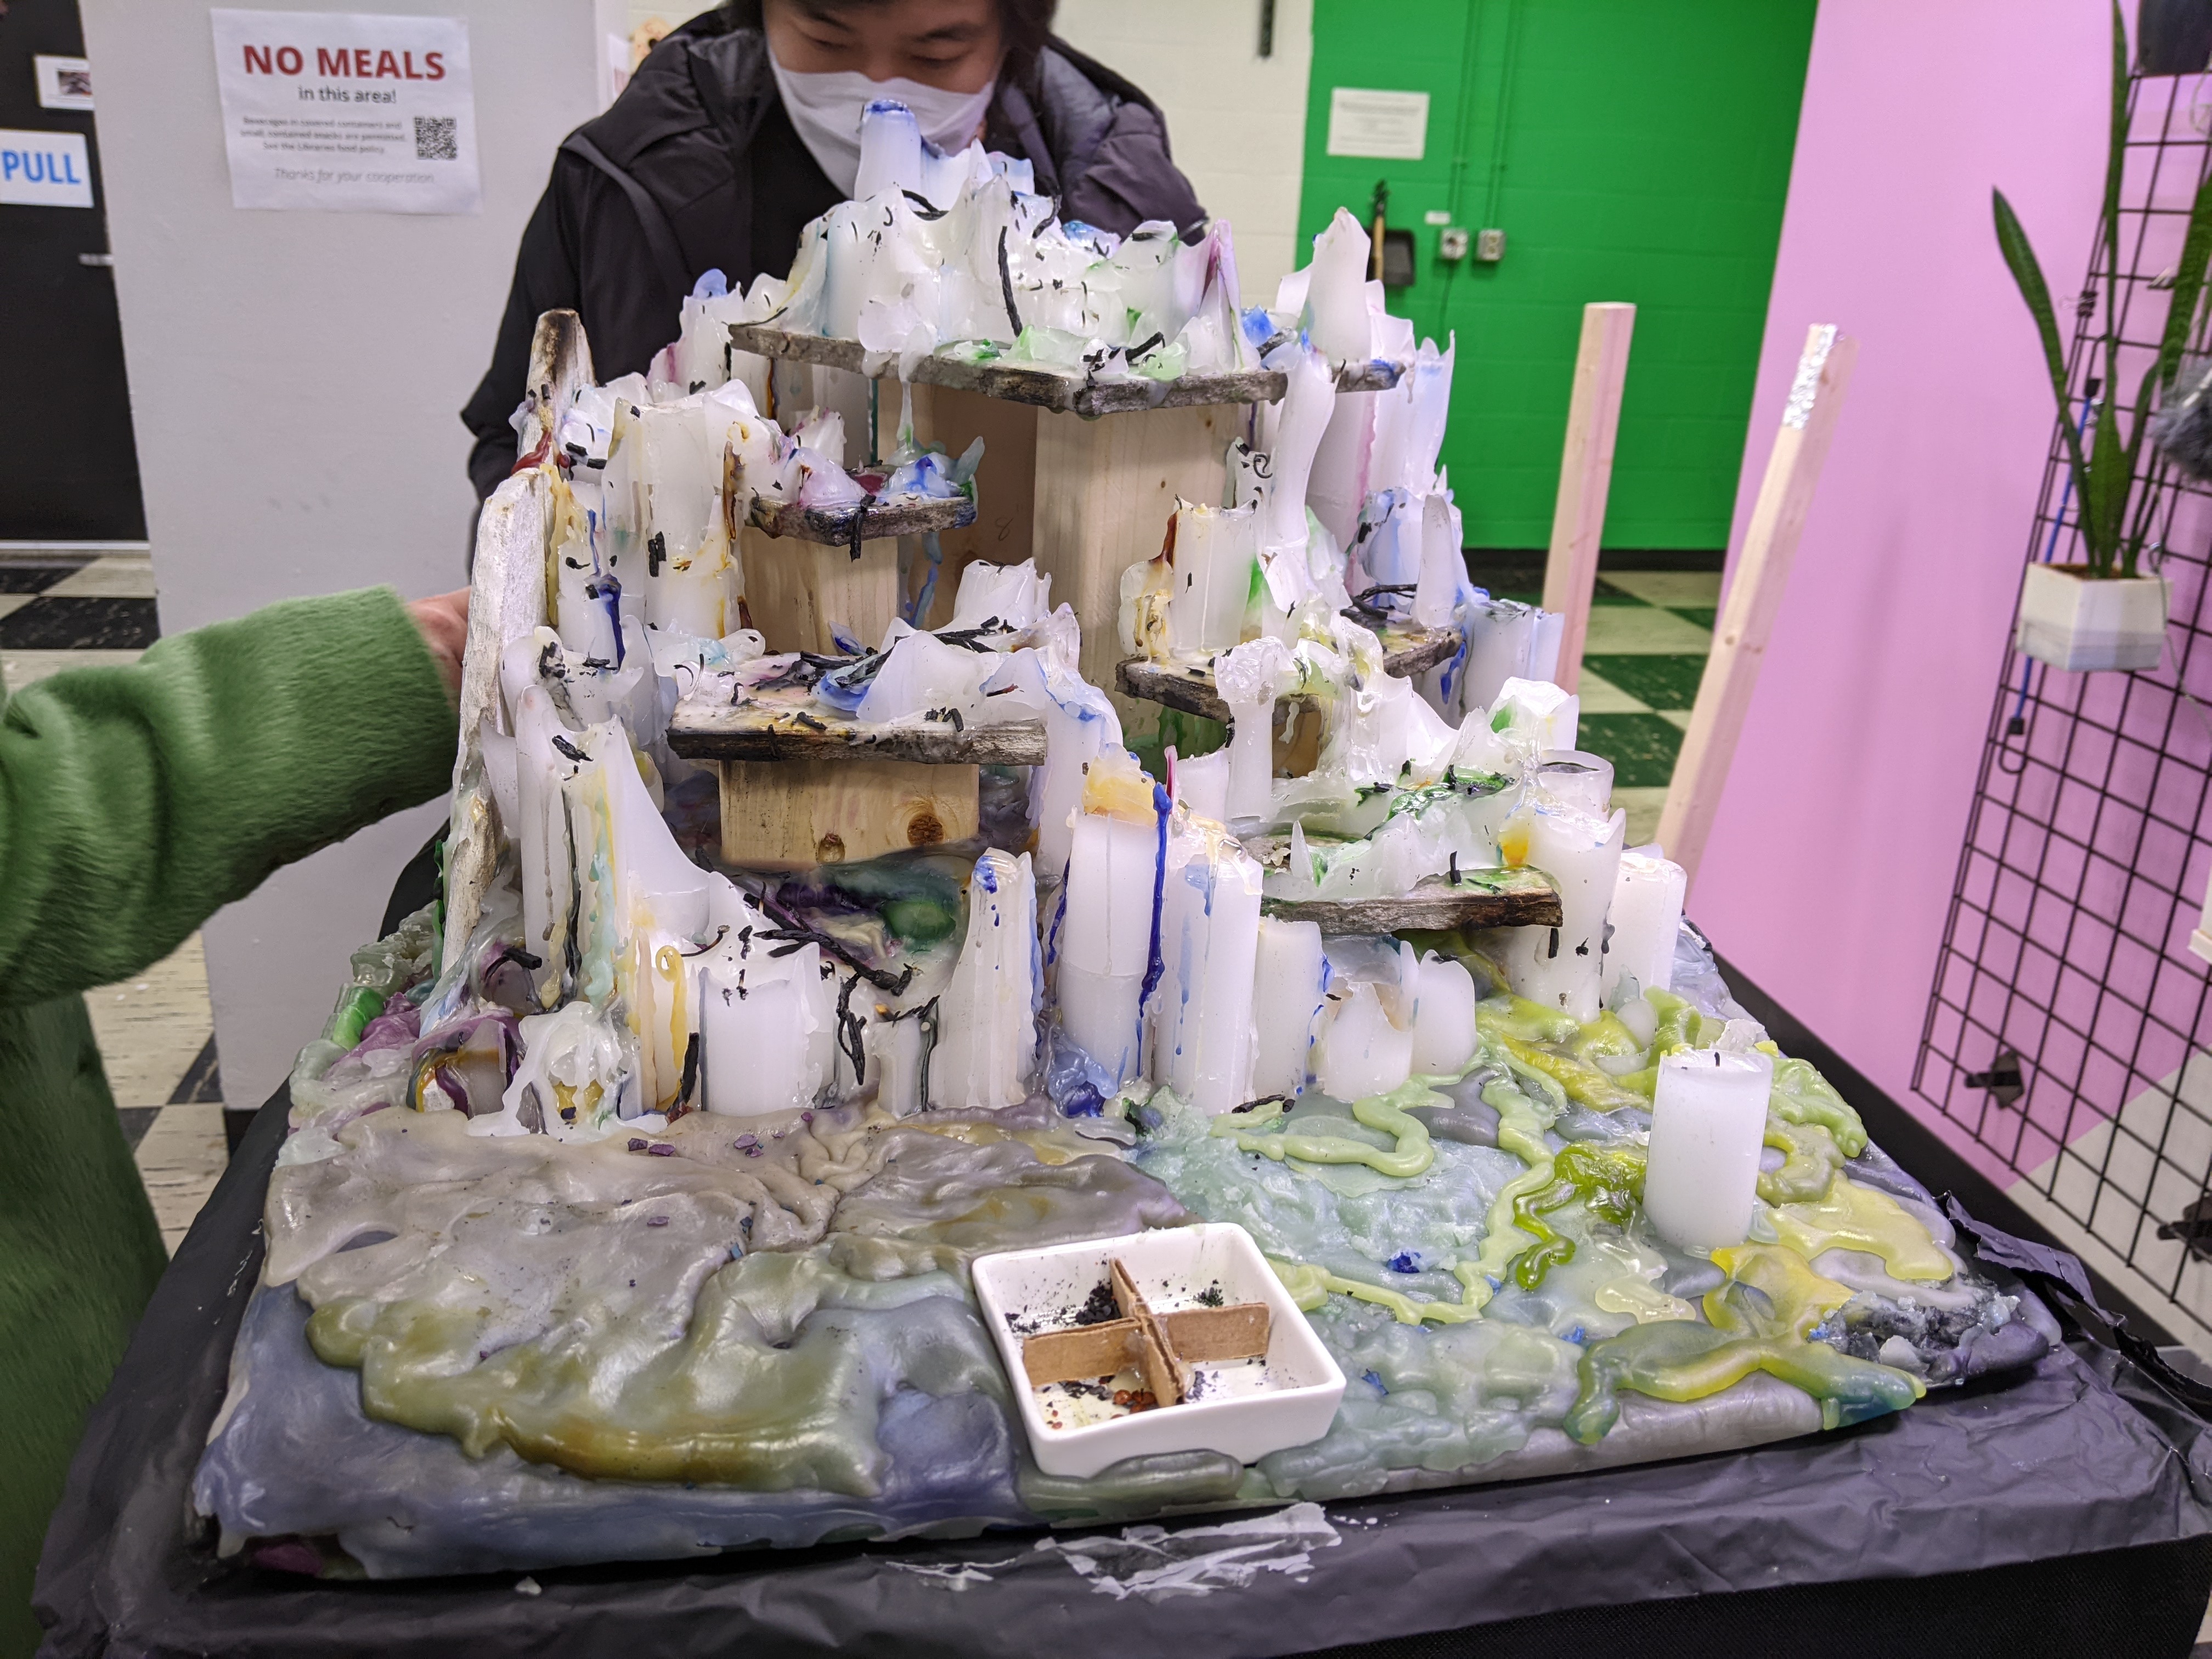
Concrete base
Since we didn't want to waste wax making the mountain completely solid, we made these platforms that would make it easier to vary the candle heights.
Concrete board that our teacher donated to us from his on-hold bathroom remodeling project
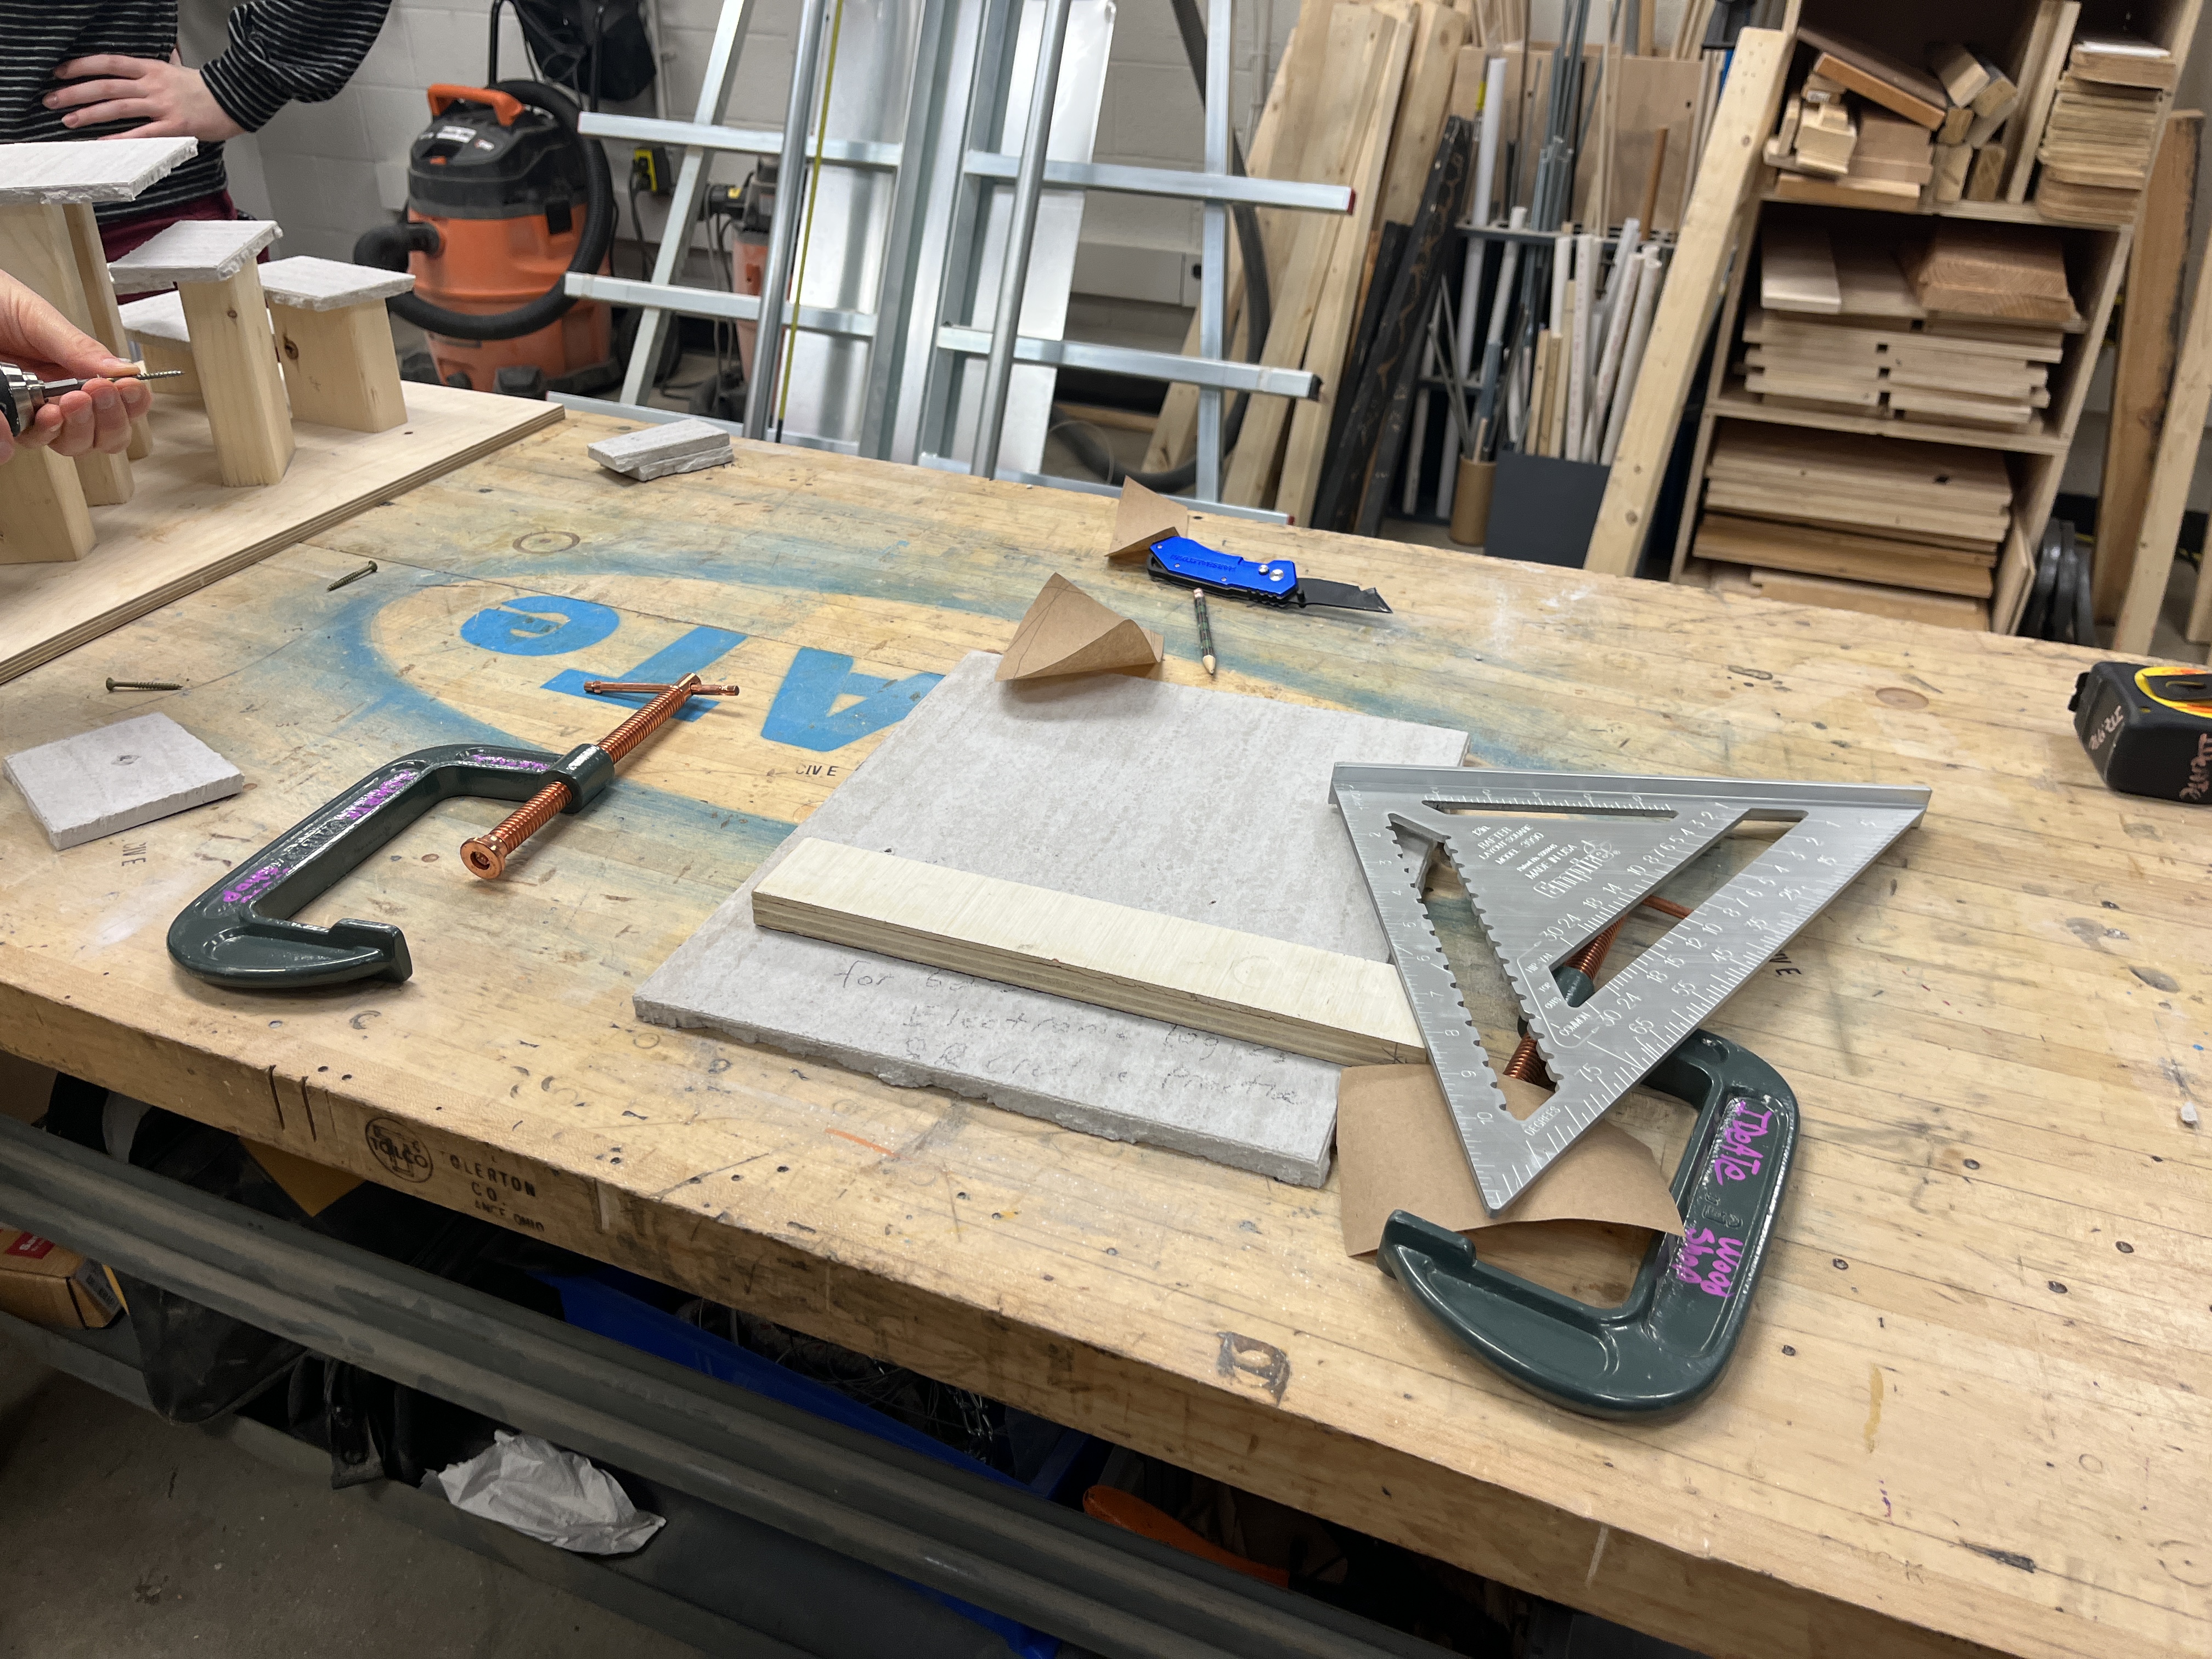
Inspection of the concrete board
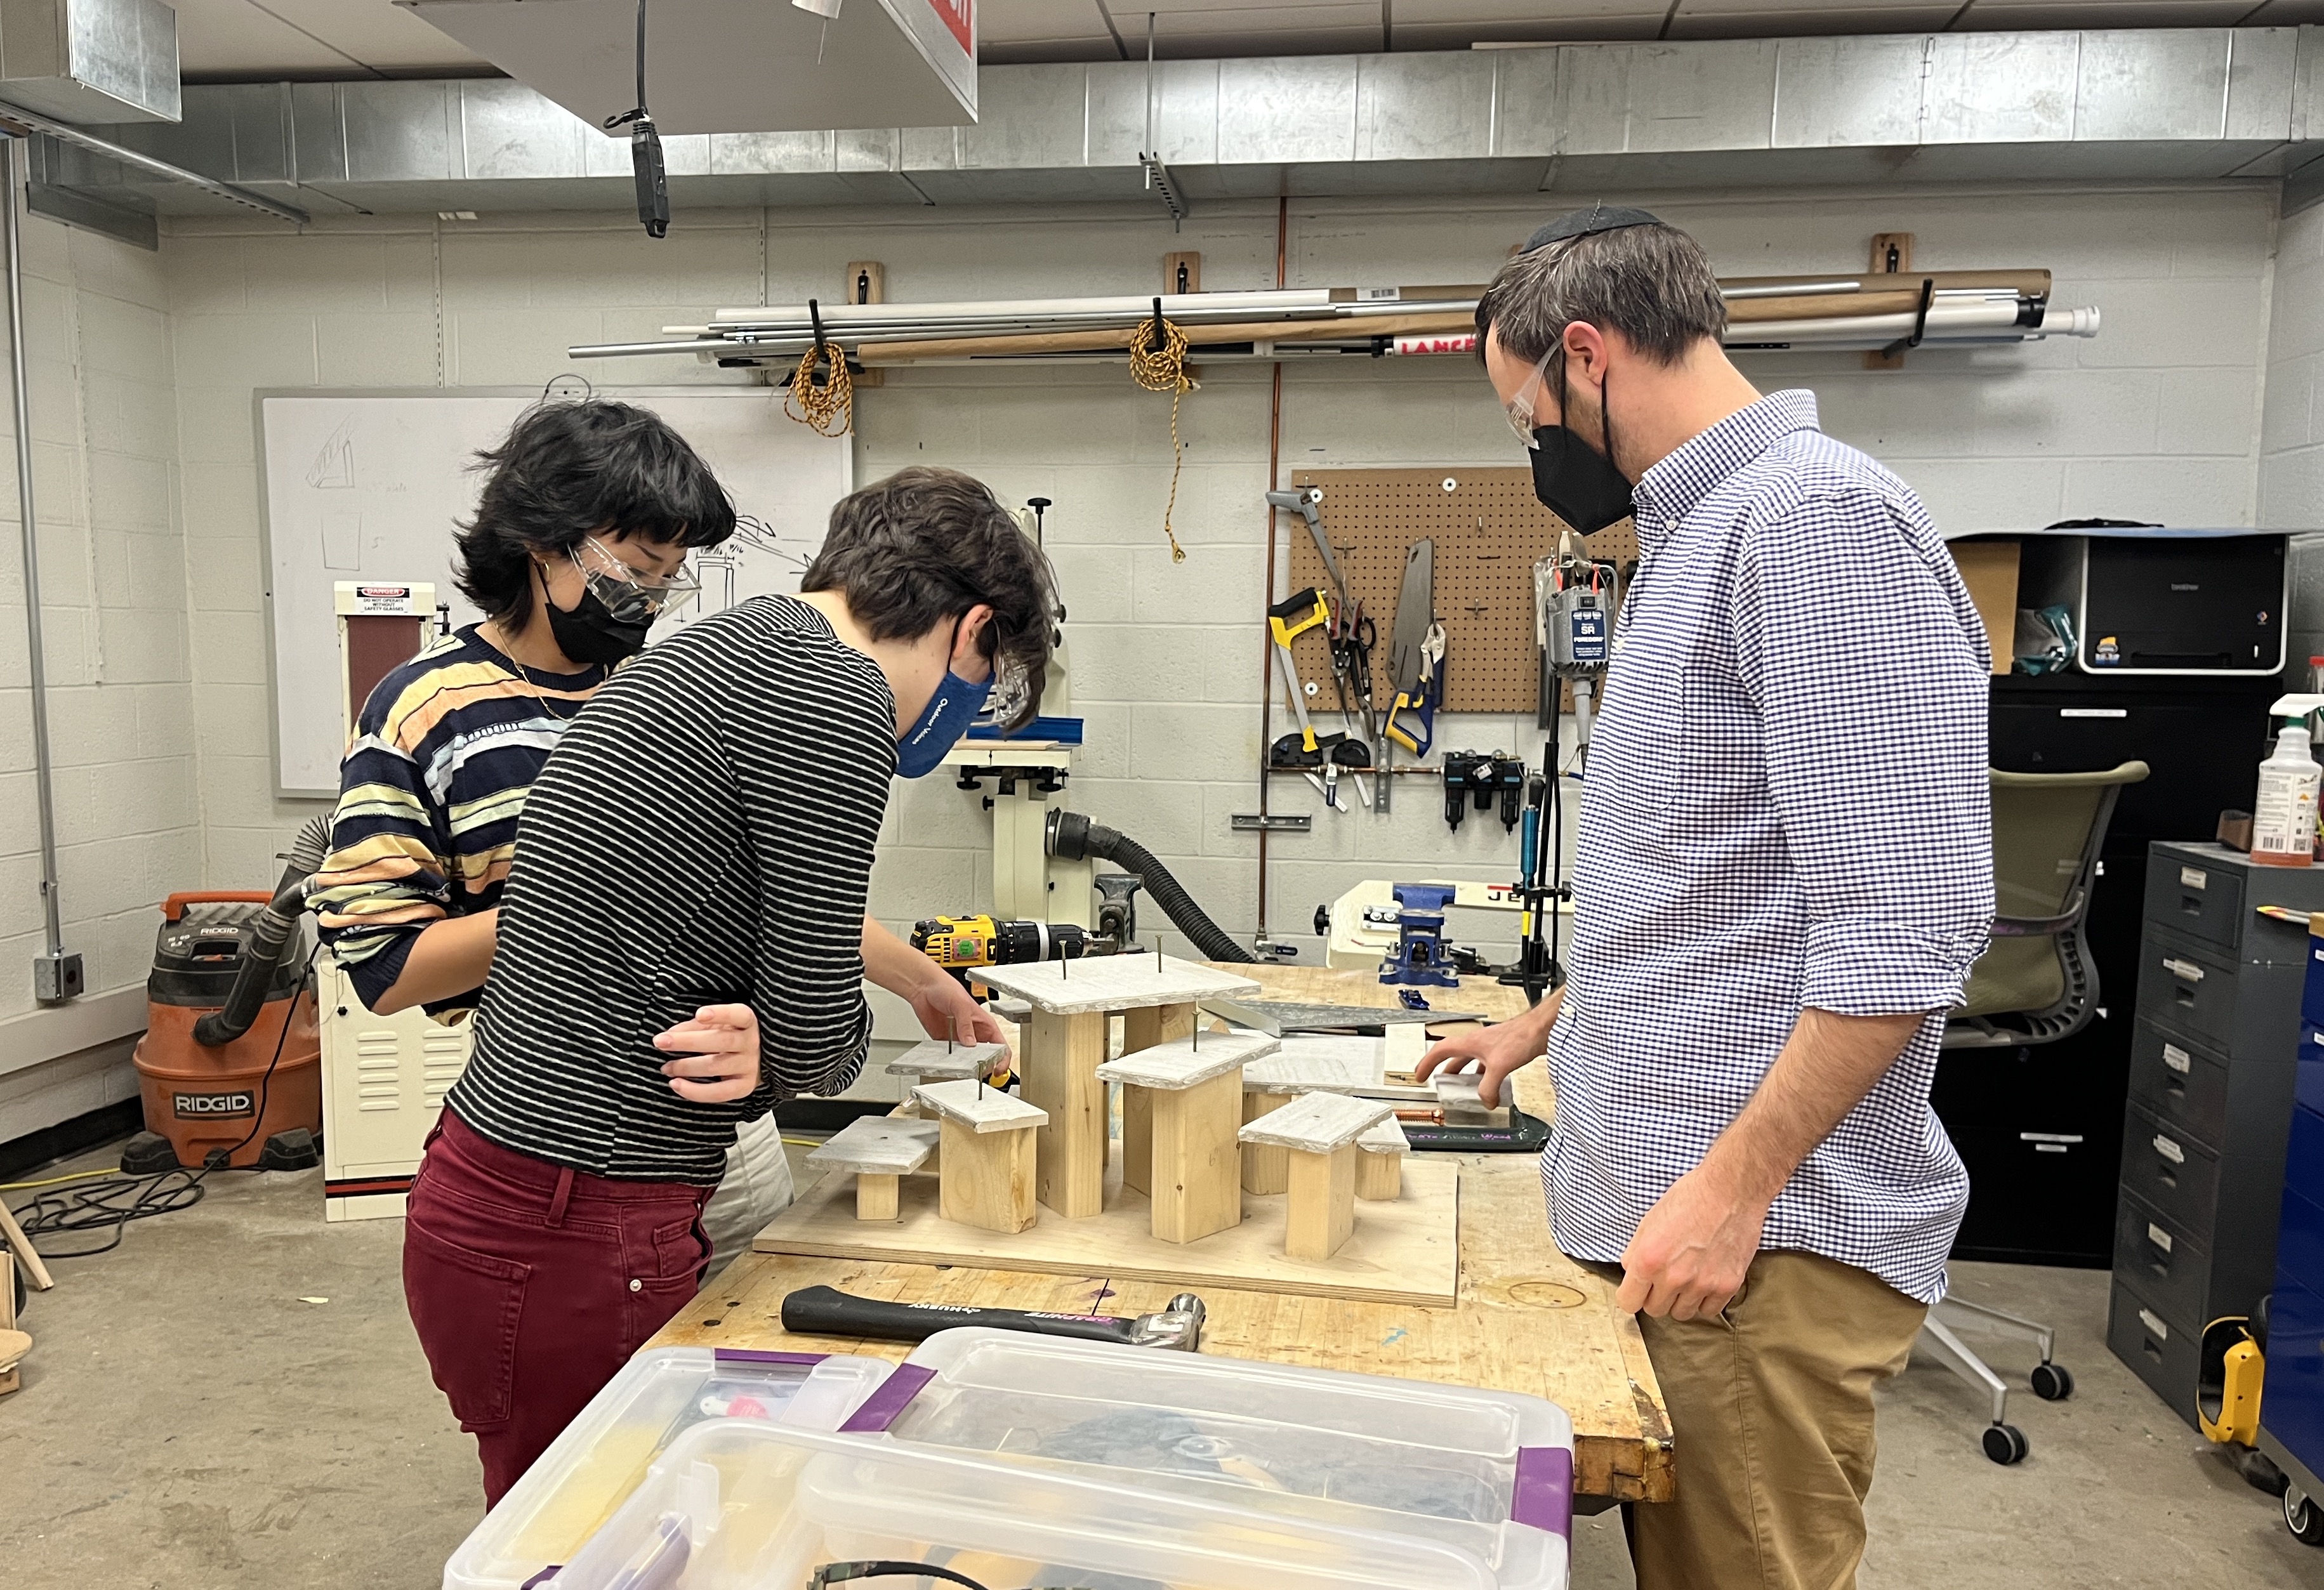
The concrete platforms on their wooden pegs, pre-drilling.
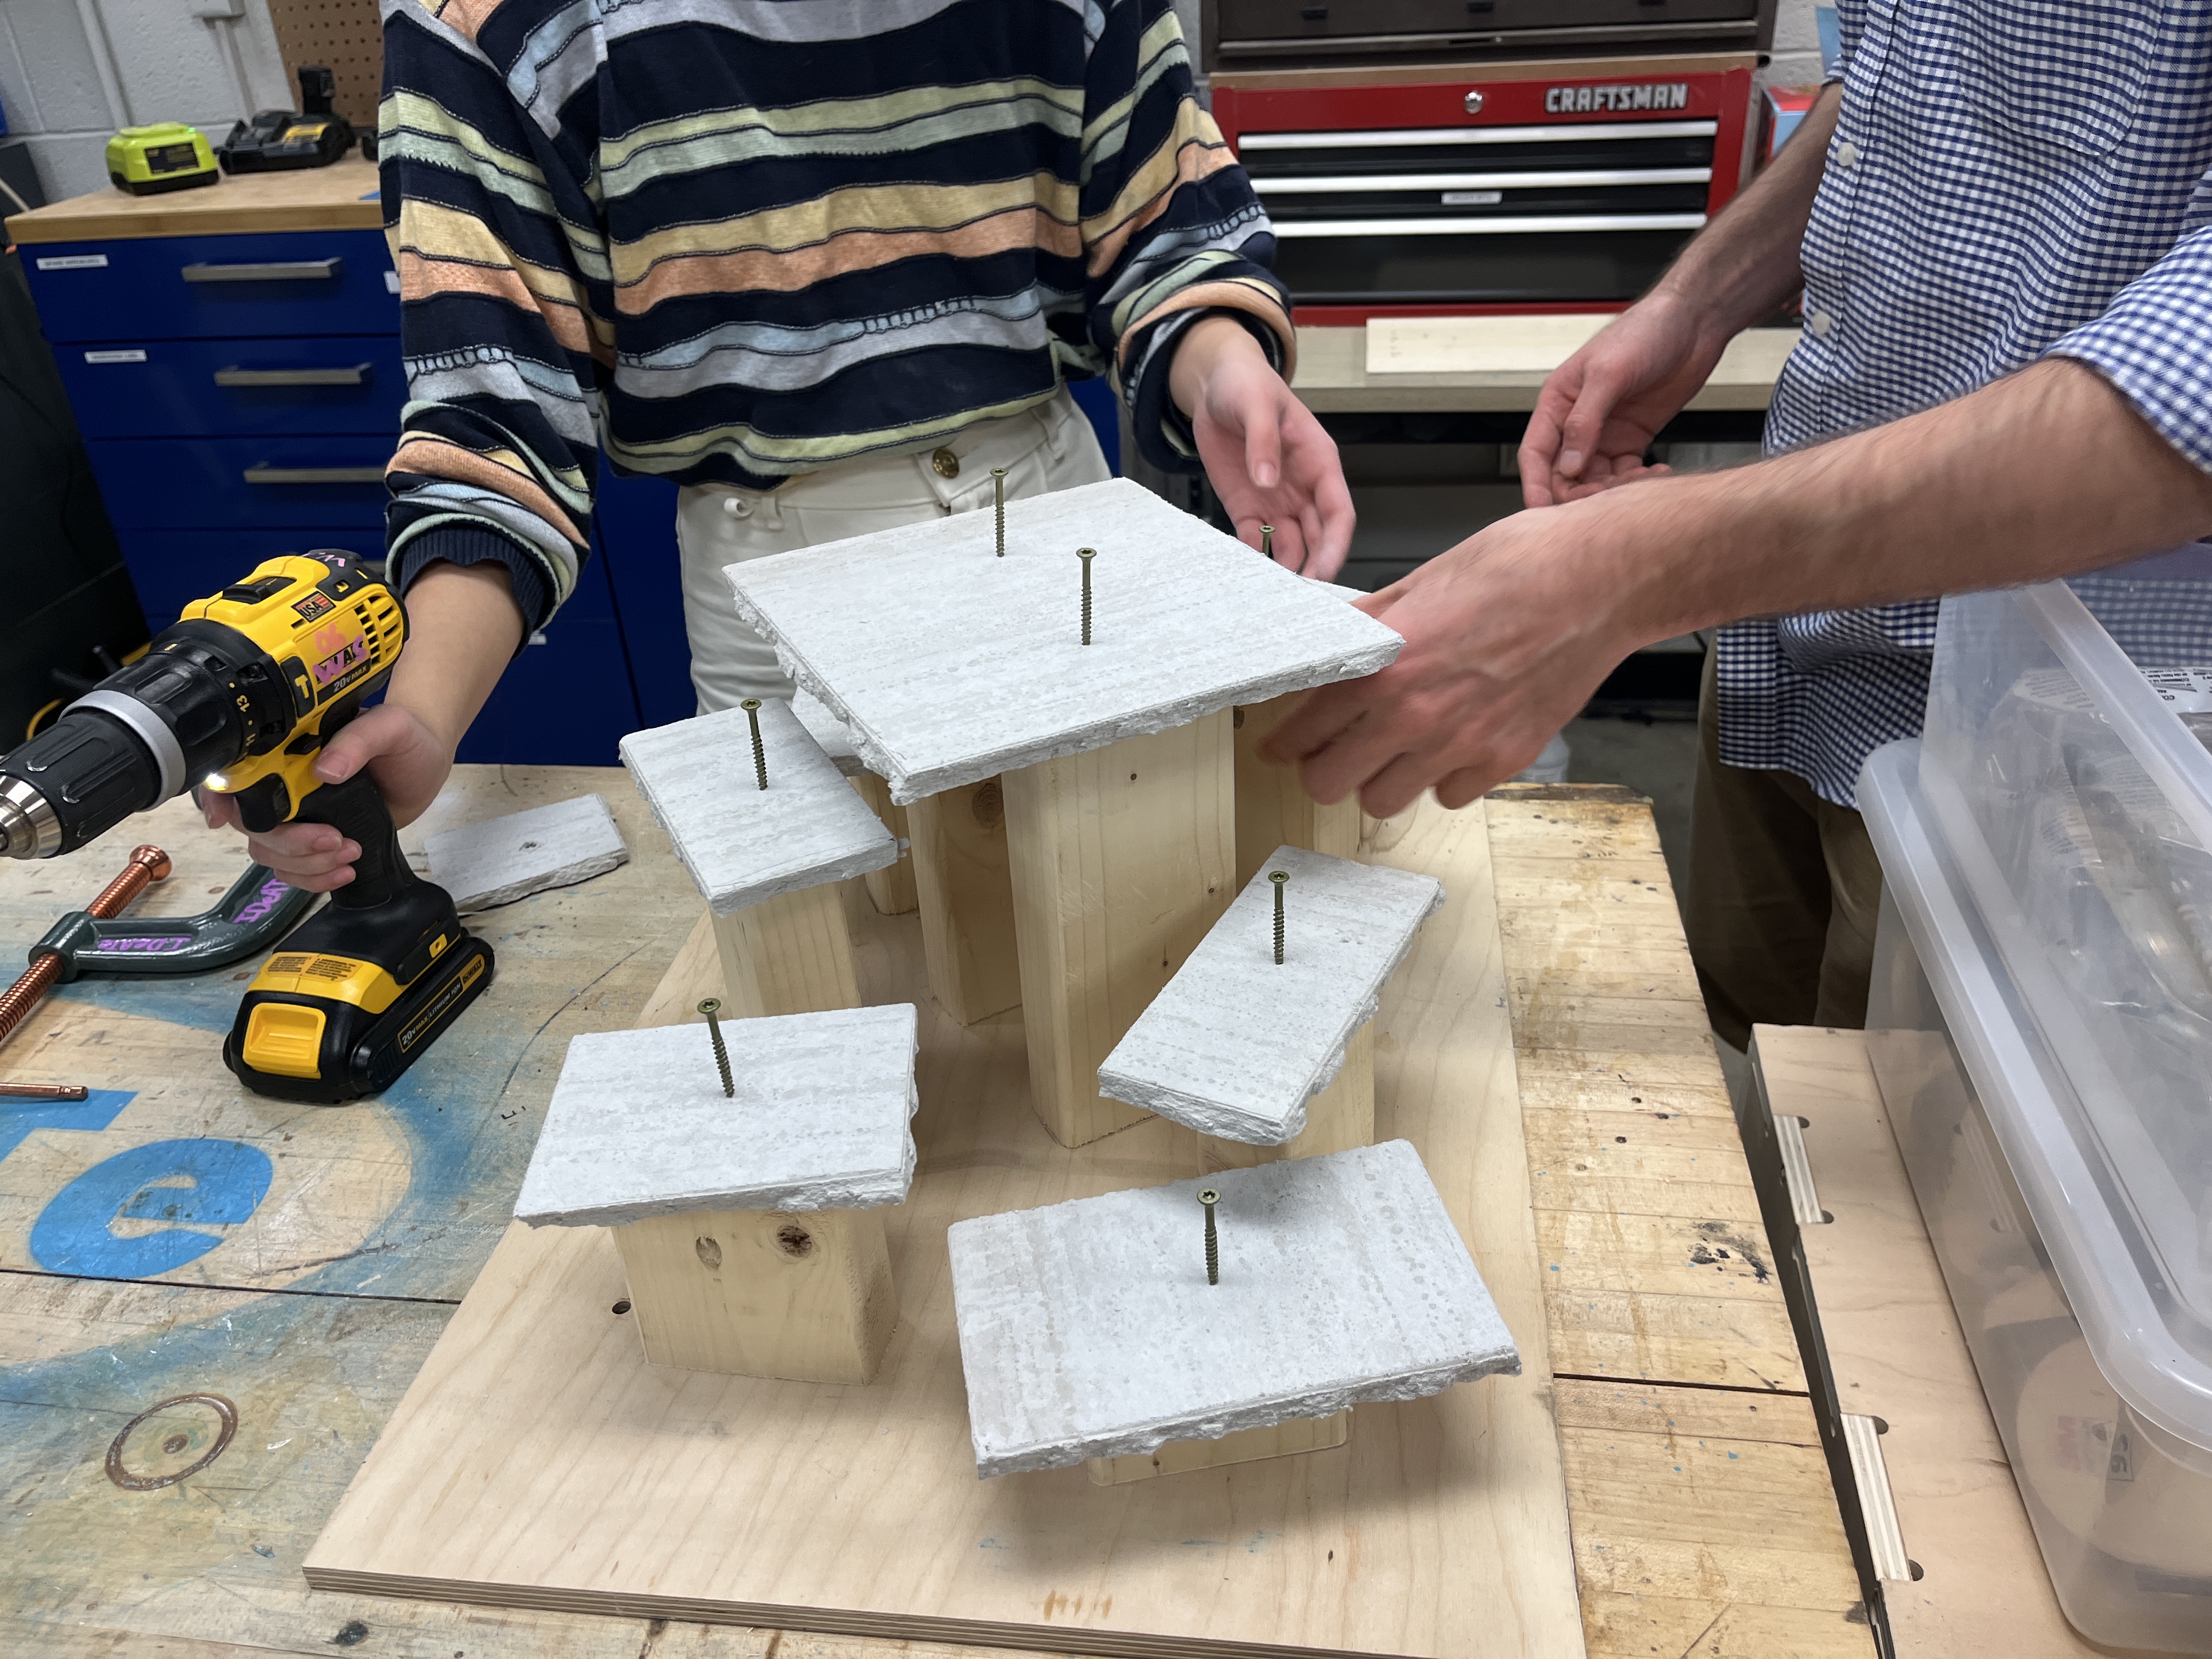
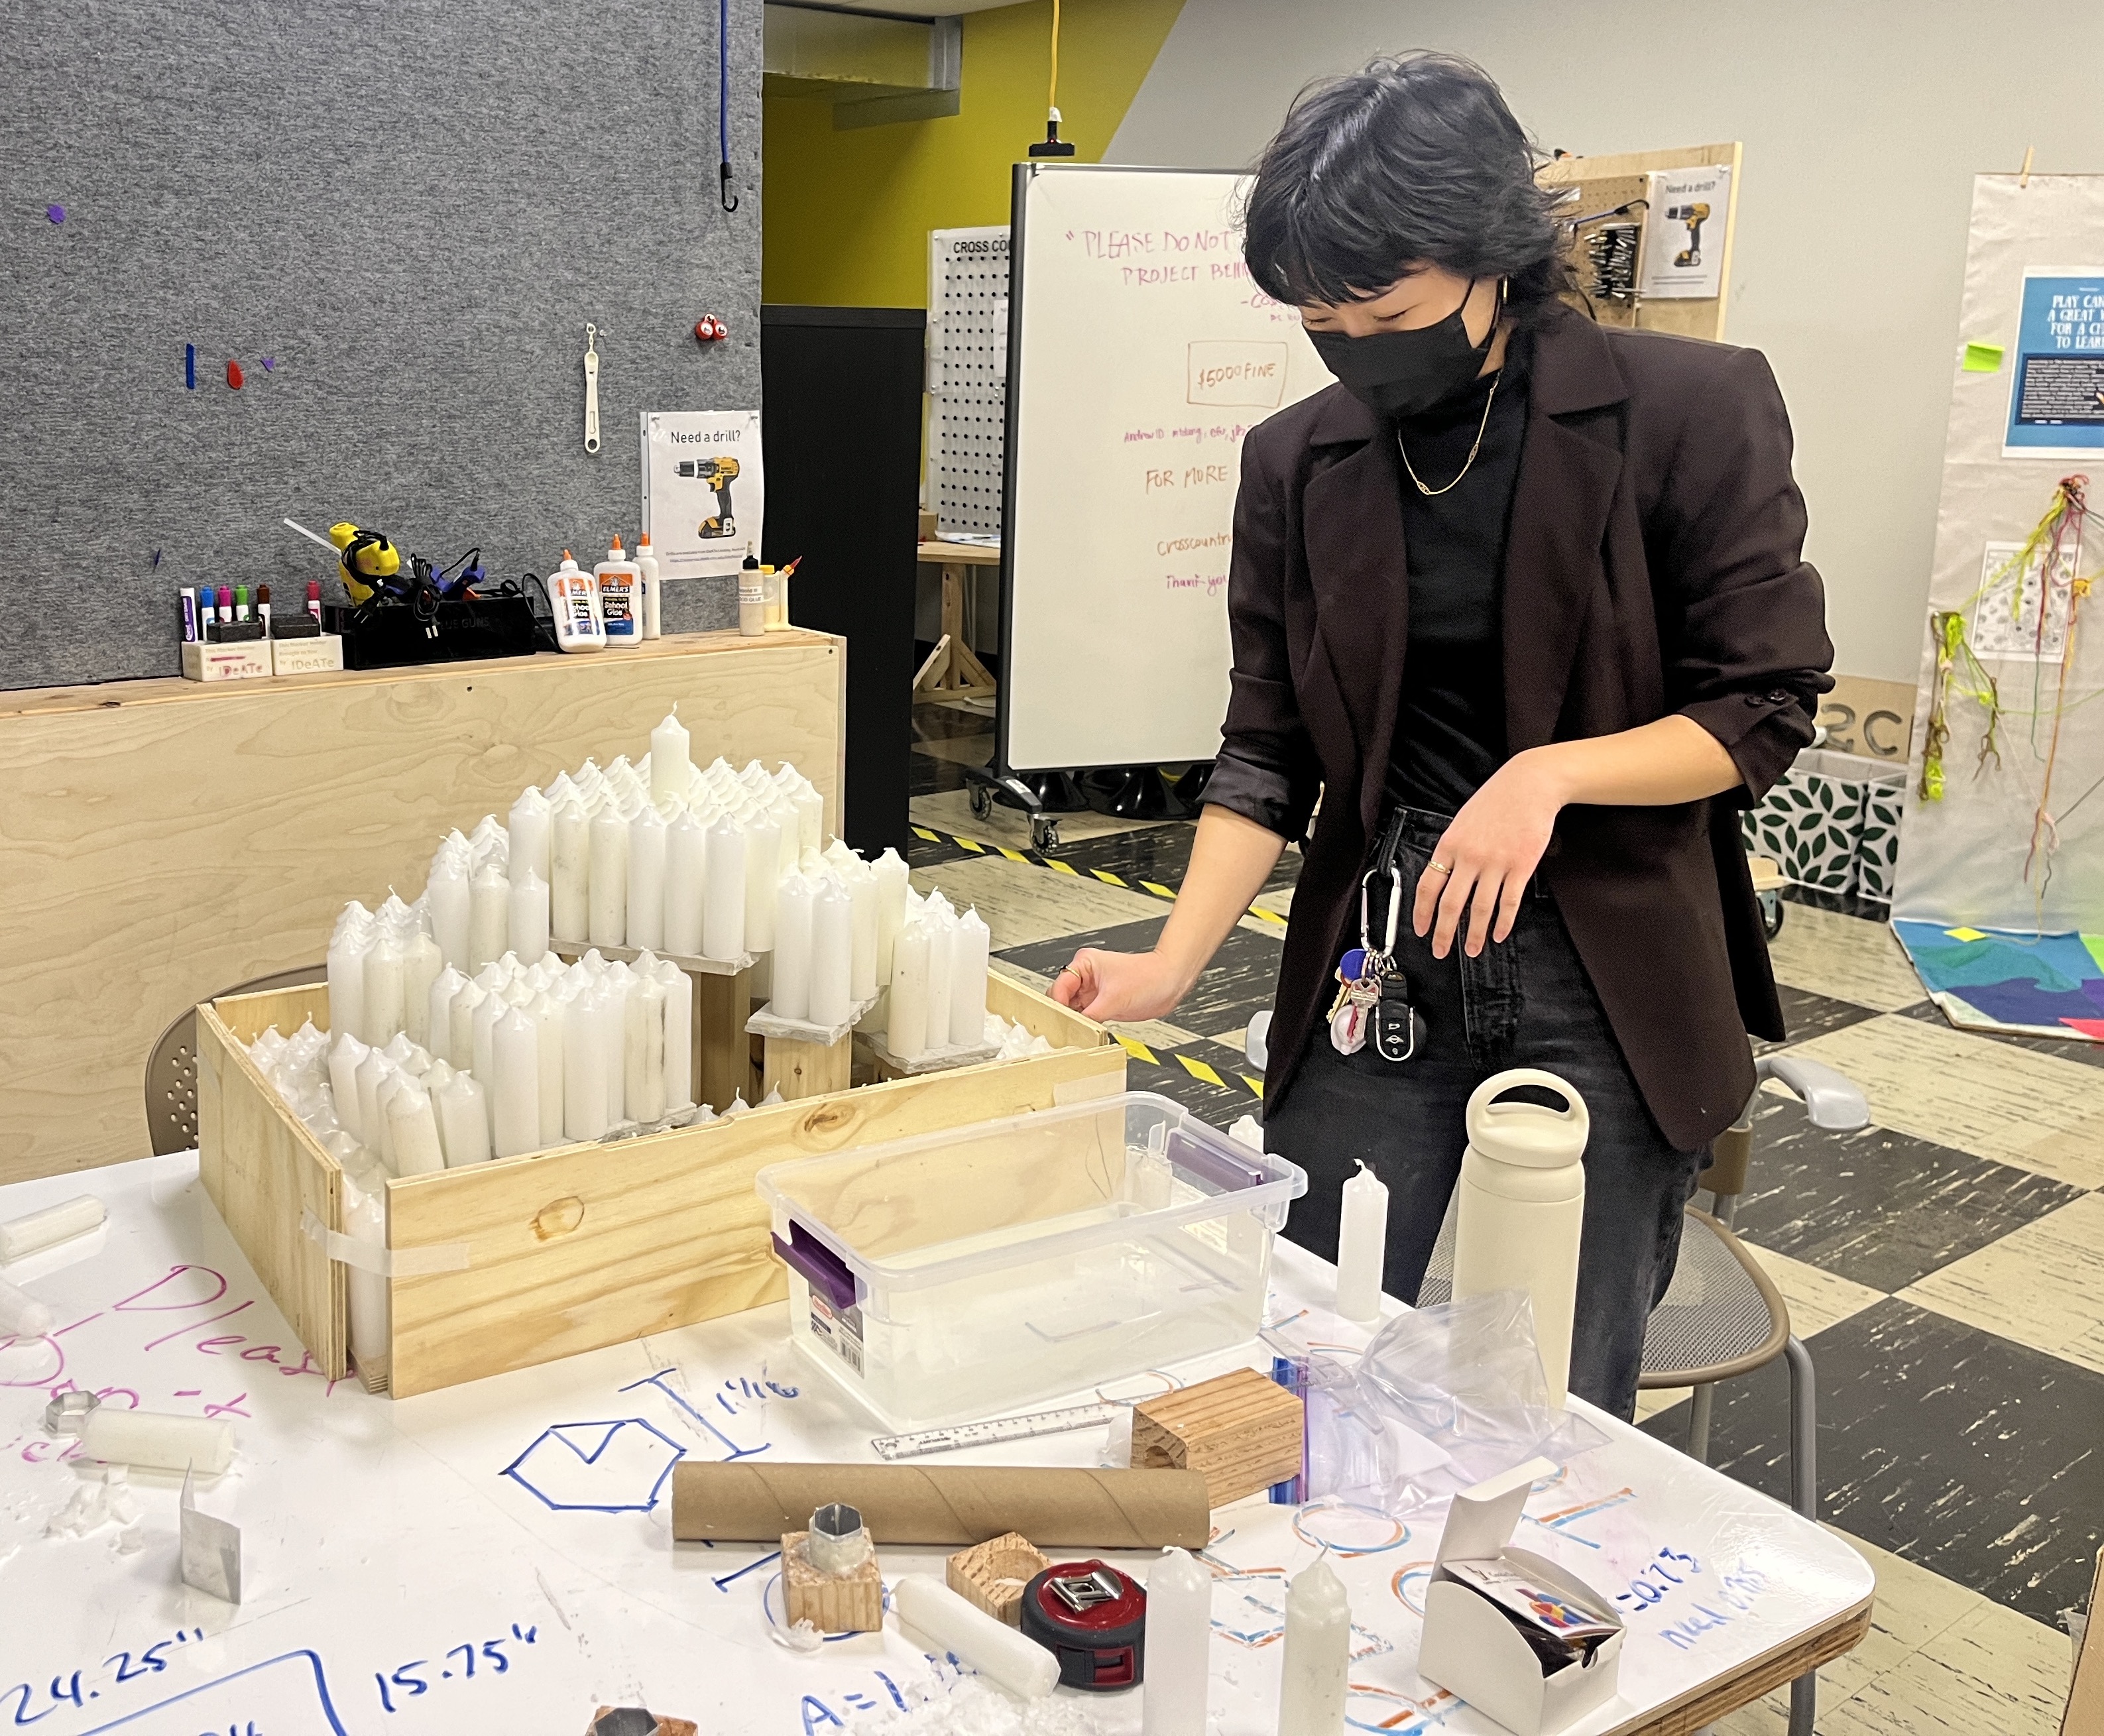
Candle placement
The placement of the candles also took a bit of thought. Just lying them out looked ugly and too regular, so we were going to cut the bottoms off some and glue them onto others. Hot glue held everything down.
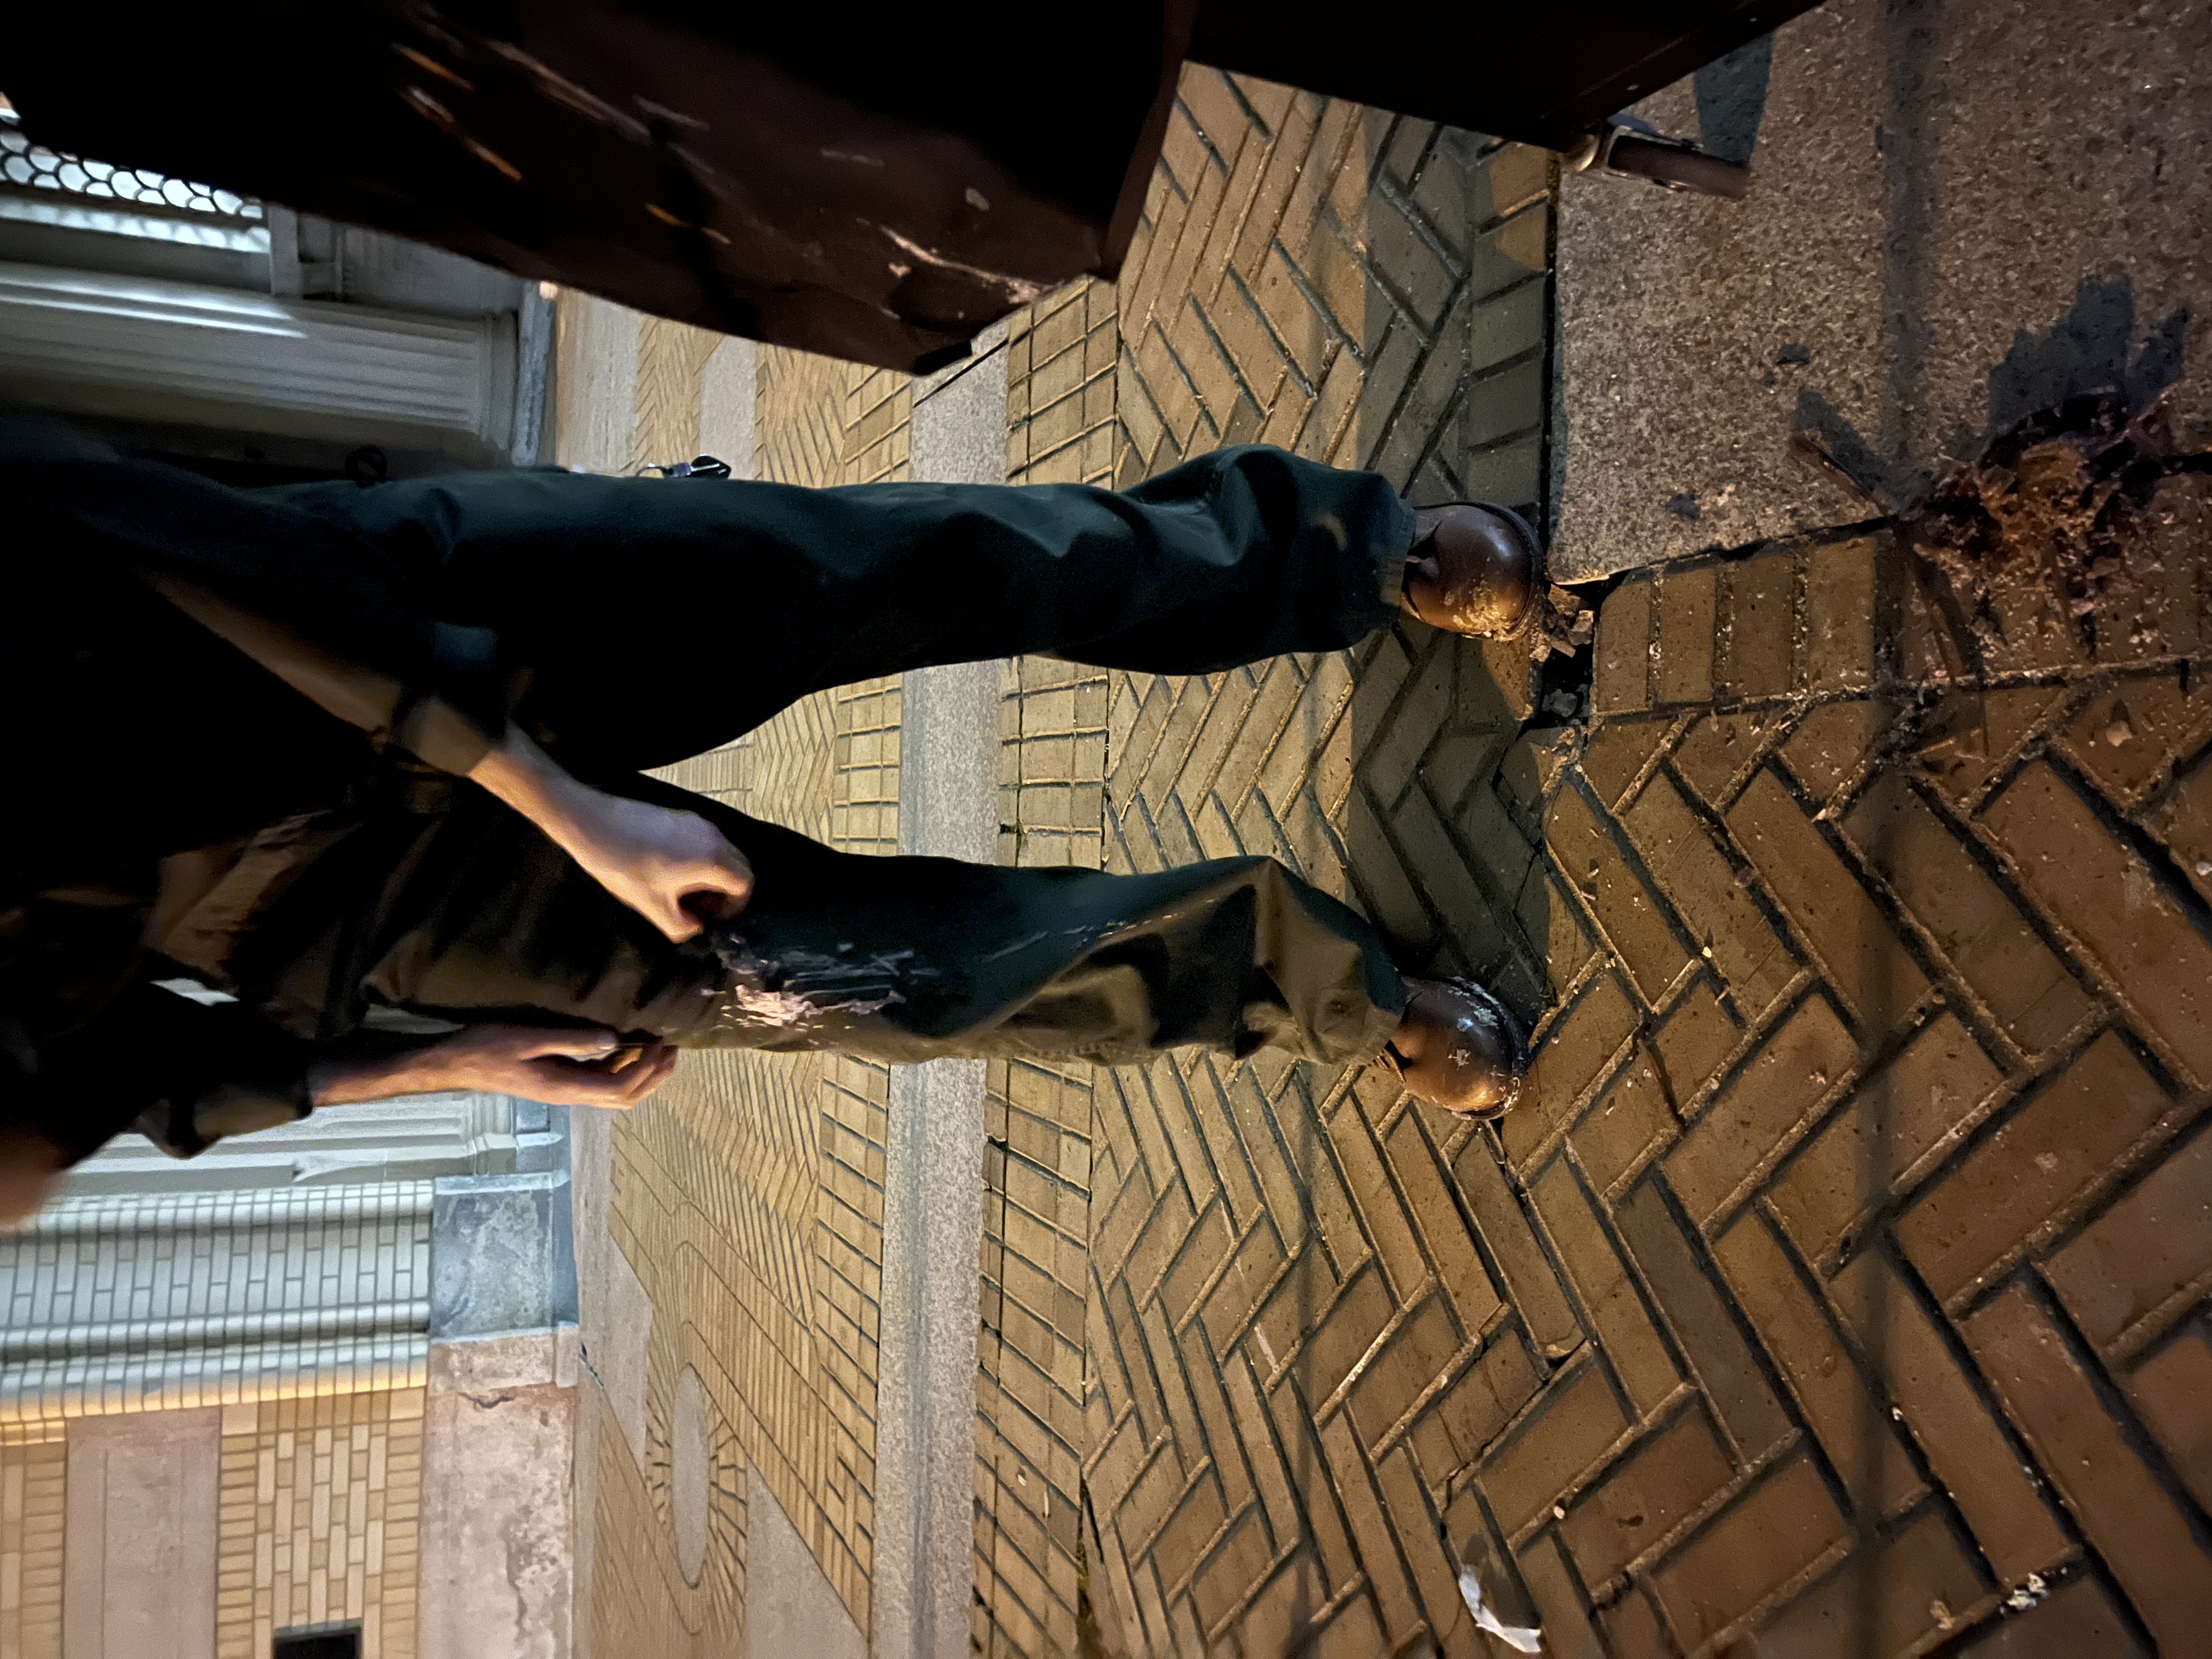
Cutting the candles turned out to be hard, especially since we needed around 300 of them, but my teammates came up with the now-famous "roll a box cutter back and forth" strategy, using body weight and the radial lever arm to make it easier.
Candles placed but not glued. We also haven't varied the heights yet.
We also used cement board later to fill in a large gap when we found out that we didn’t have enough candles to cover one side of the mountain (pictured below).
Post-cut candles, with some big ones in front. We've glued a few to be floating, and the insides are still visible.
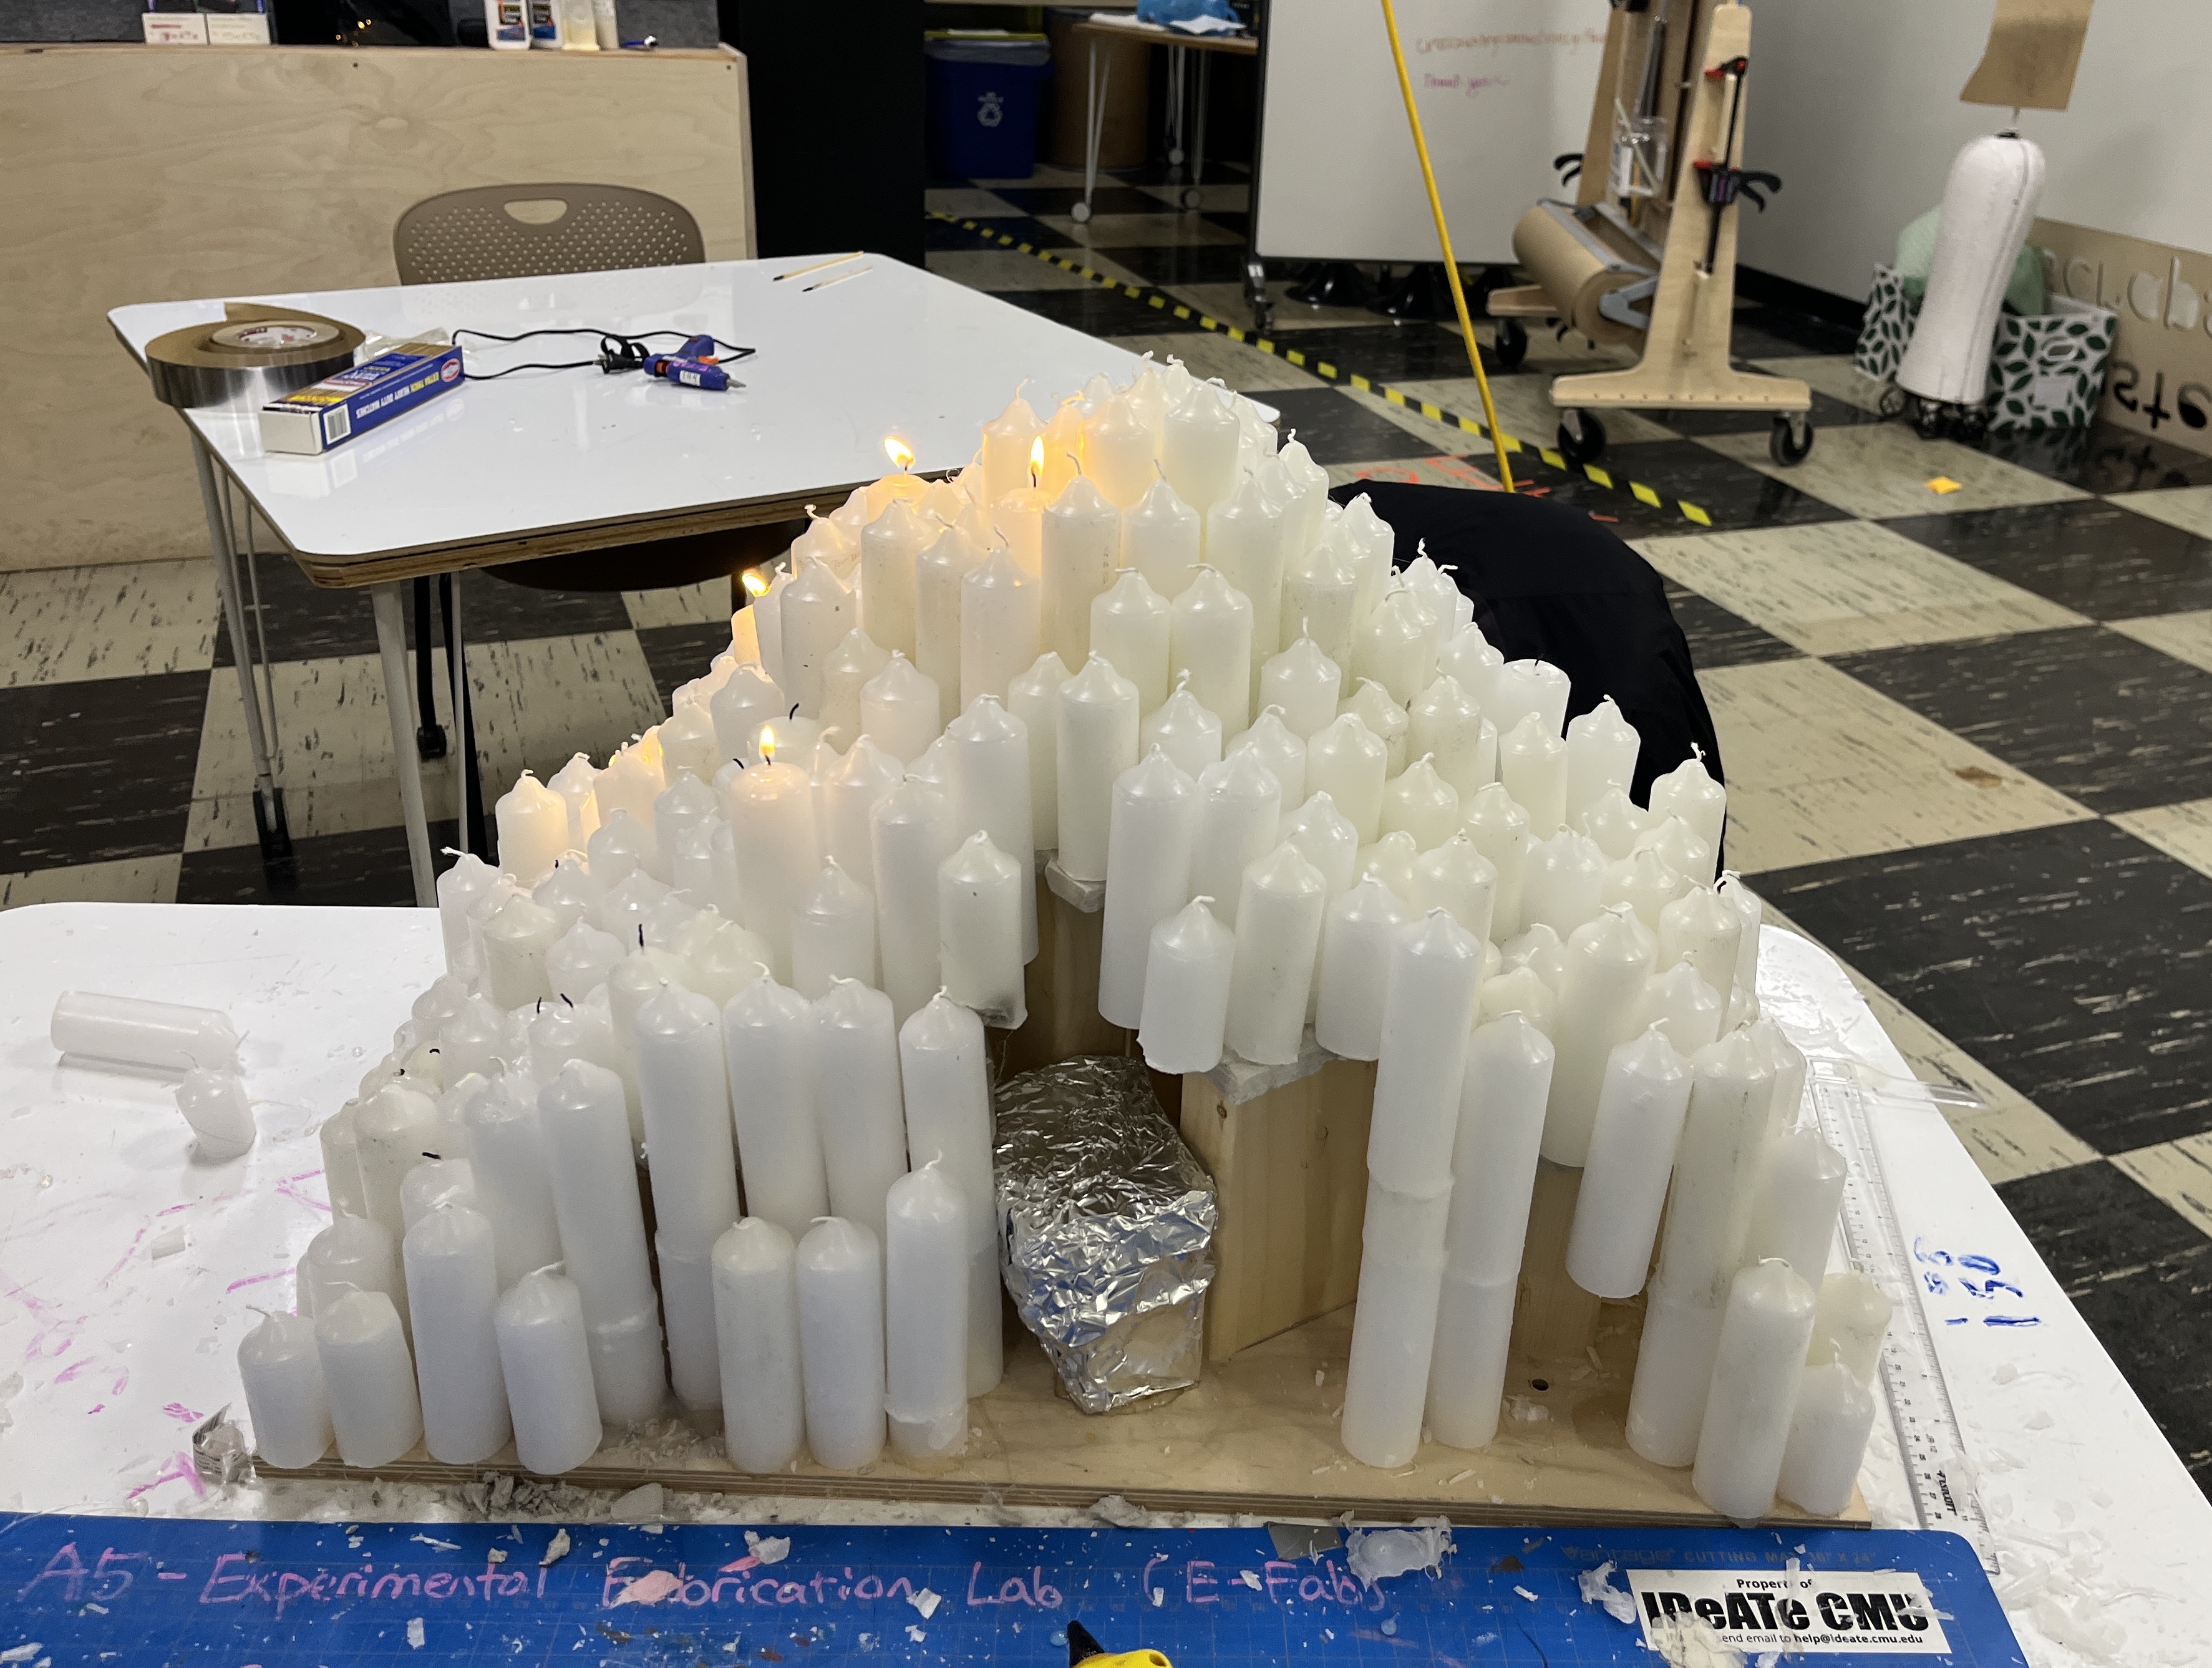
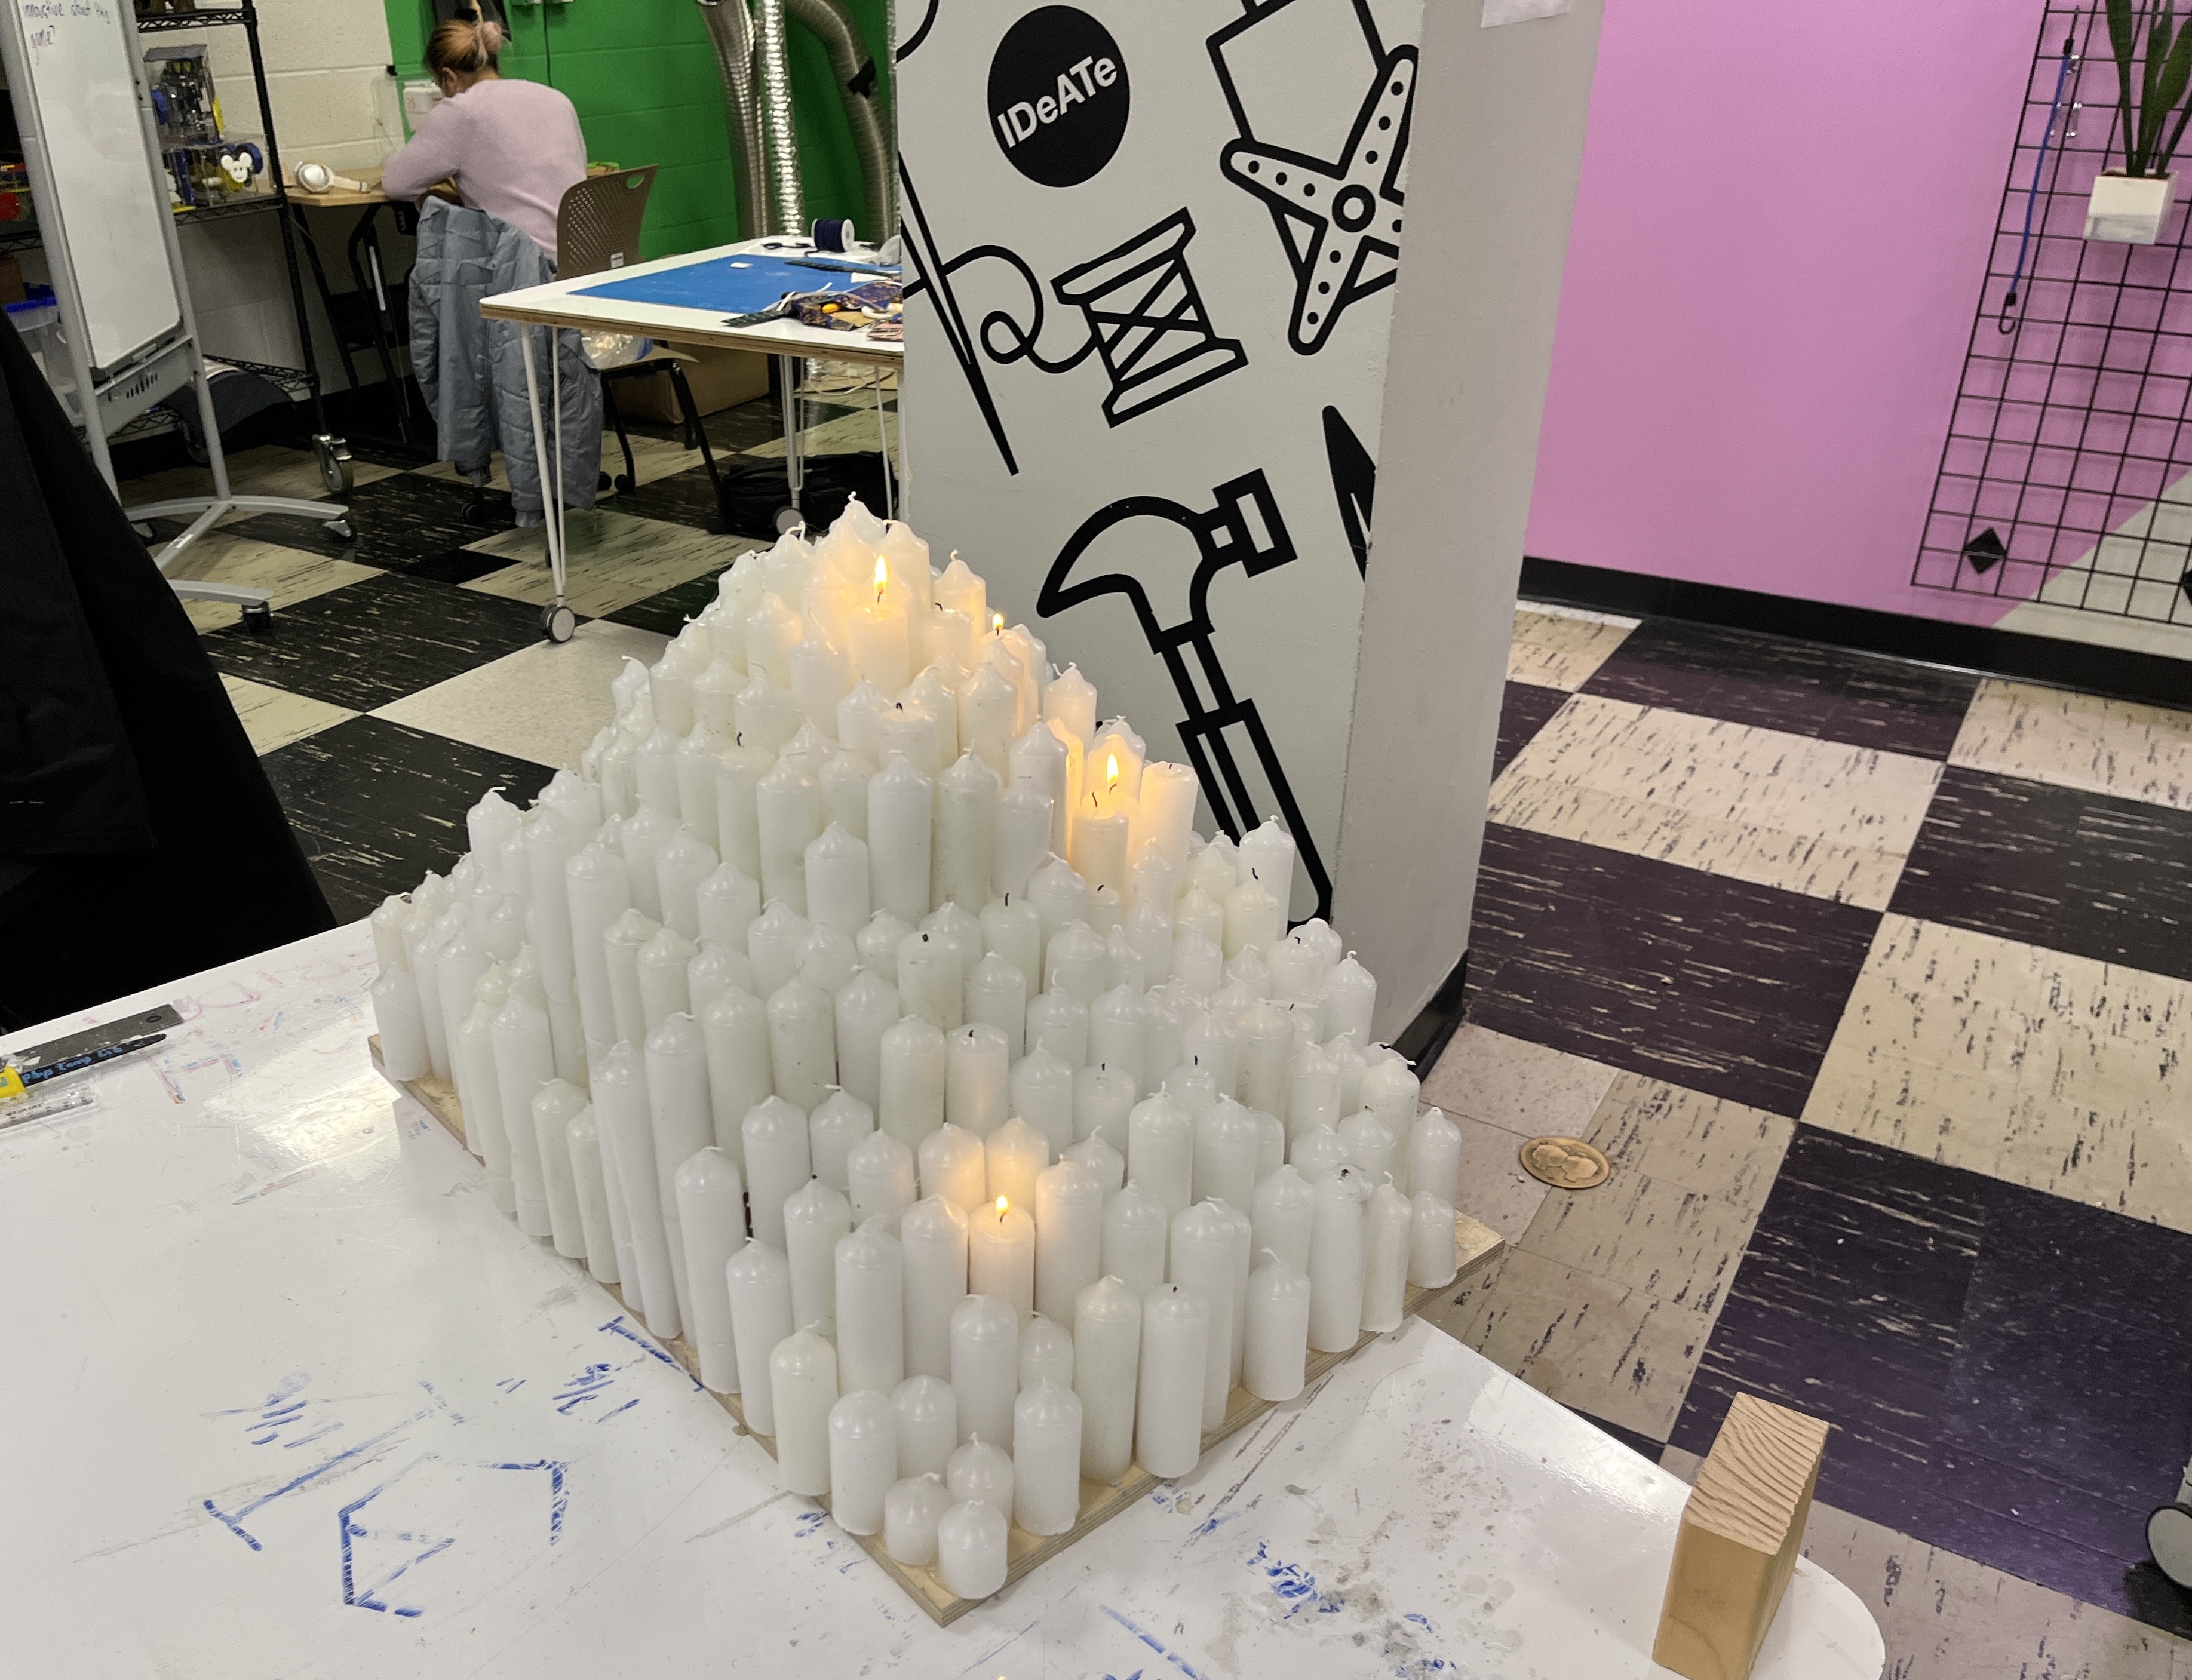
Completed candle mountain, with a few test candles lit
Cart and Foil
So, we were going to transport this thing indoors so people could interact with it. Unfortunately, the fire chief did not like that, so we were exiled outside the front door. Here you can see the cart that we ended up using.
Another important feature was suggested by Zach, our teacher. He wanted to layer the cart with foil in case the wax dripped out of the sculpture. "How silly" I said, "what a preposterous idea." He insisted, I demurred, we wrapped the whole top. This turns out to be an ass-saving maneuver by Zach, so I'm glad we did that.
Foil and cart that made our final exhibit presentable at the exposition

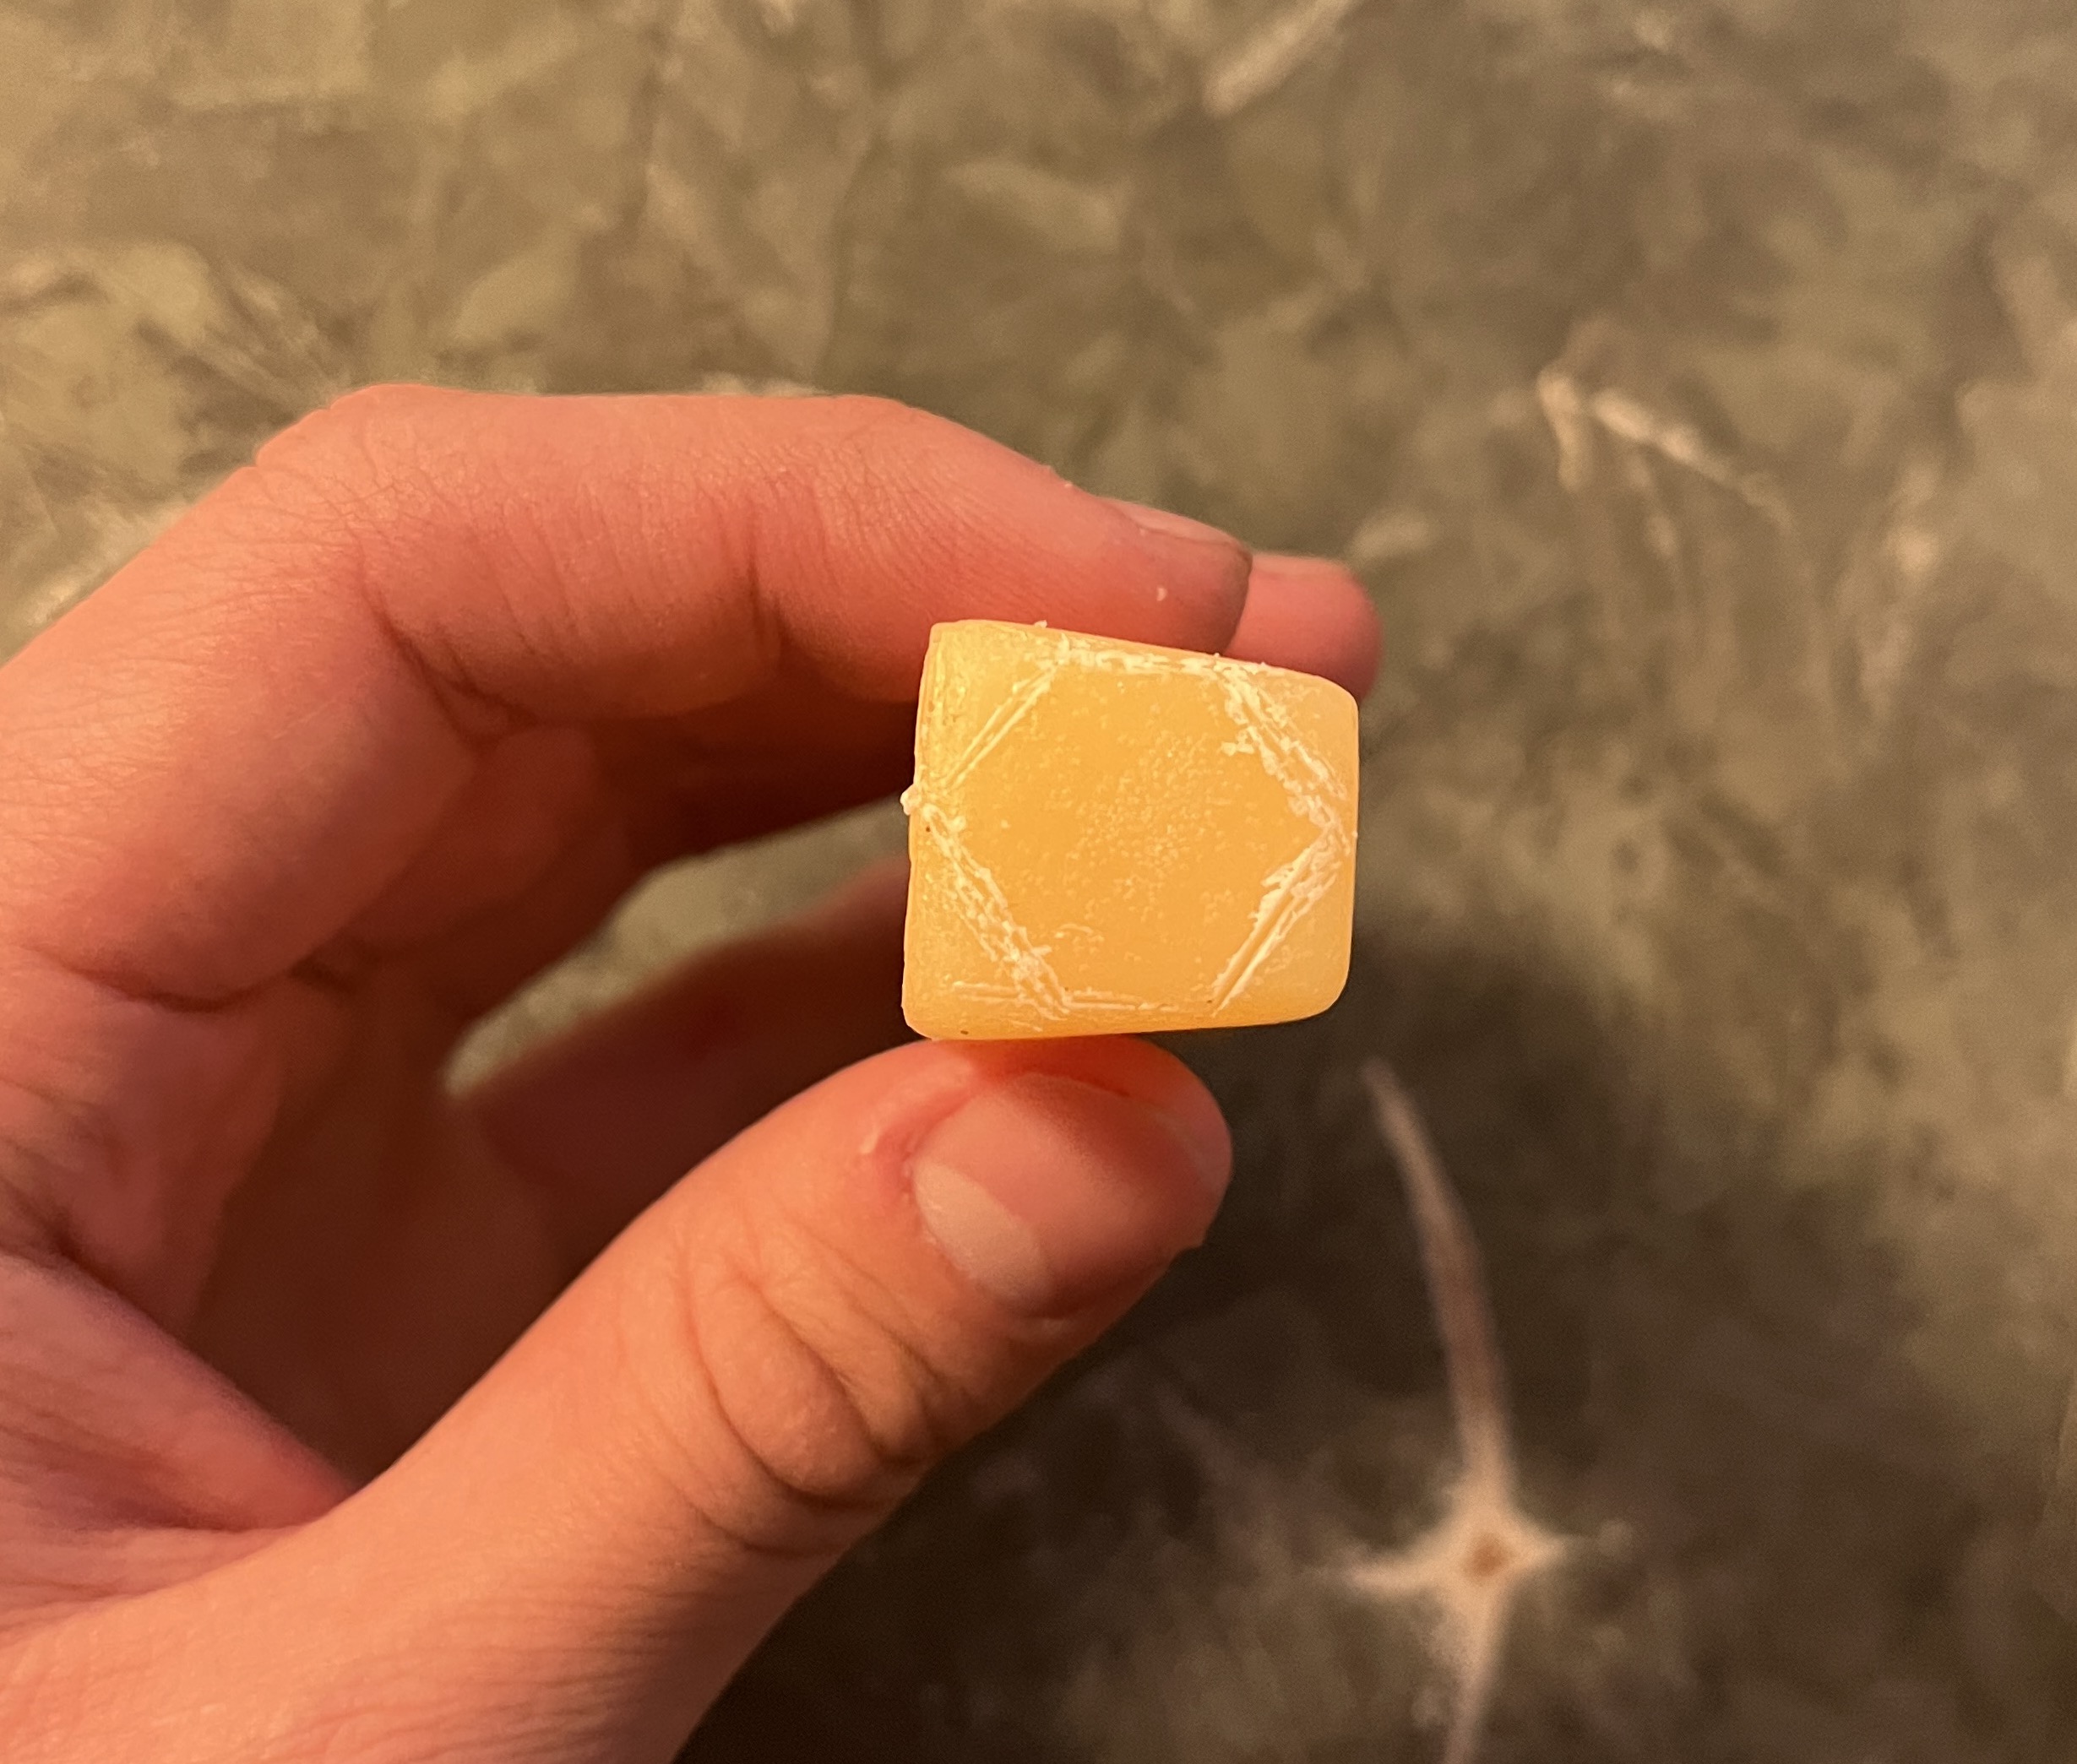
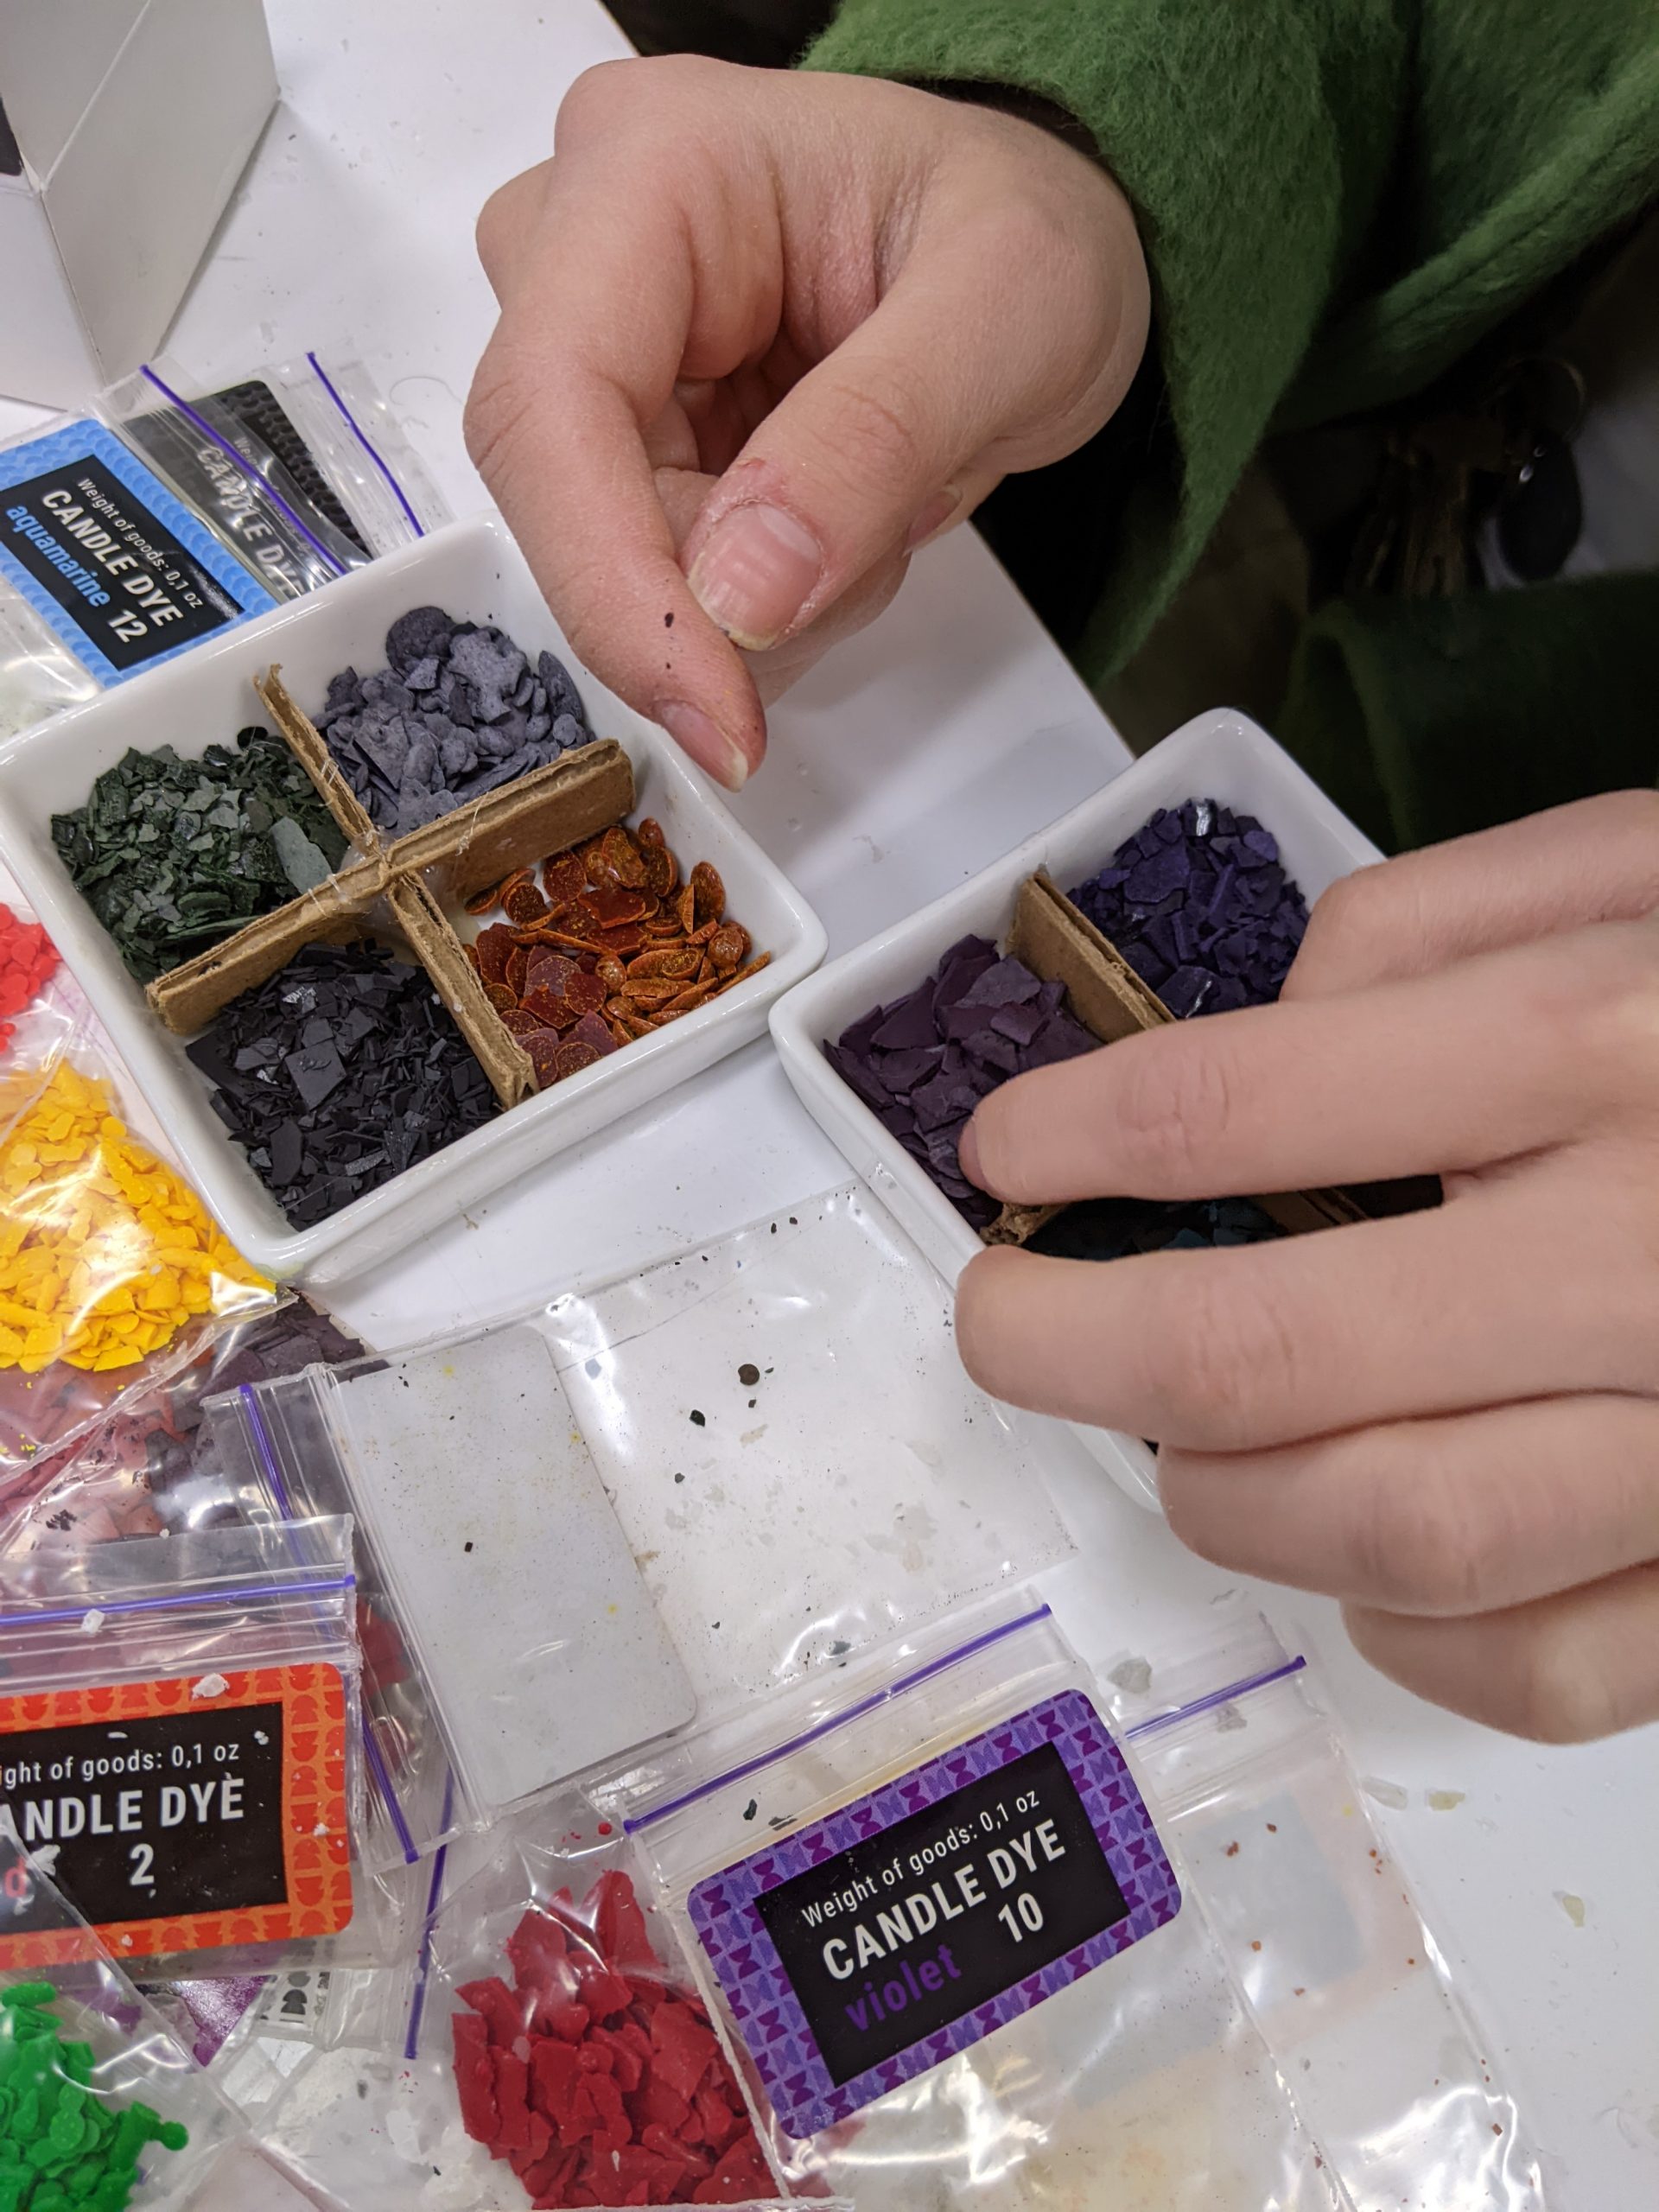
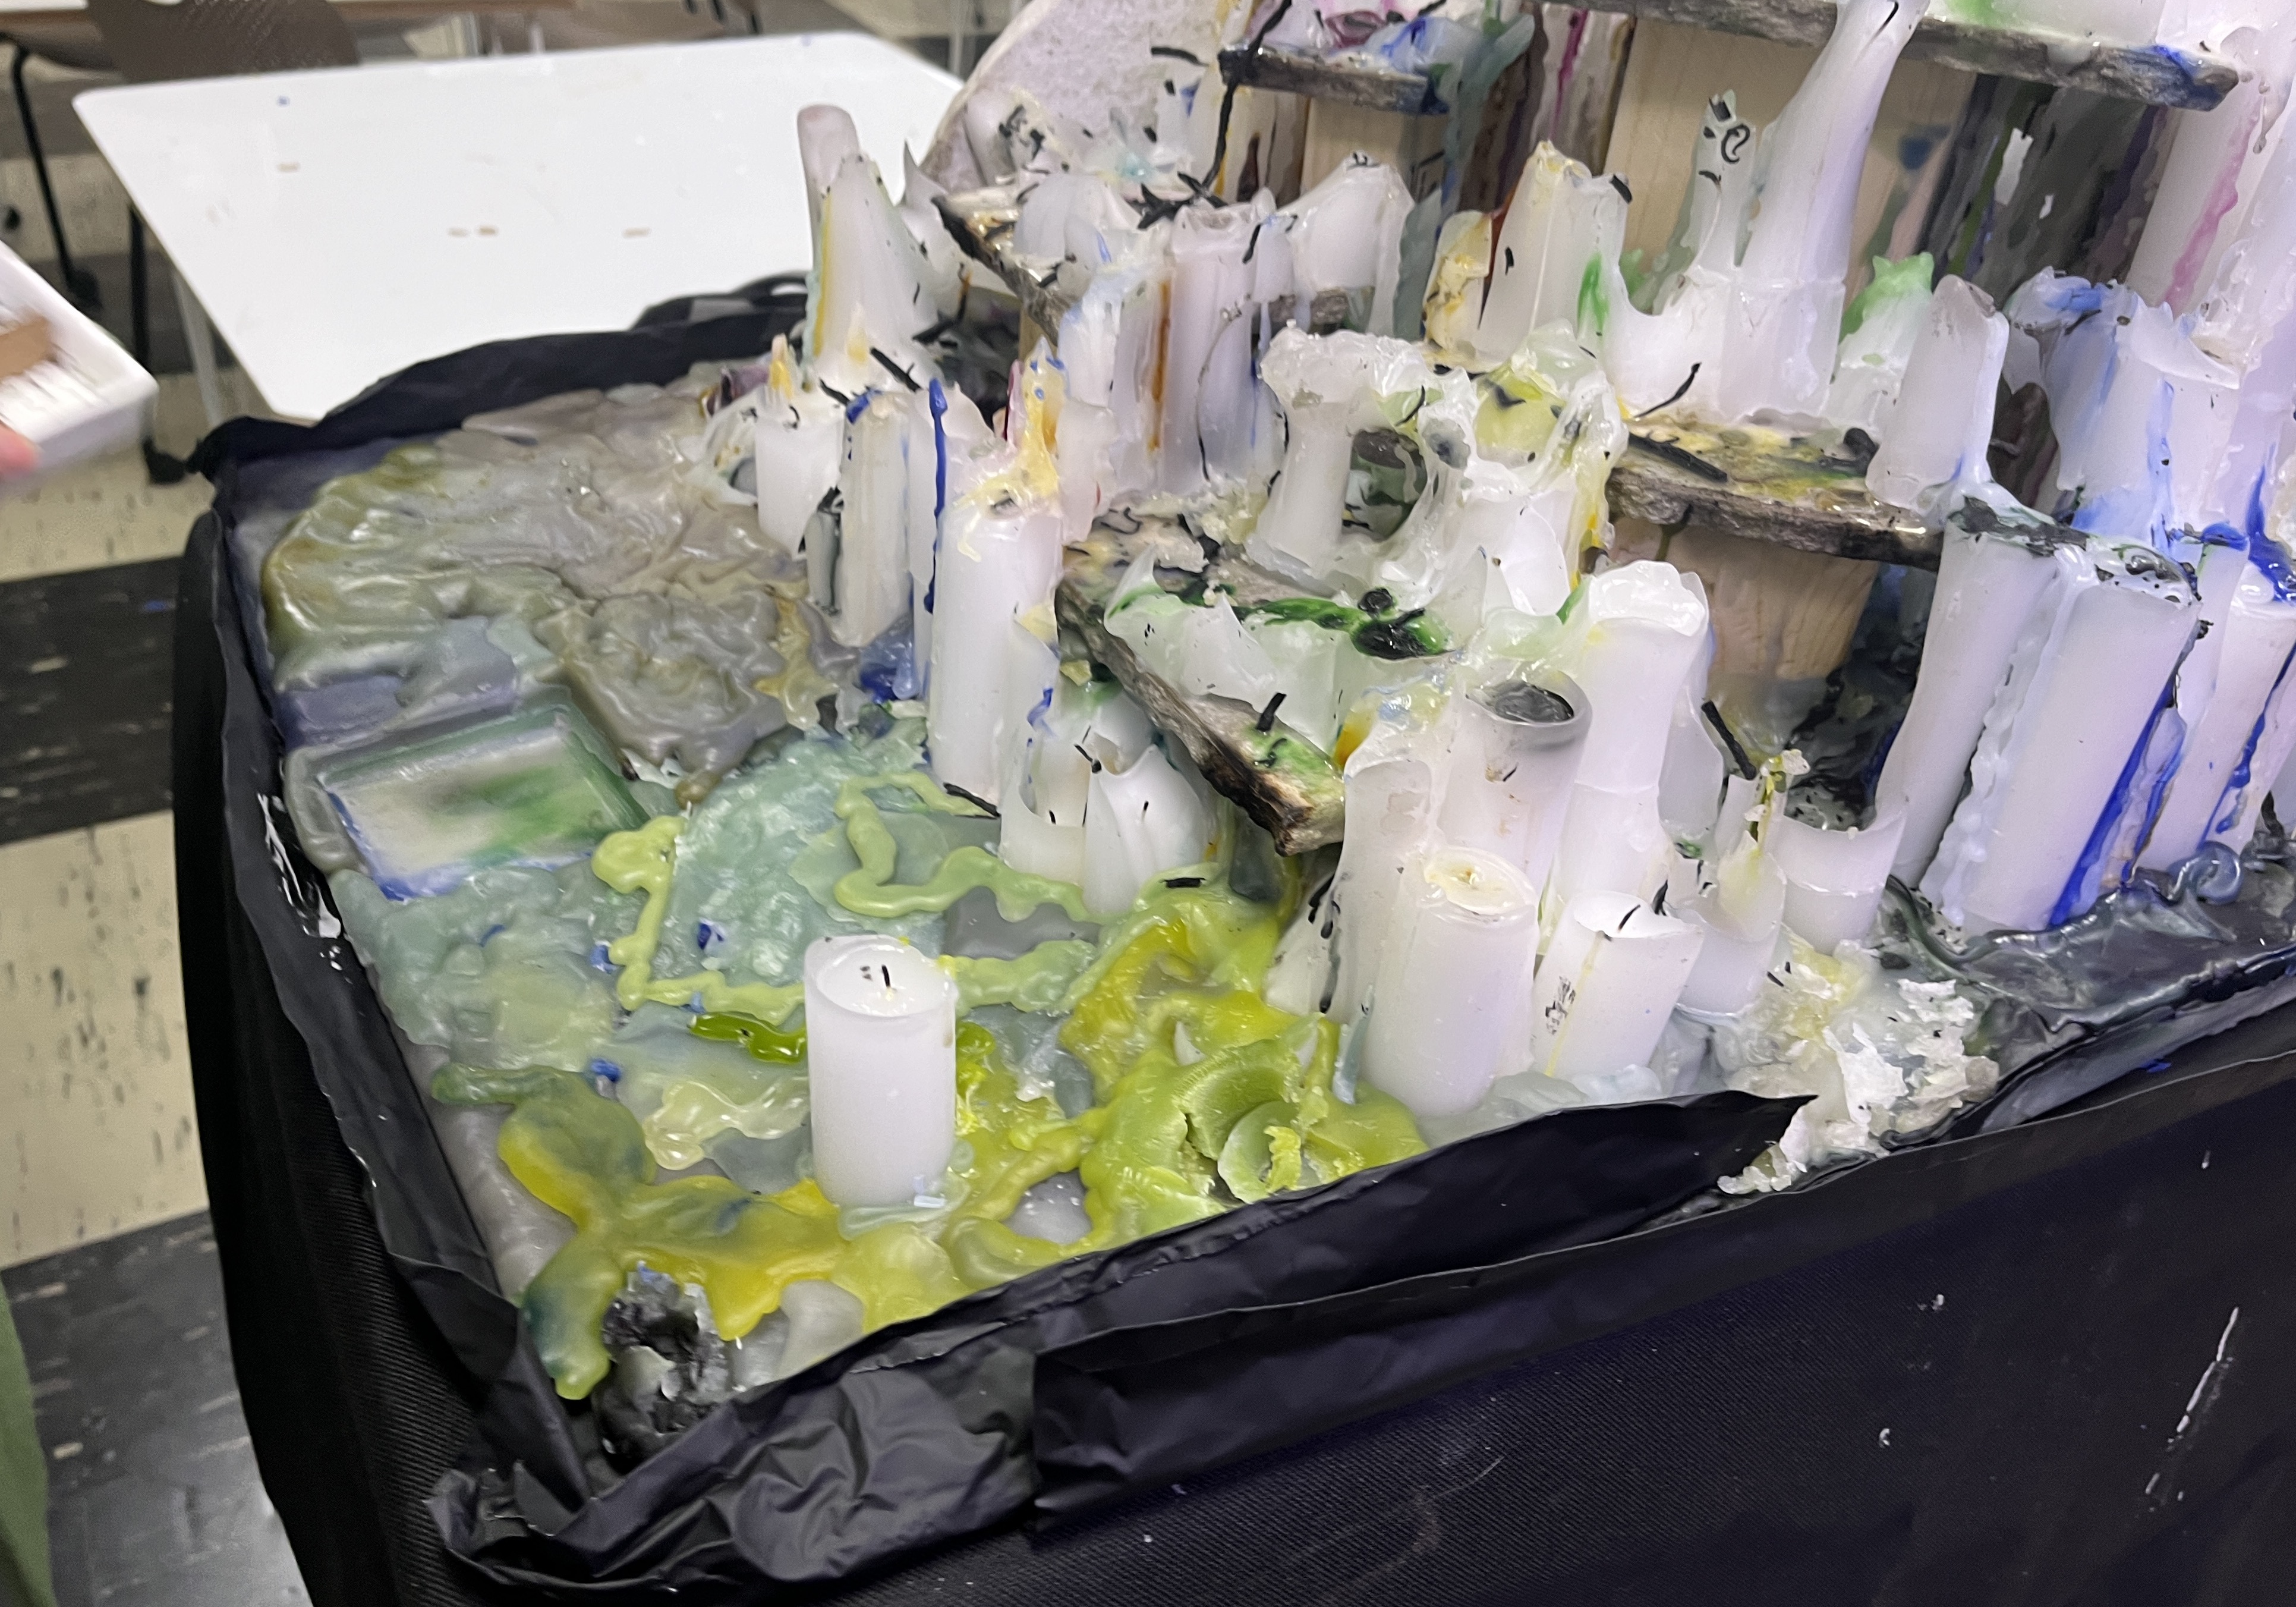
Wax dye chips for the audience to use on the candles so they weren't all just white
Exhibition
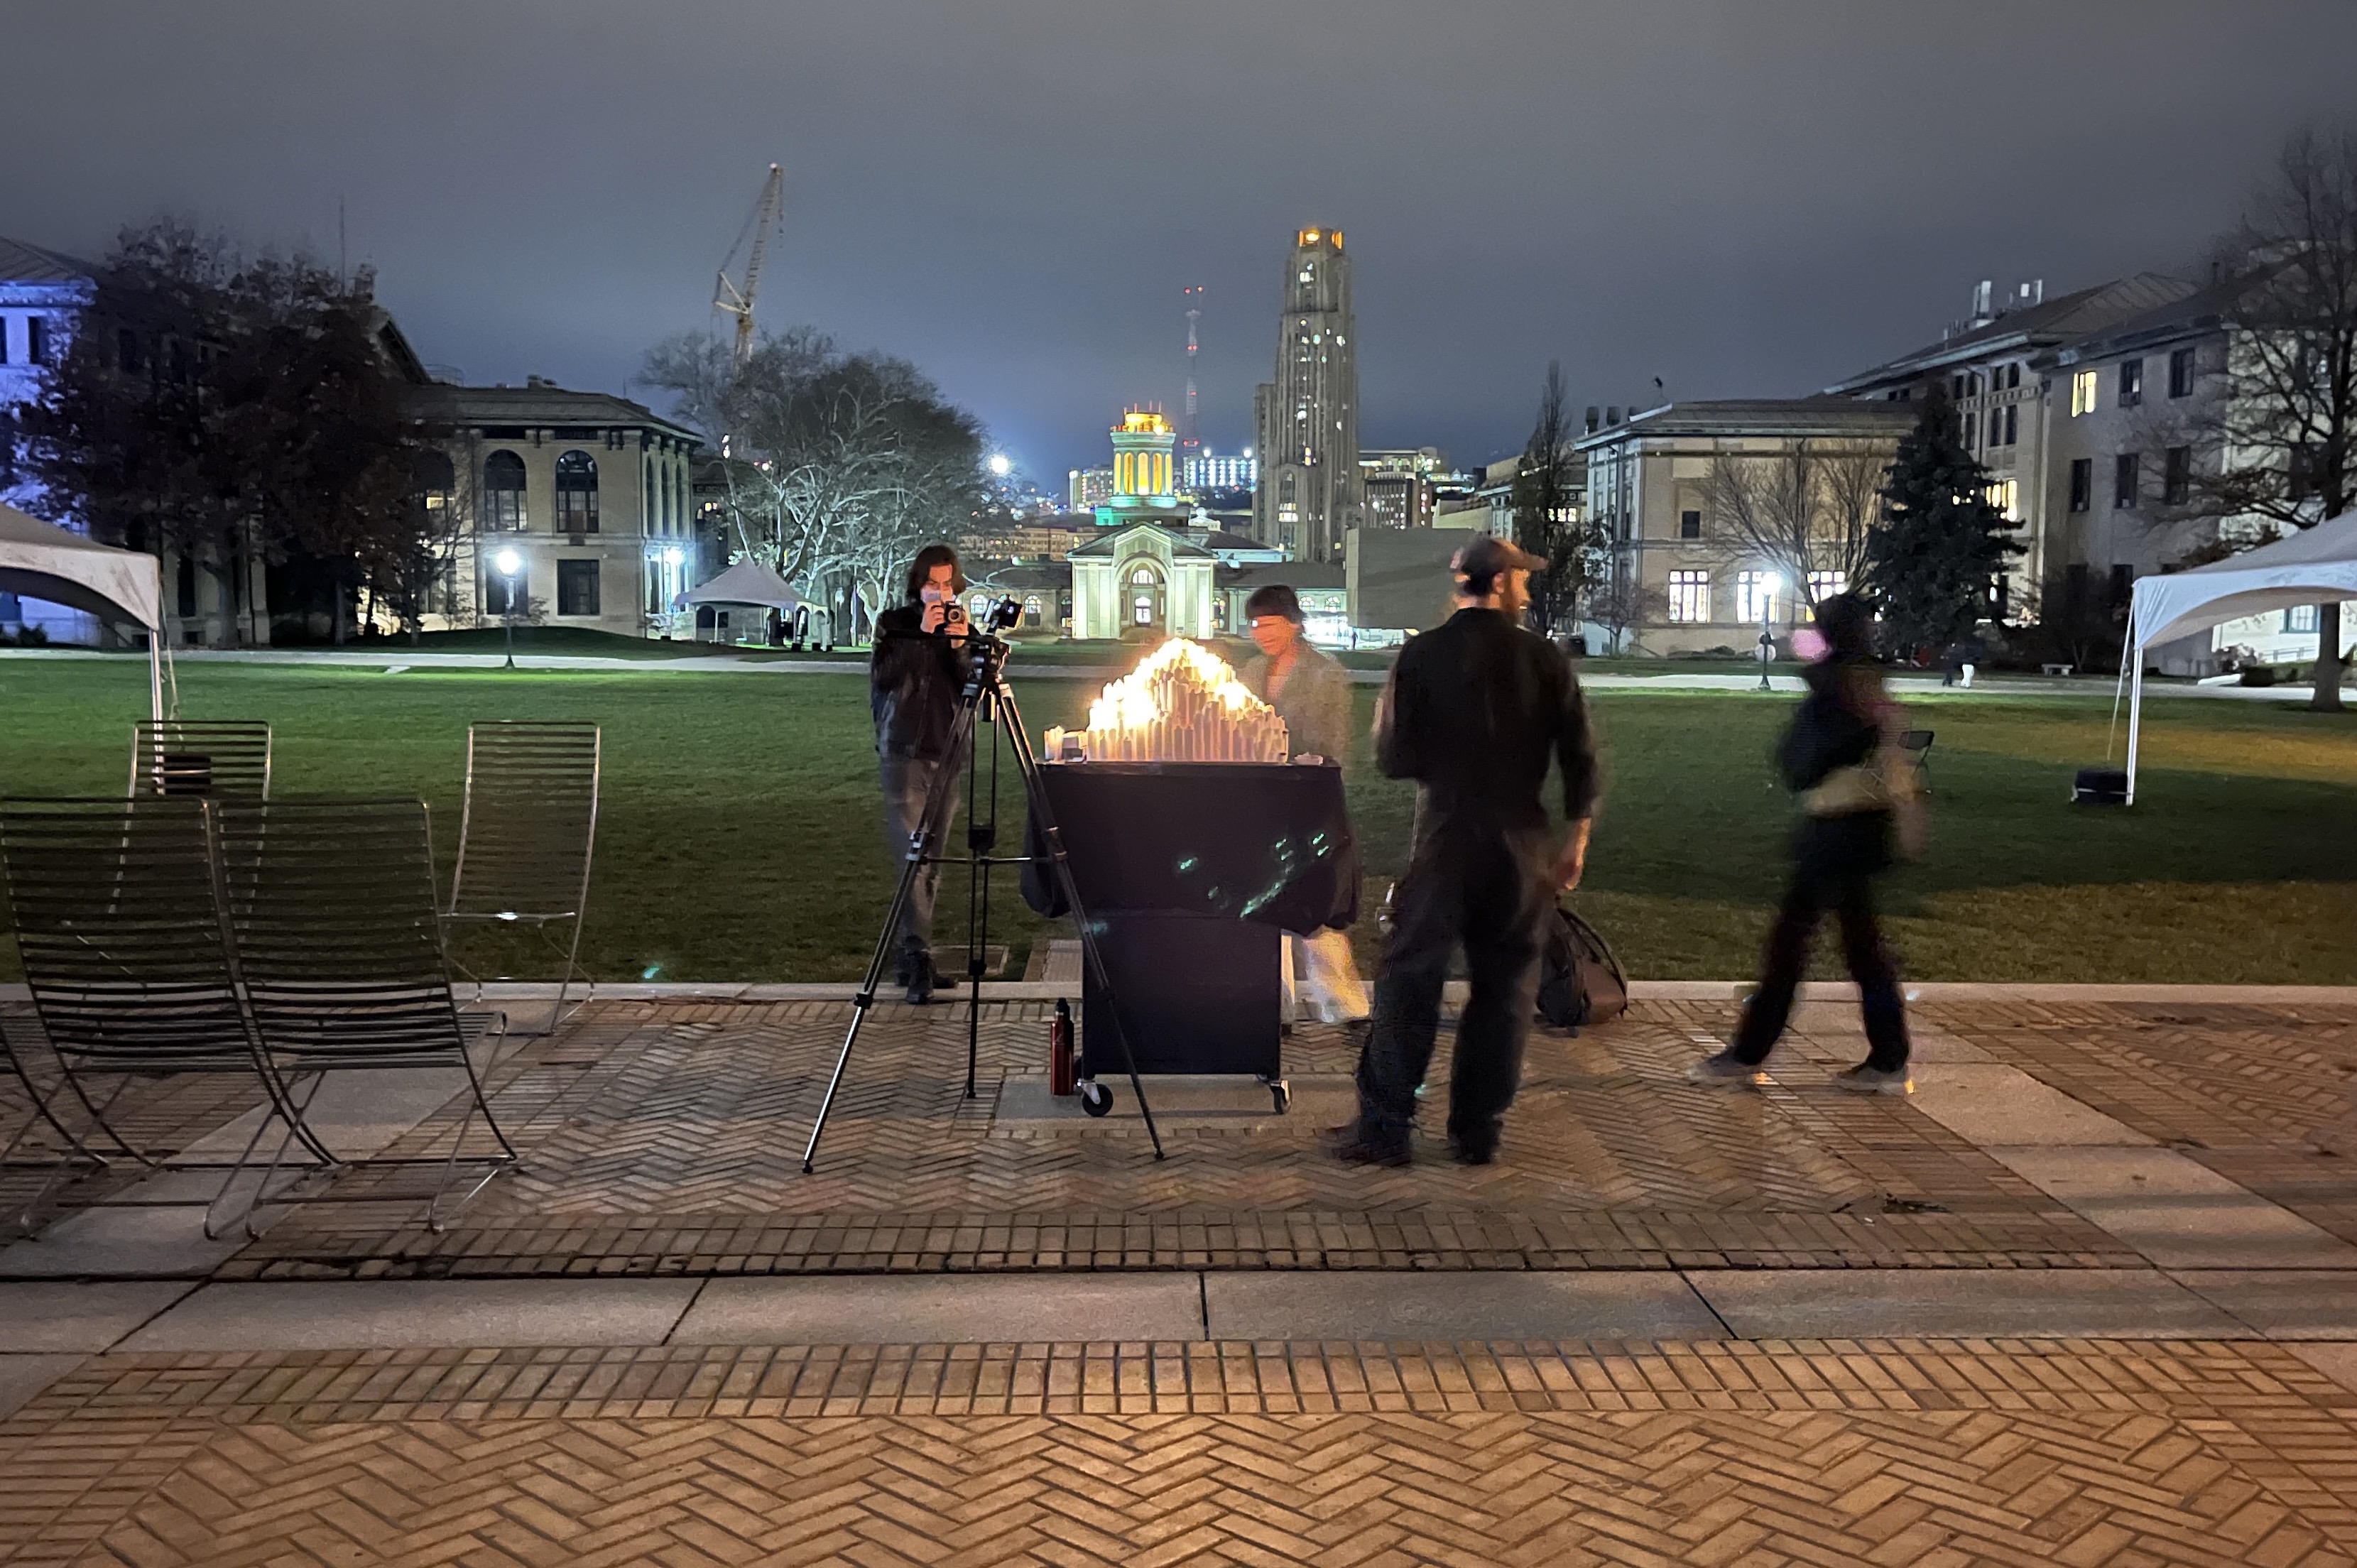
We finished assembling all the candles and supplies the night before the exhibition. On the day of, at 4-5pm we began rolling our projects from the library to the Center of Fine Arts (this doesn't have a person's name in it because that would require a rich fine arts alumni who also loved CMU).
Poster for the exhibition

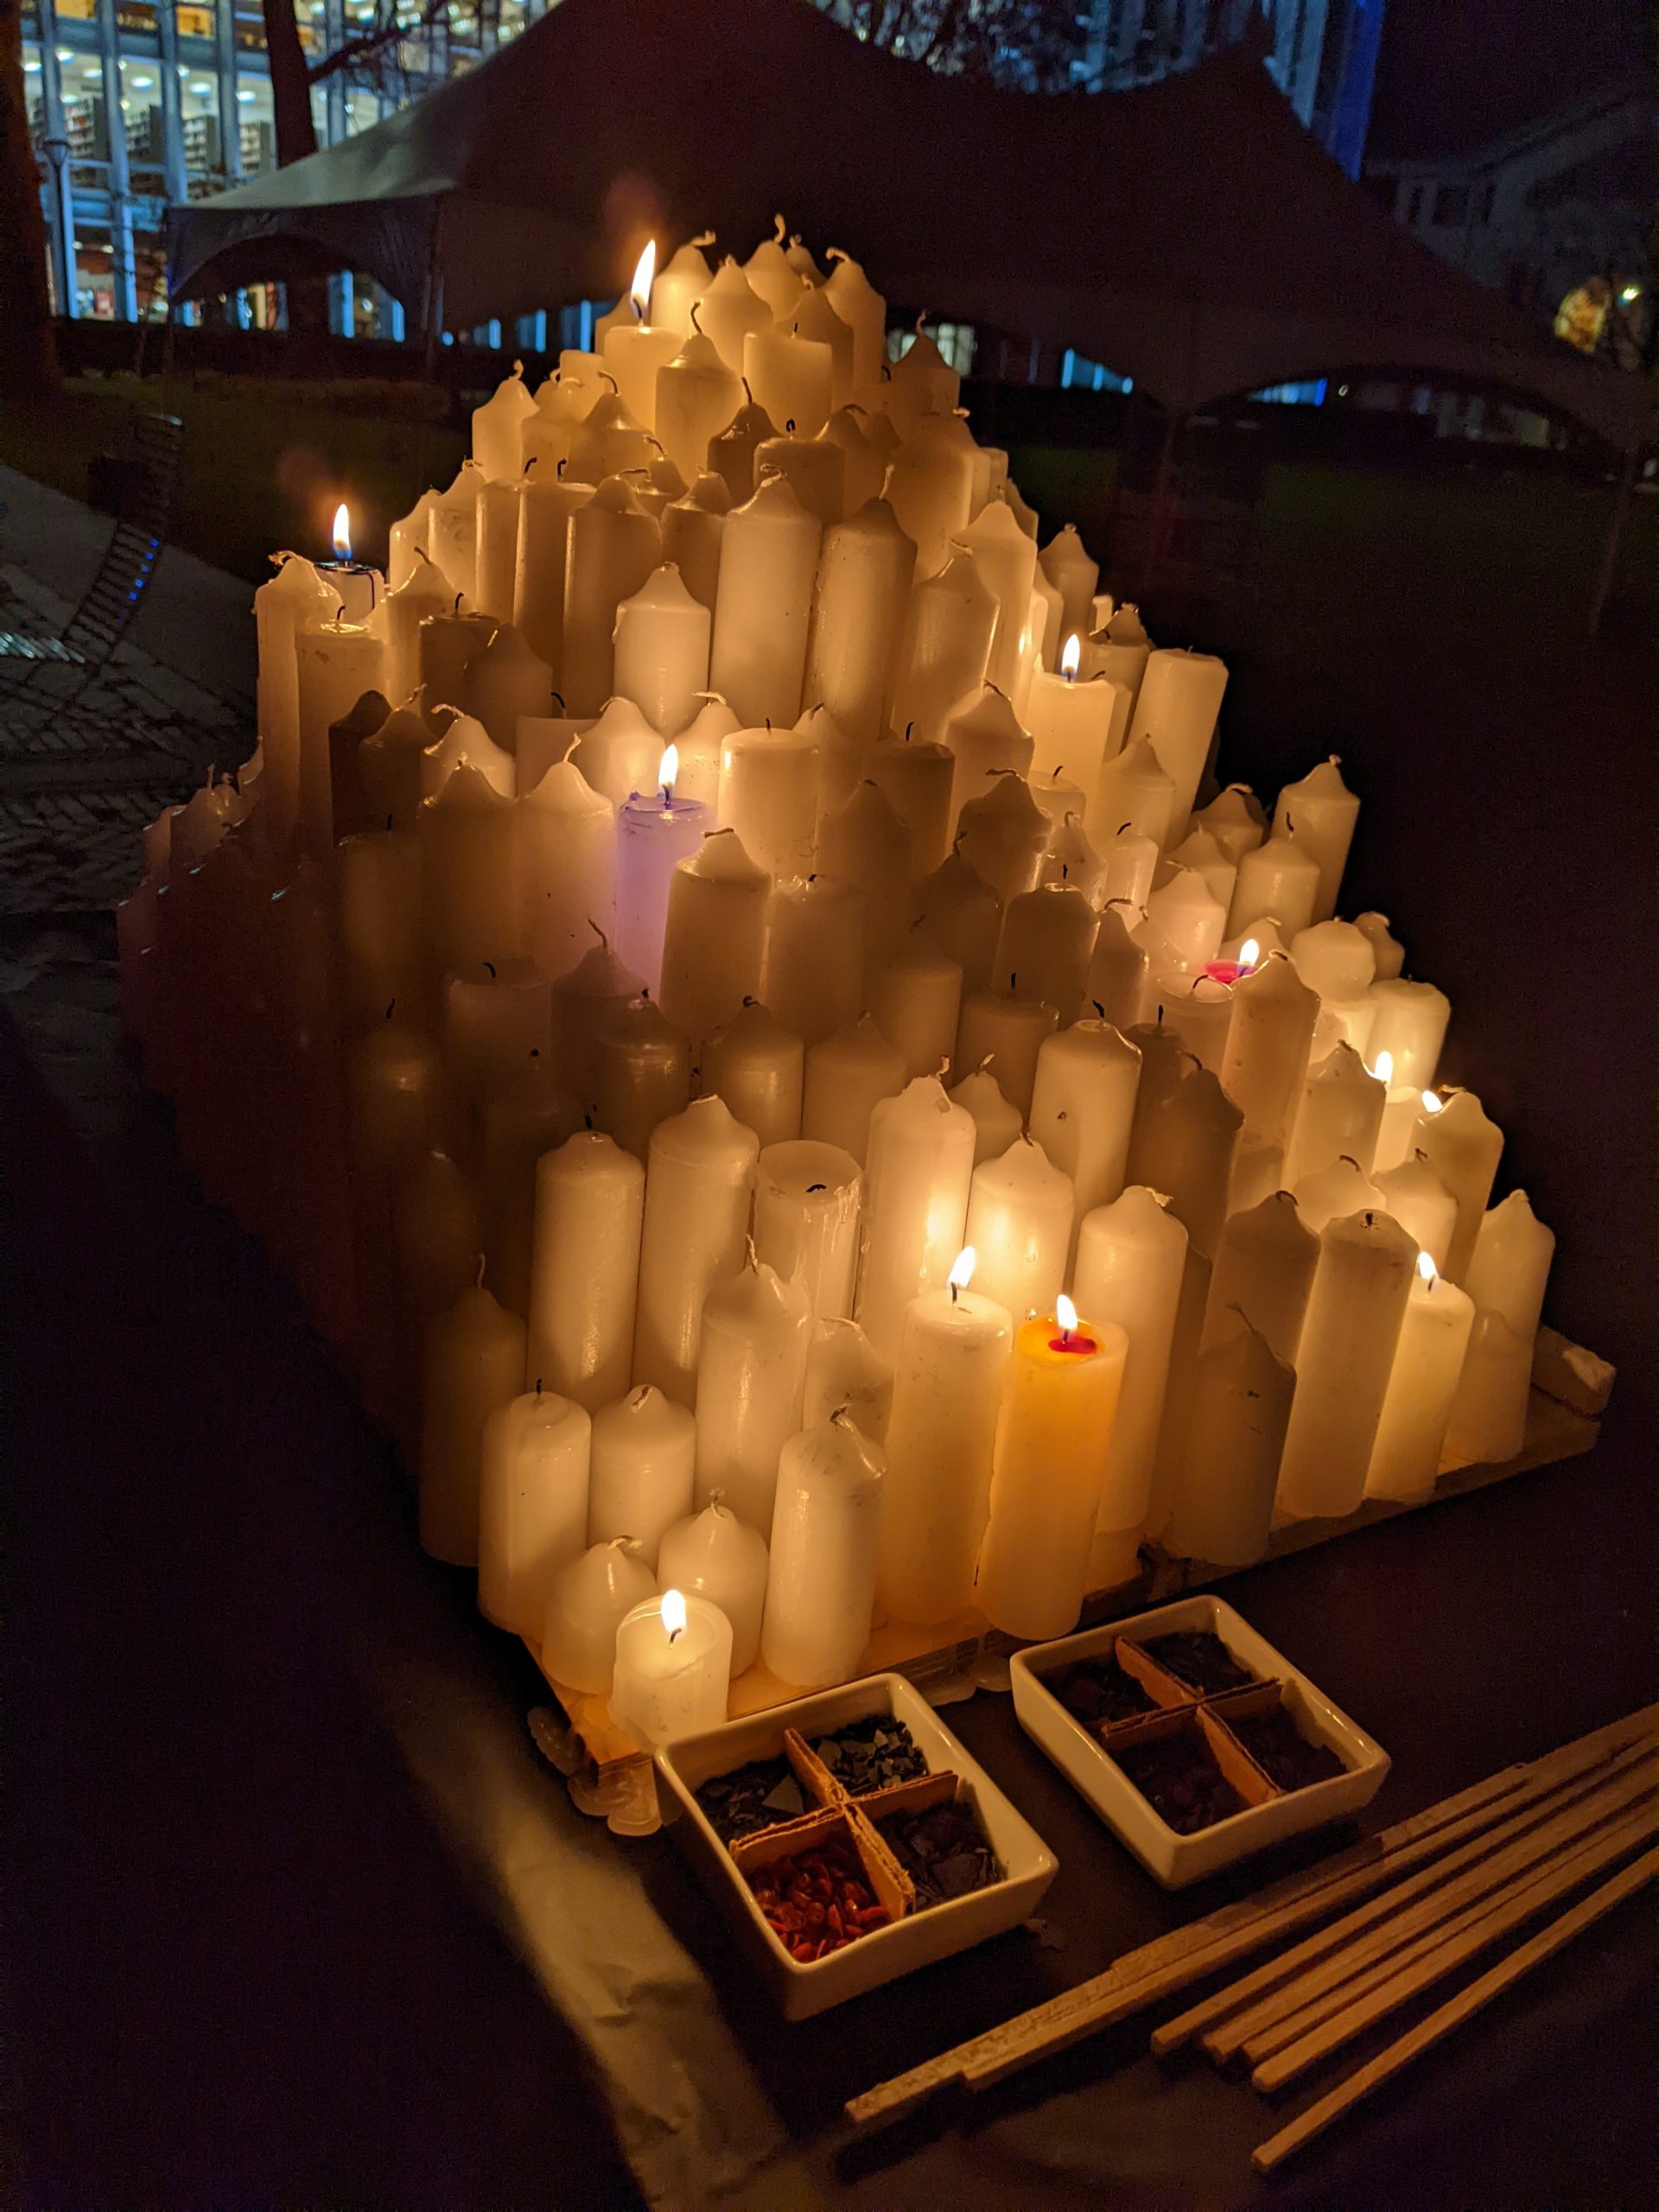
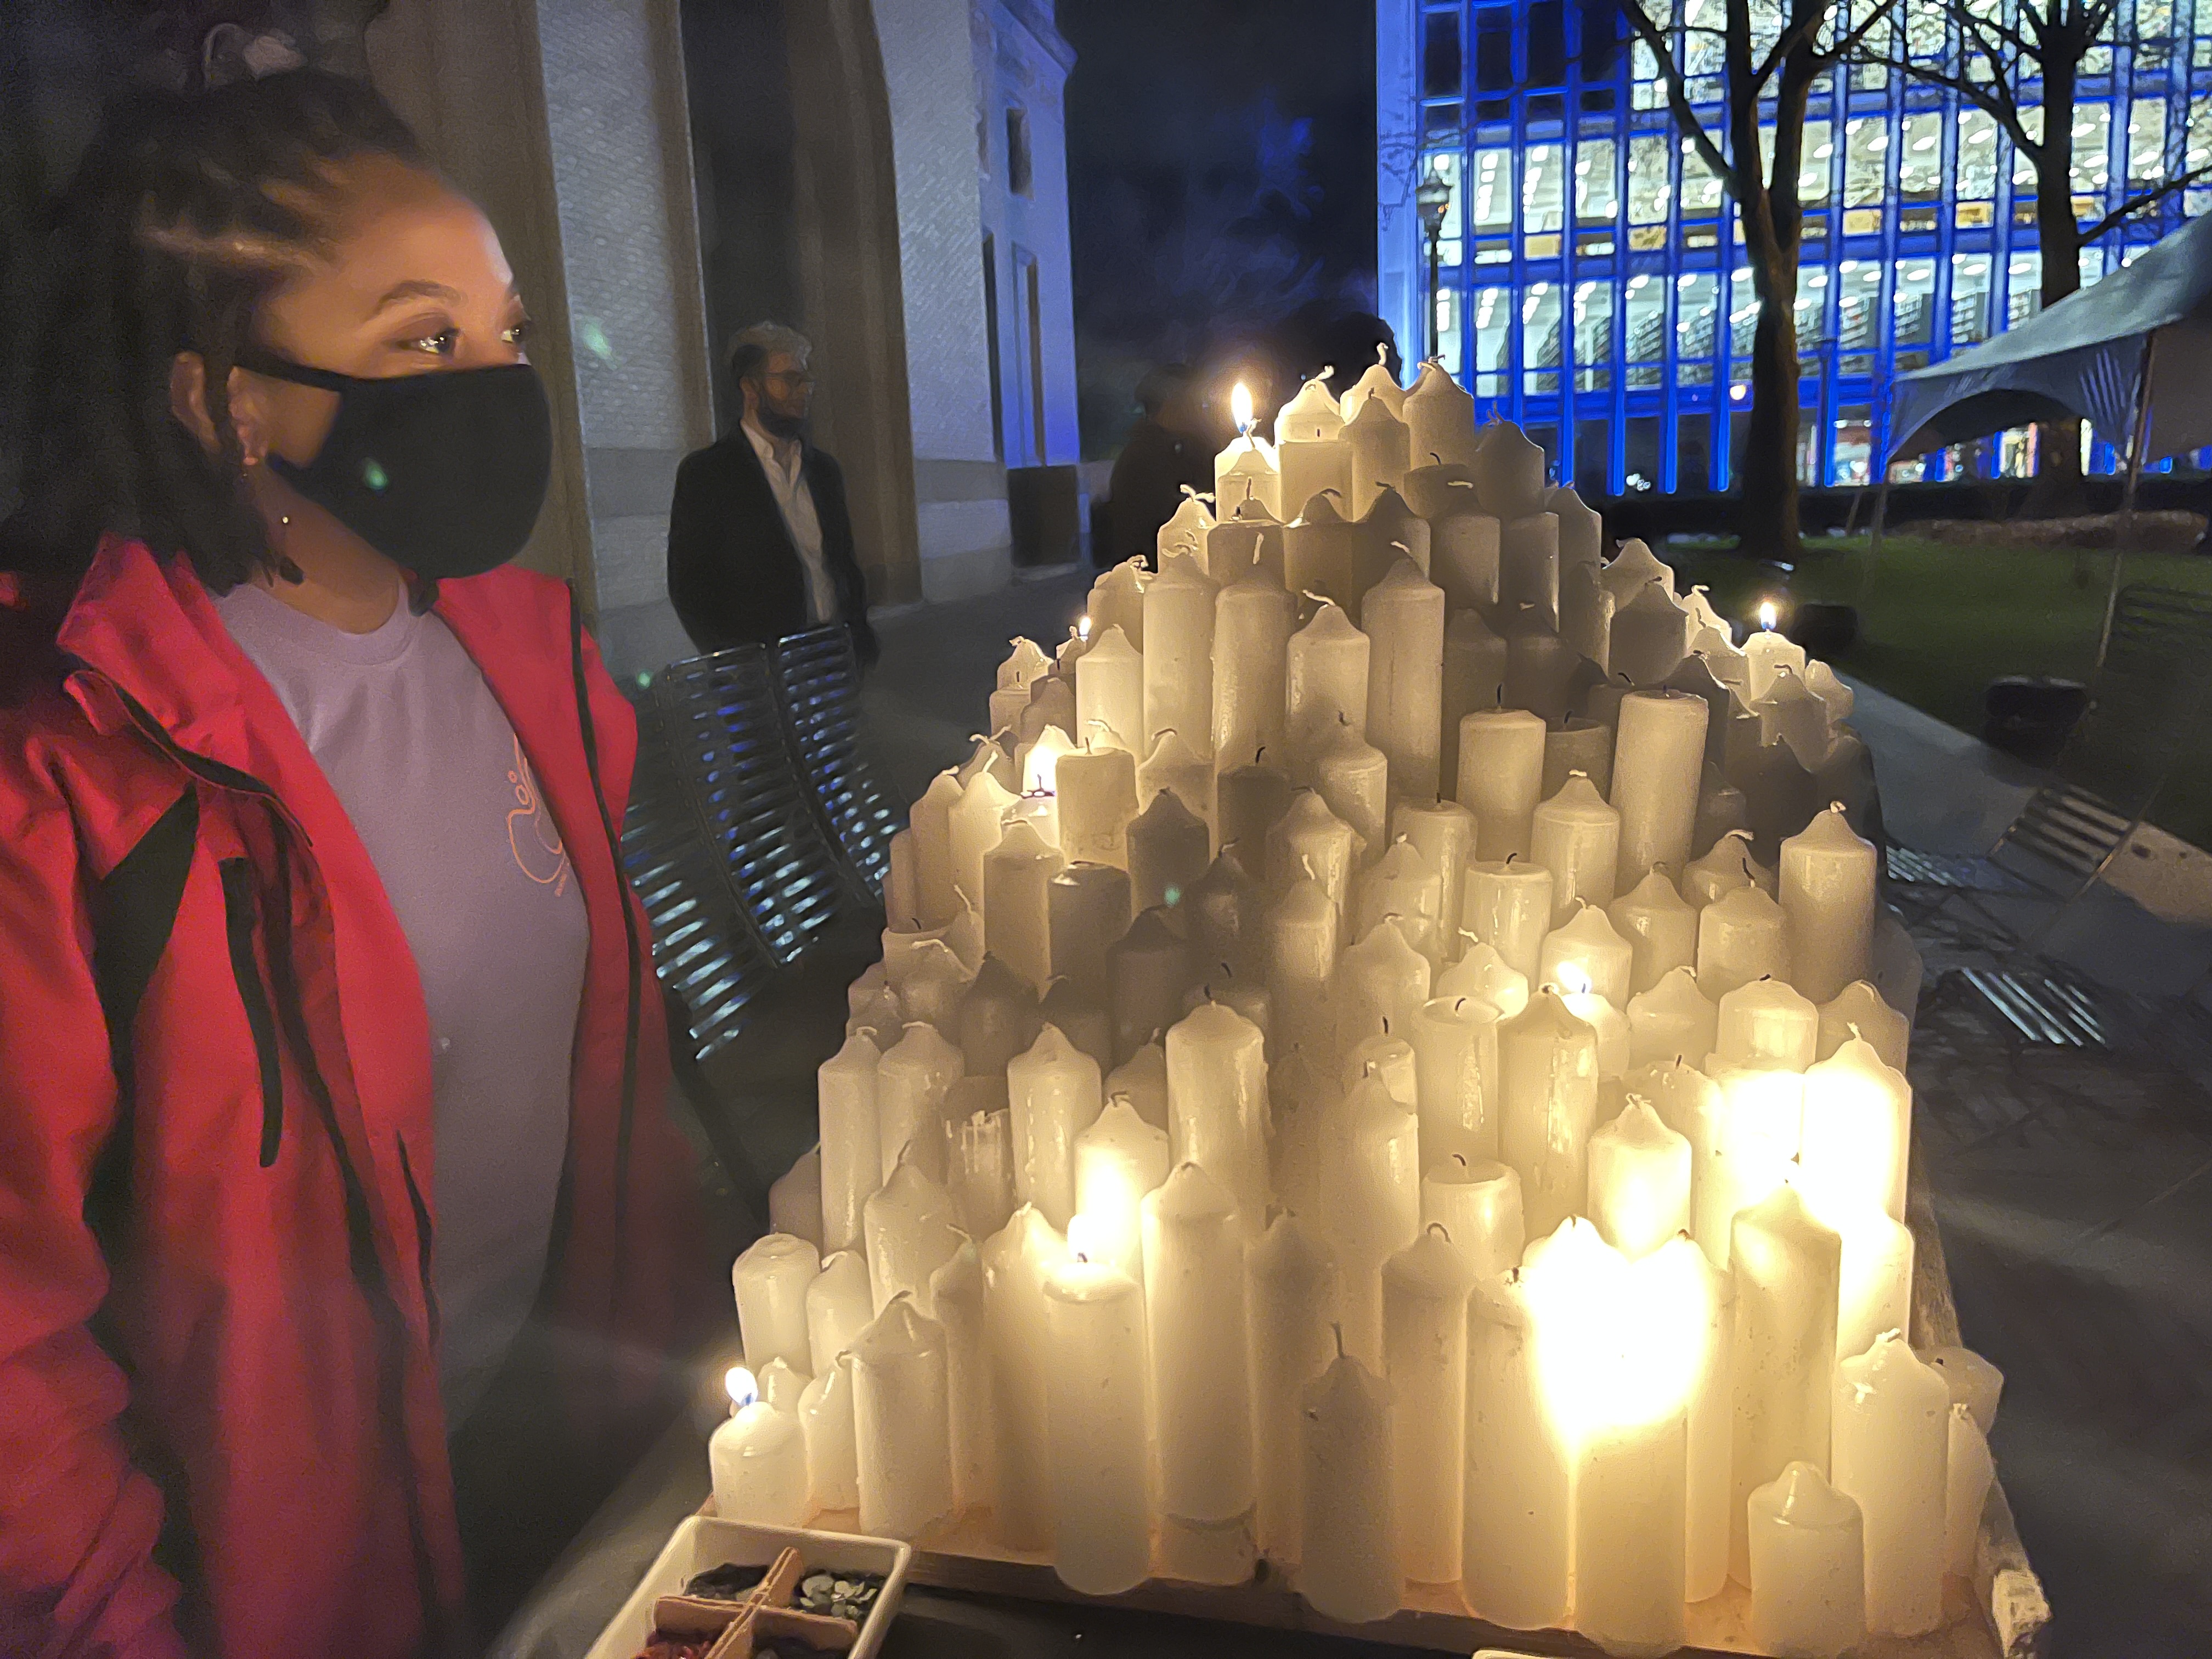
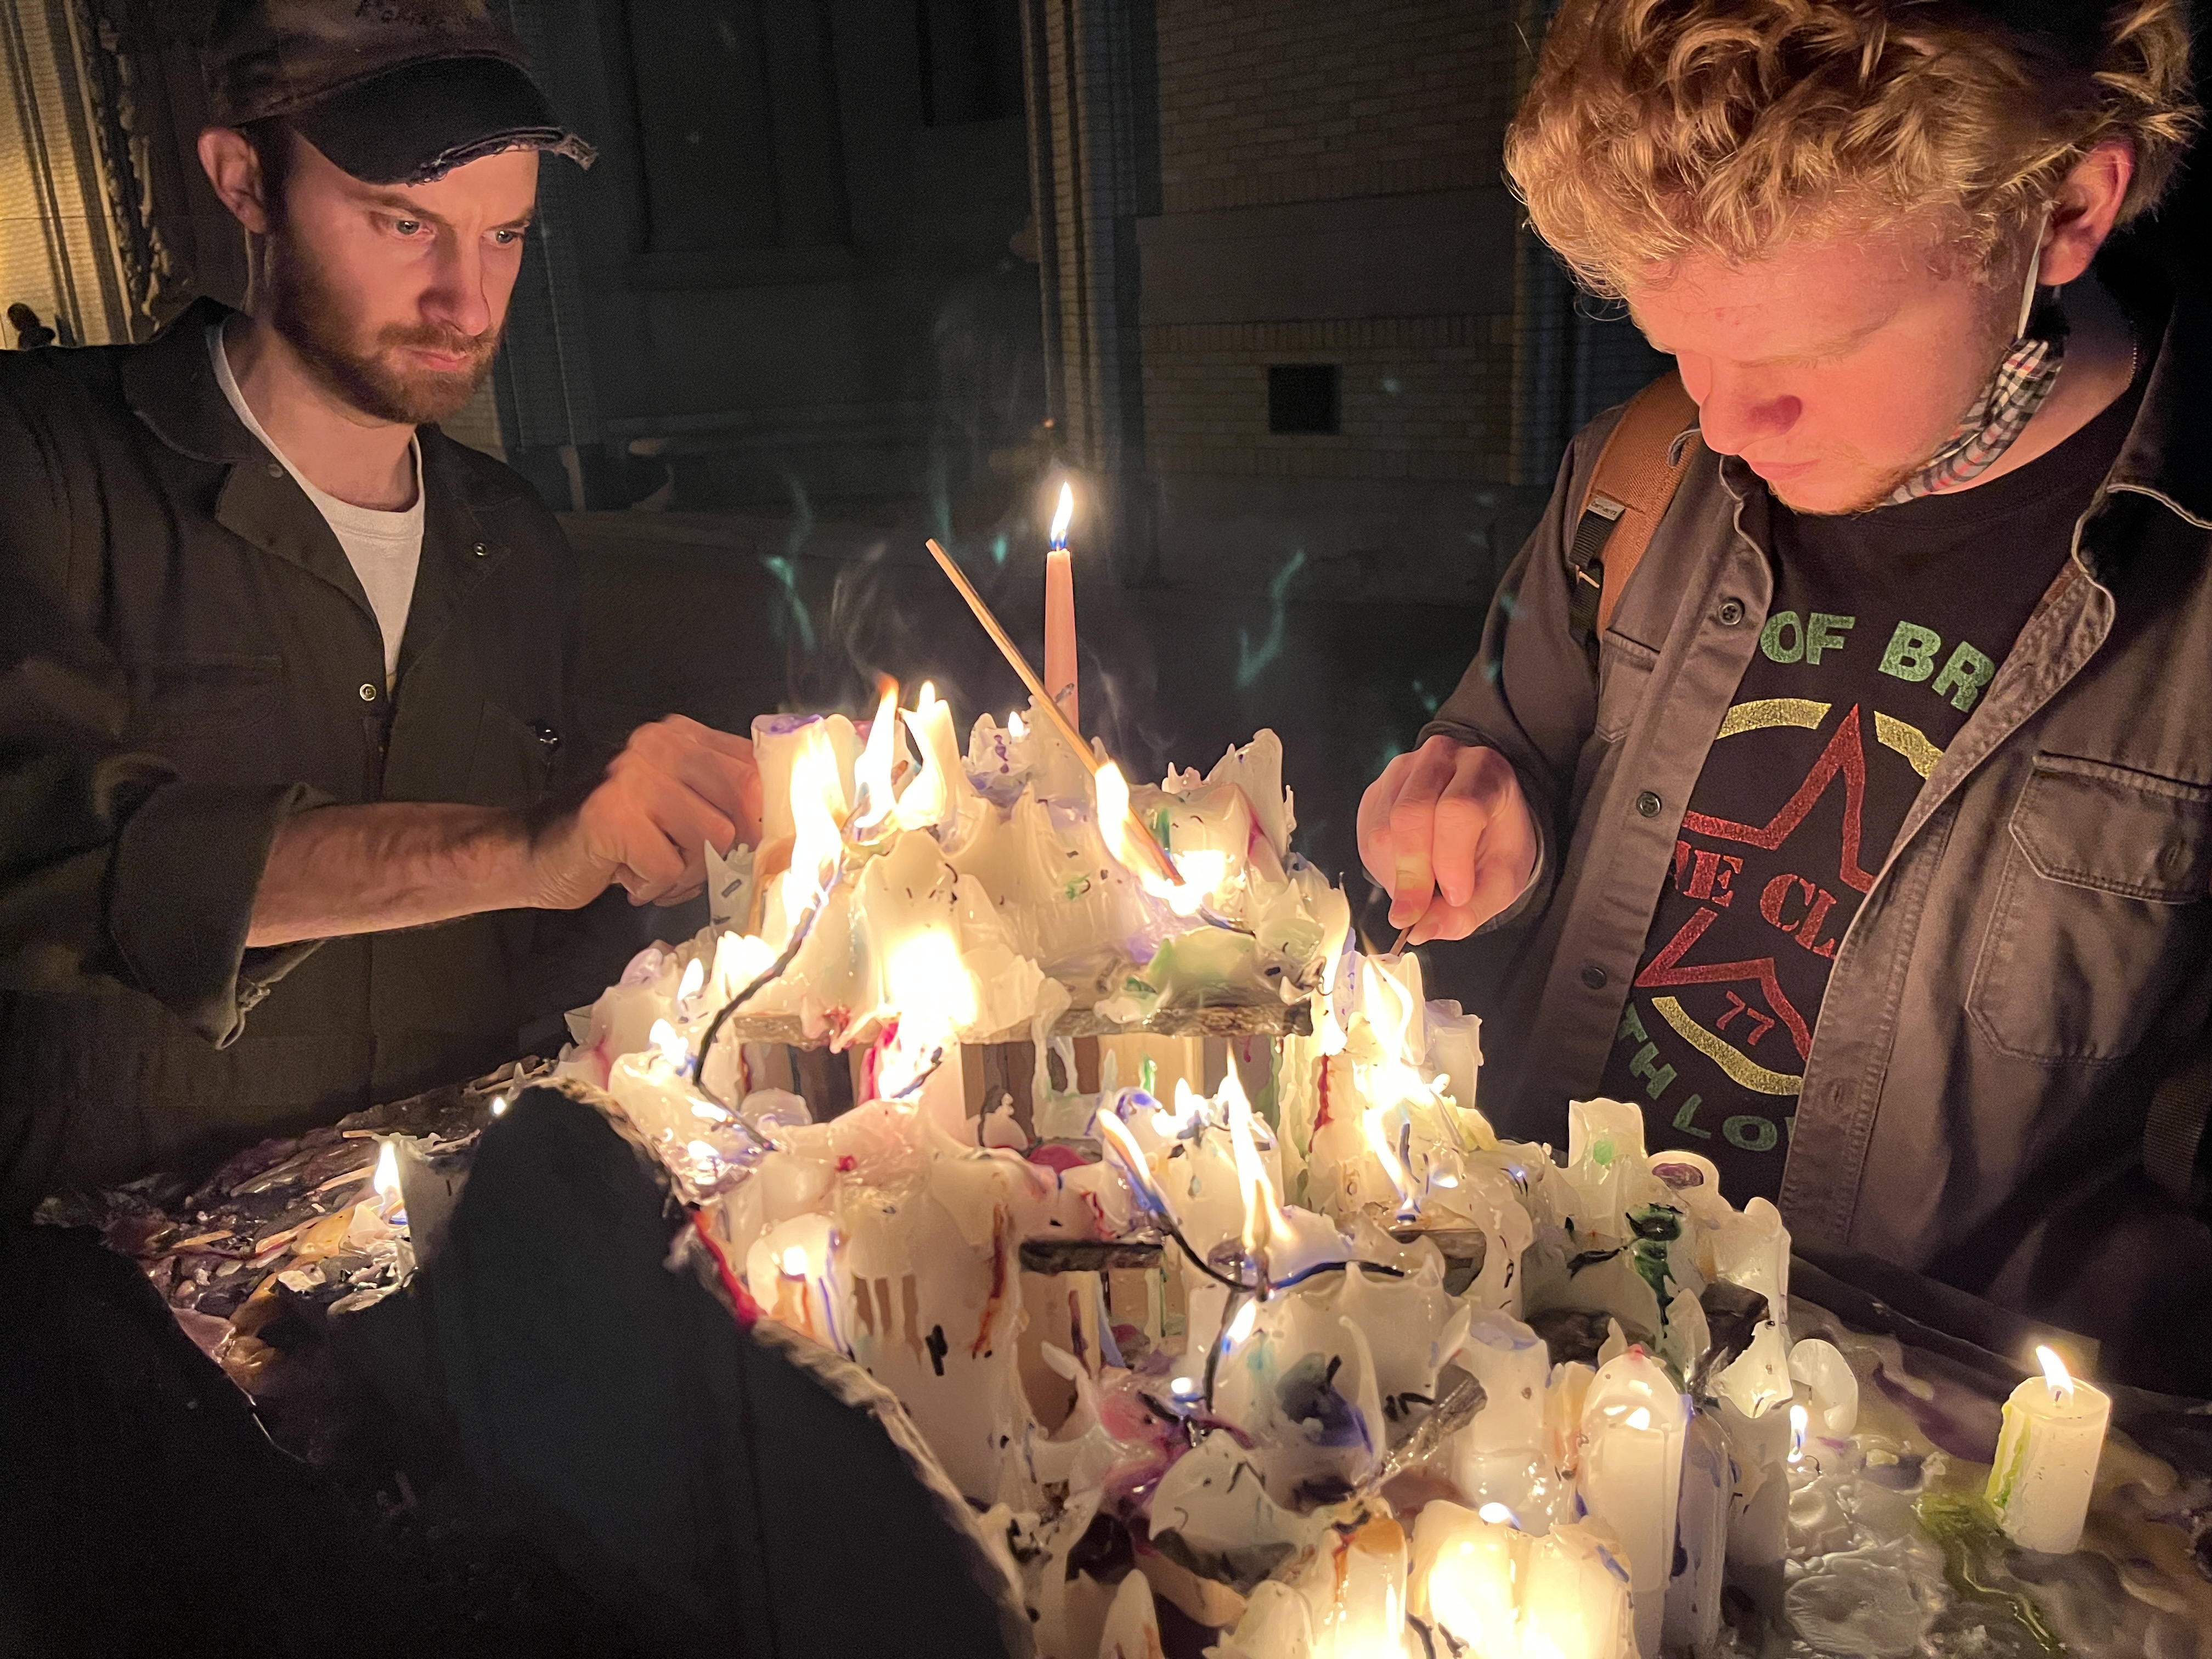
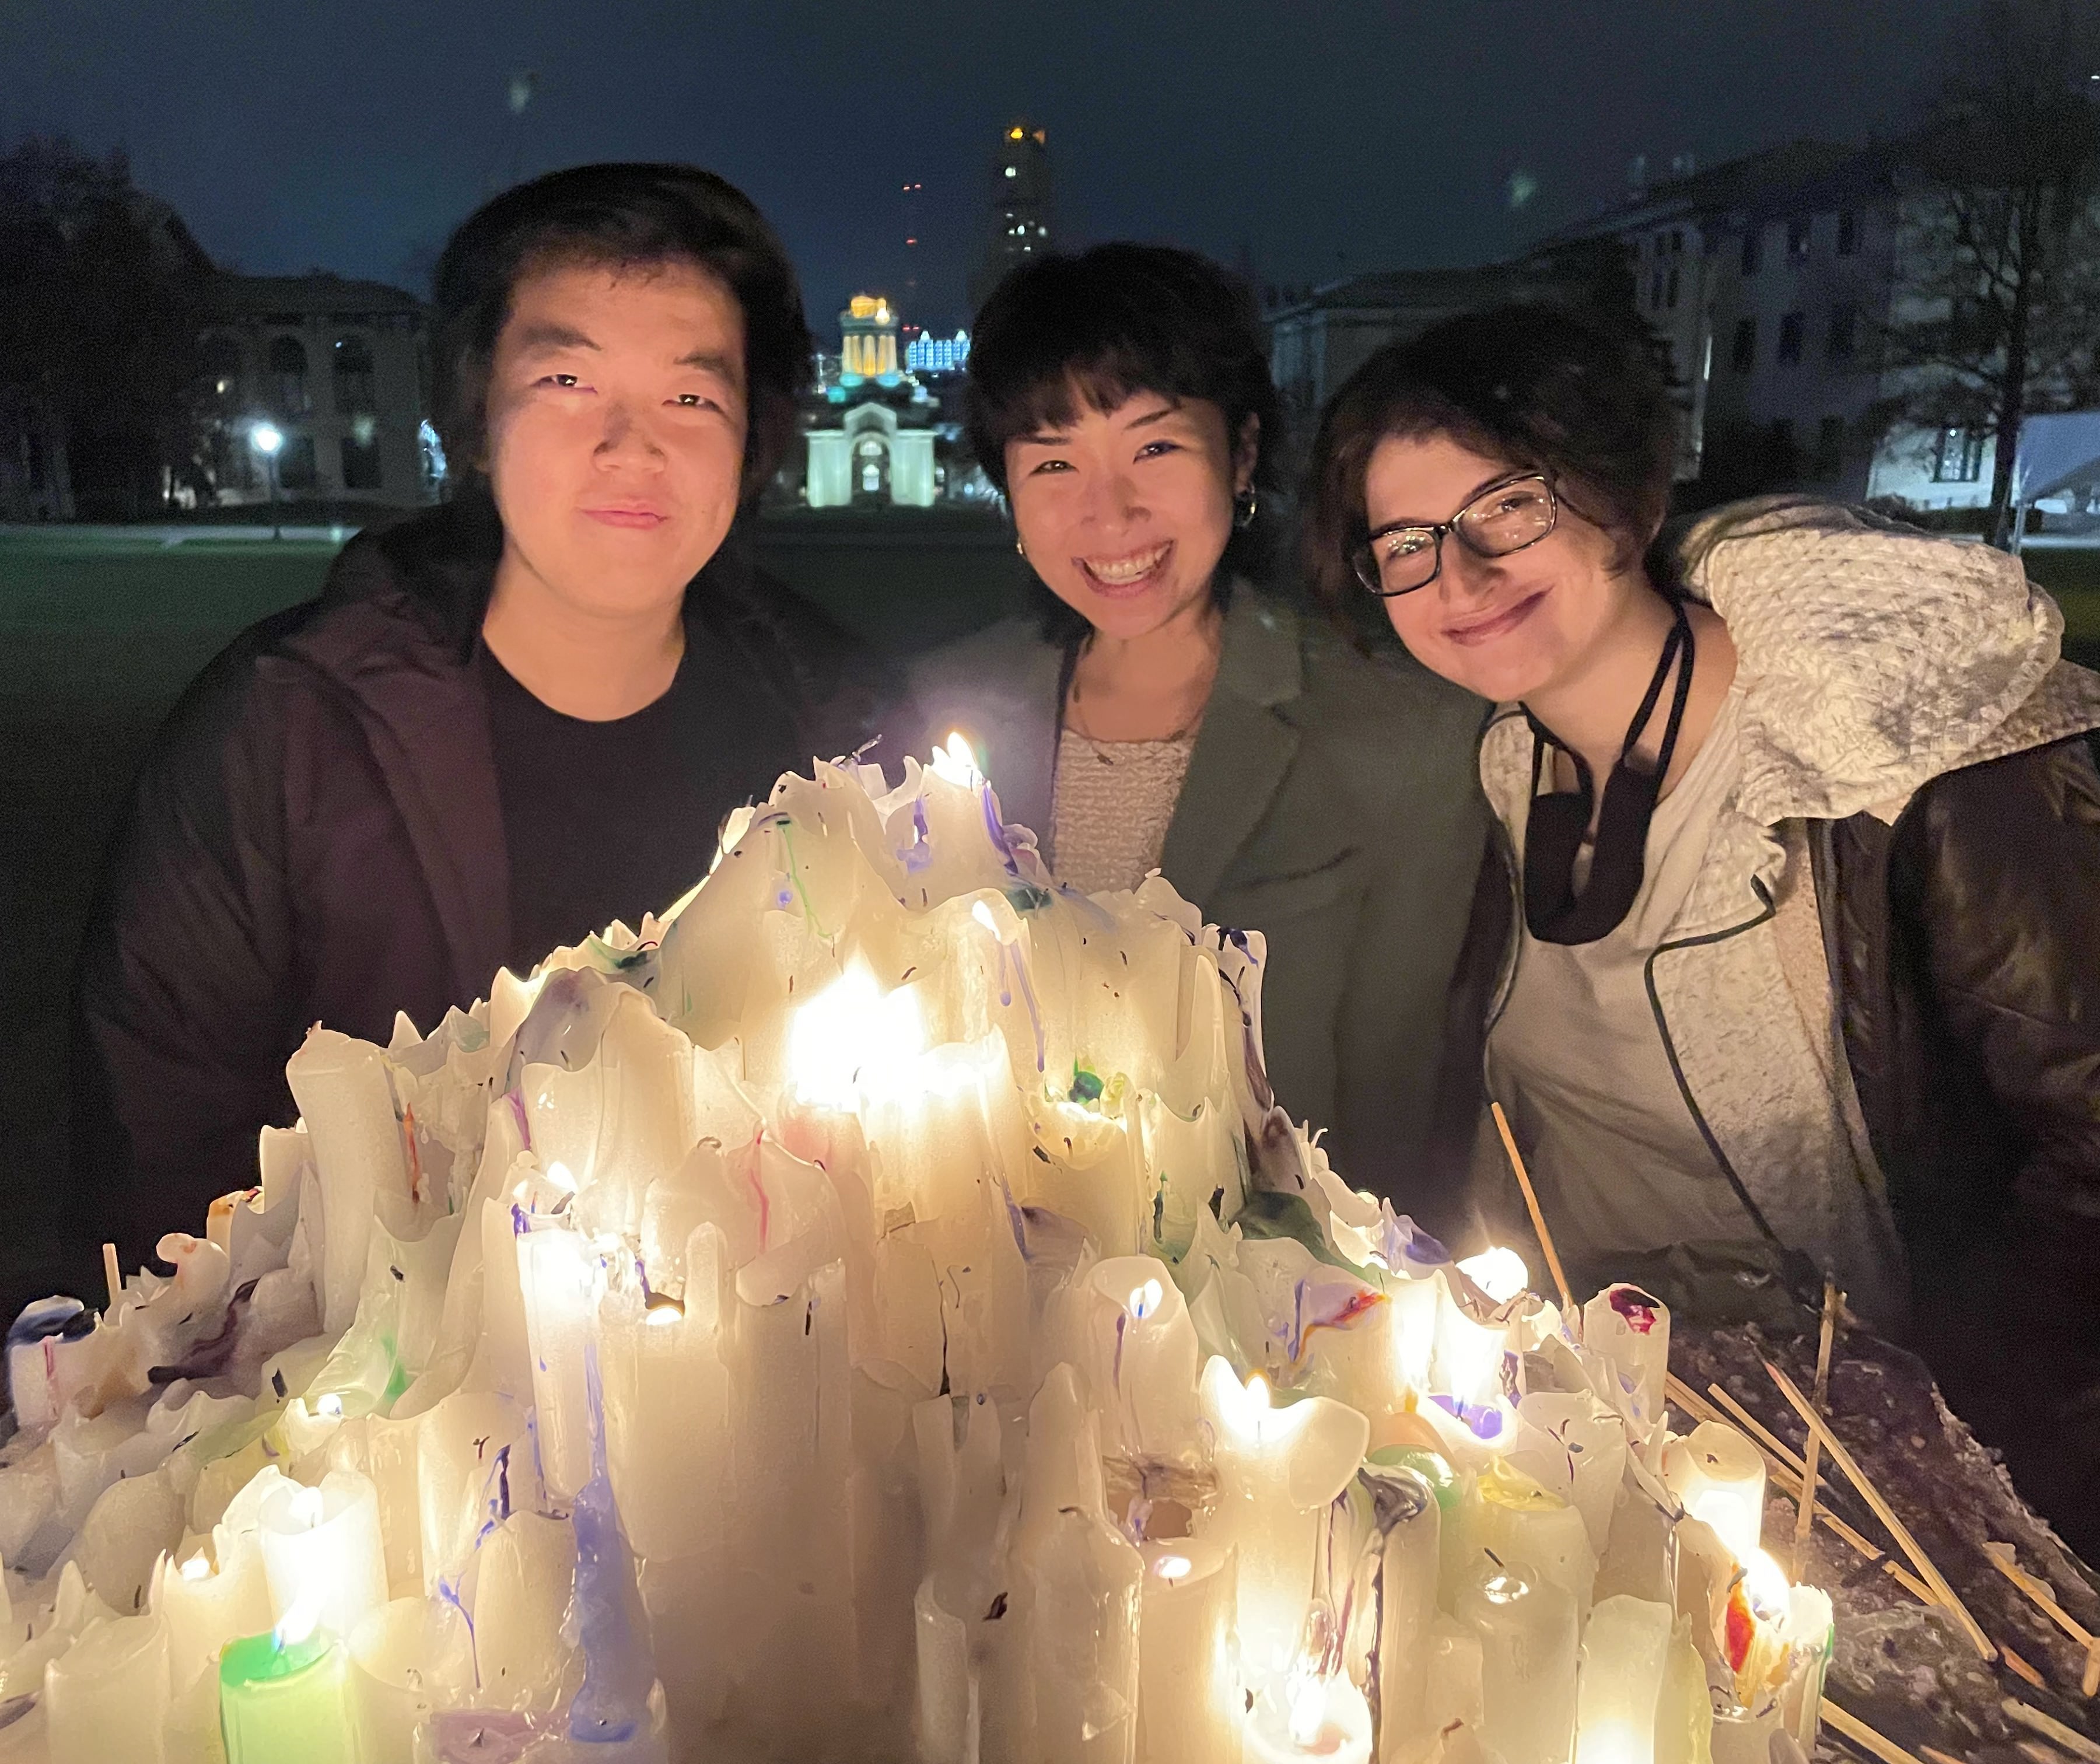
Here's some of the first candles being lit, as well as a thematic shot. We were the only art group to be outside, and this turned out to be in our favor. Since we shared the space with the "Exploded Ensemble" class, they made so much ruckus playing everyone's project at the same time that several visitors came outside to us for refuge.
Dramatic shot of candle mountain with dye chips with the long matches
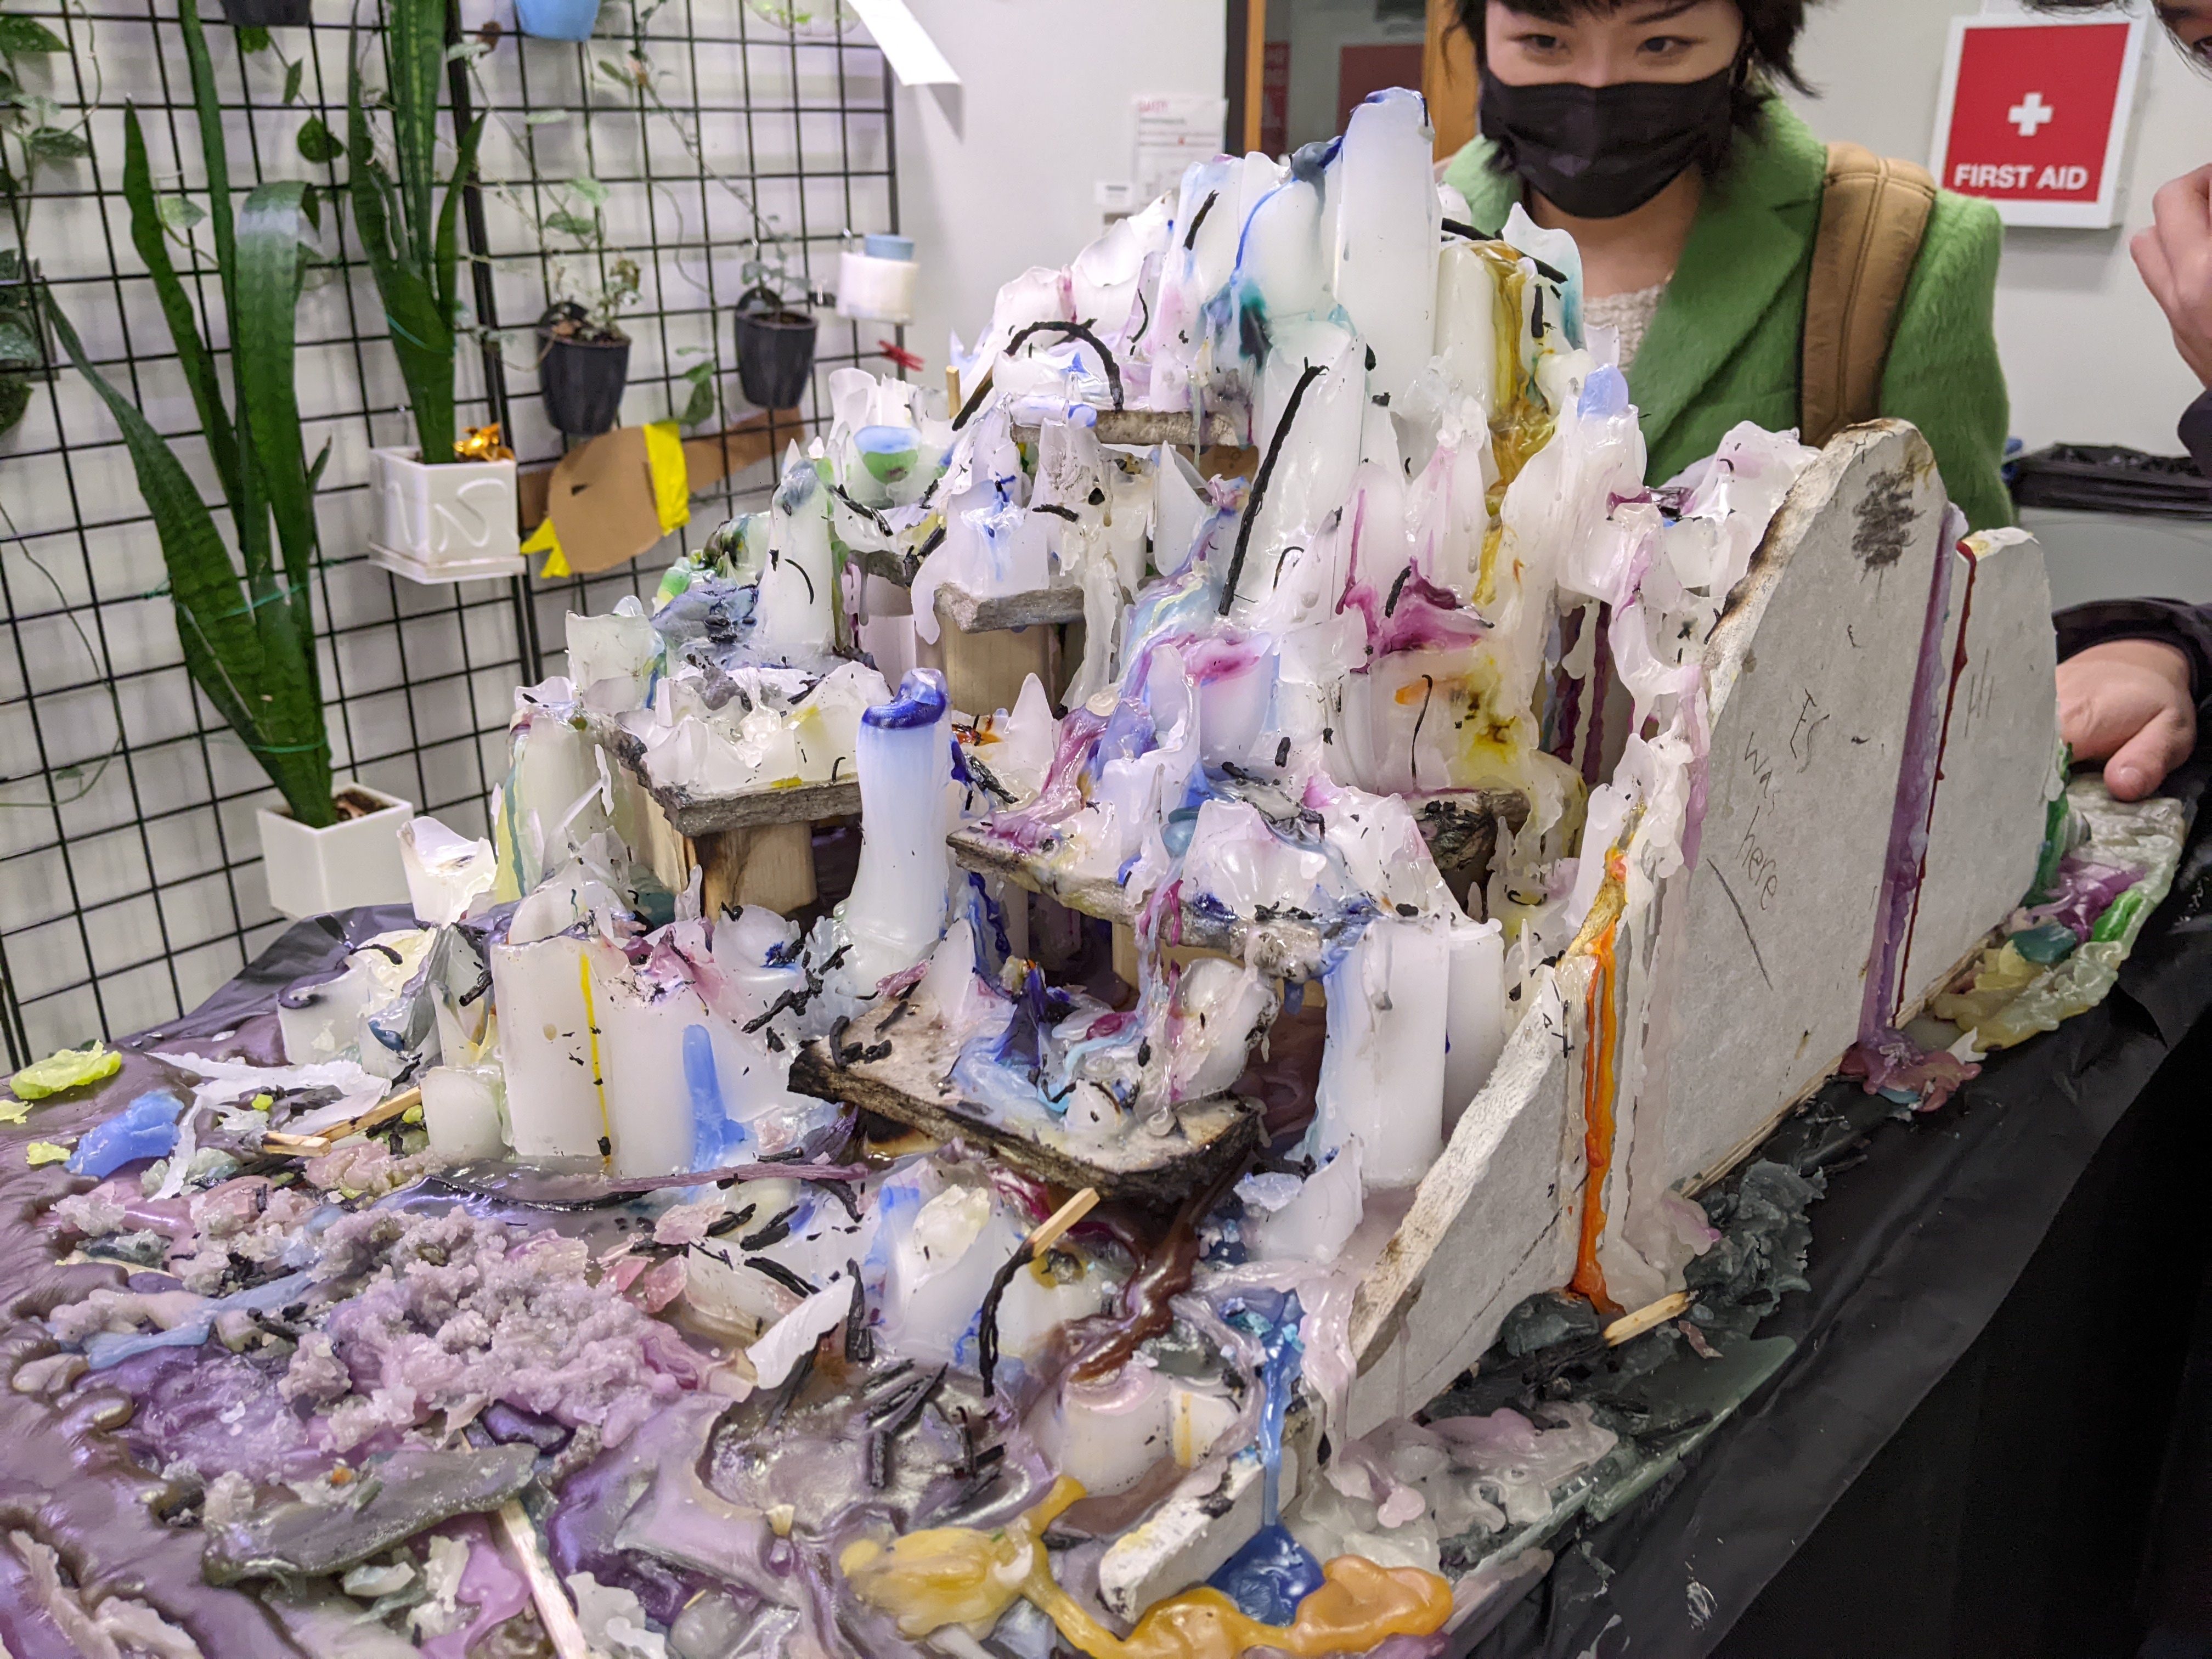
A fellow classmate looks on with awe
Far away shot from the front door of CFA to our exhibit. We're the only ones outside
Our project represented indoors by a projected video feed
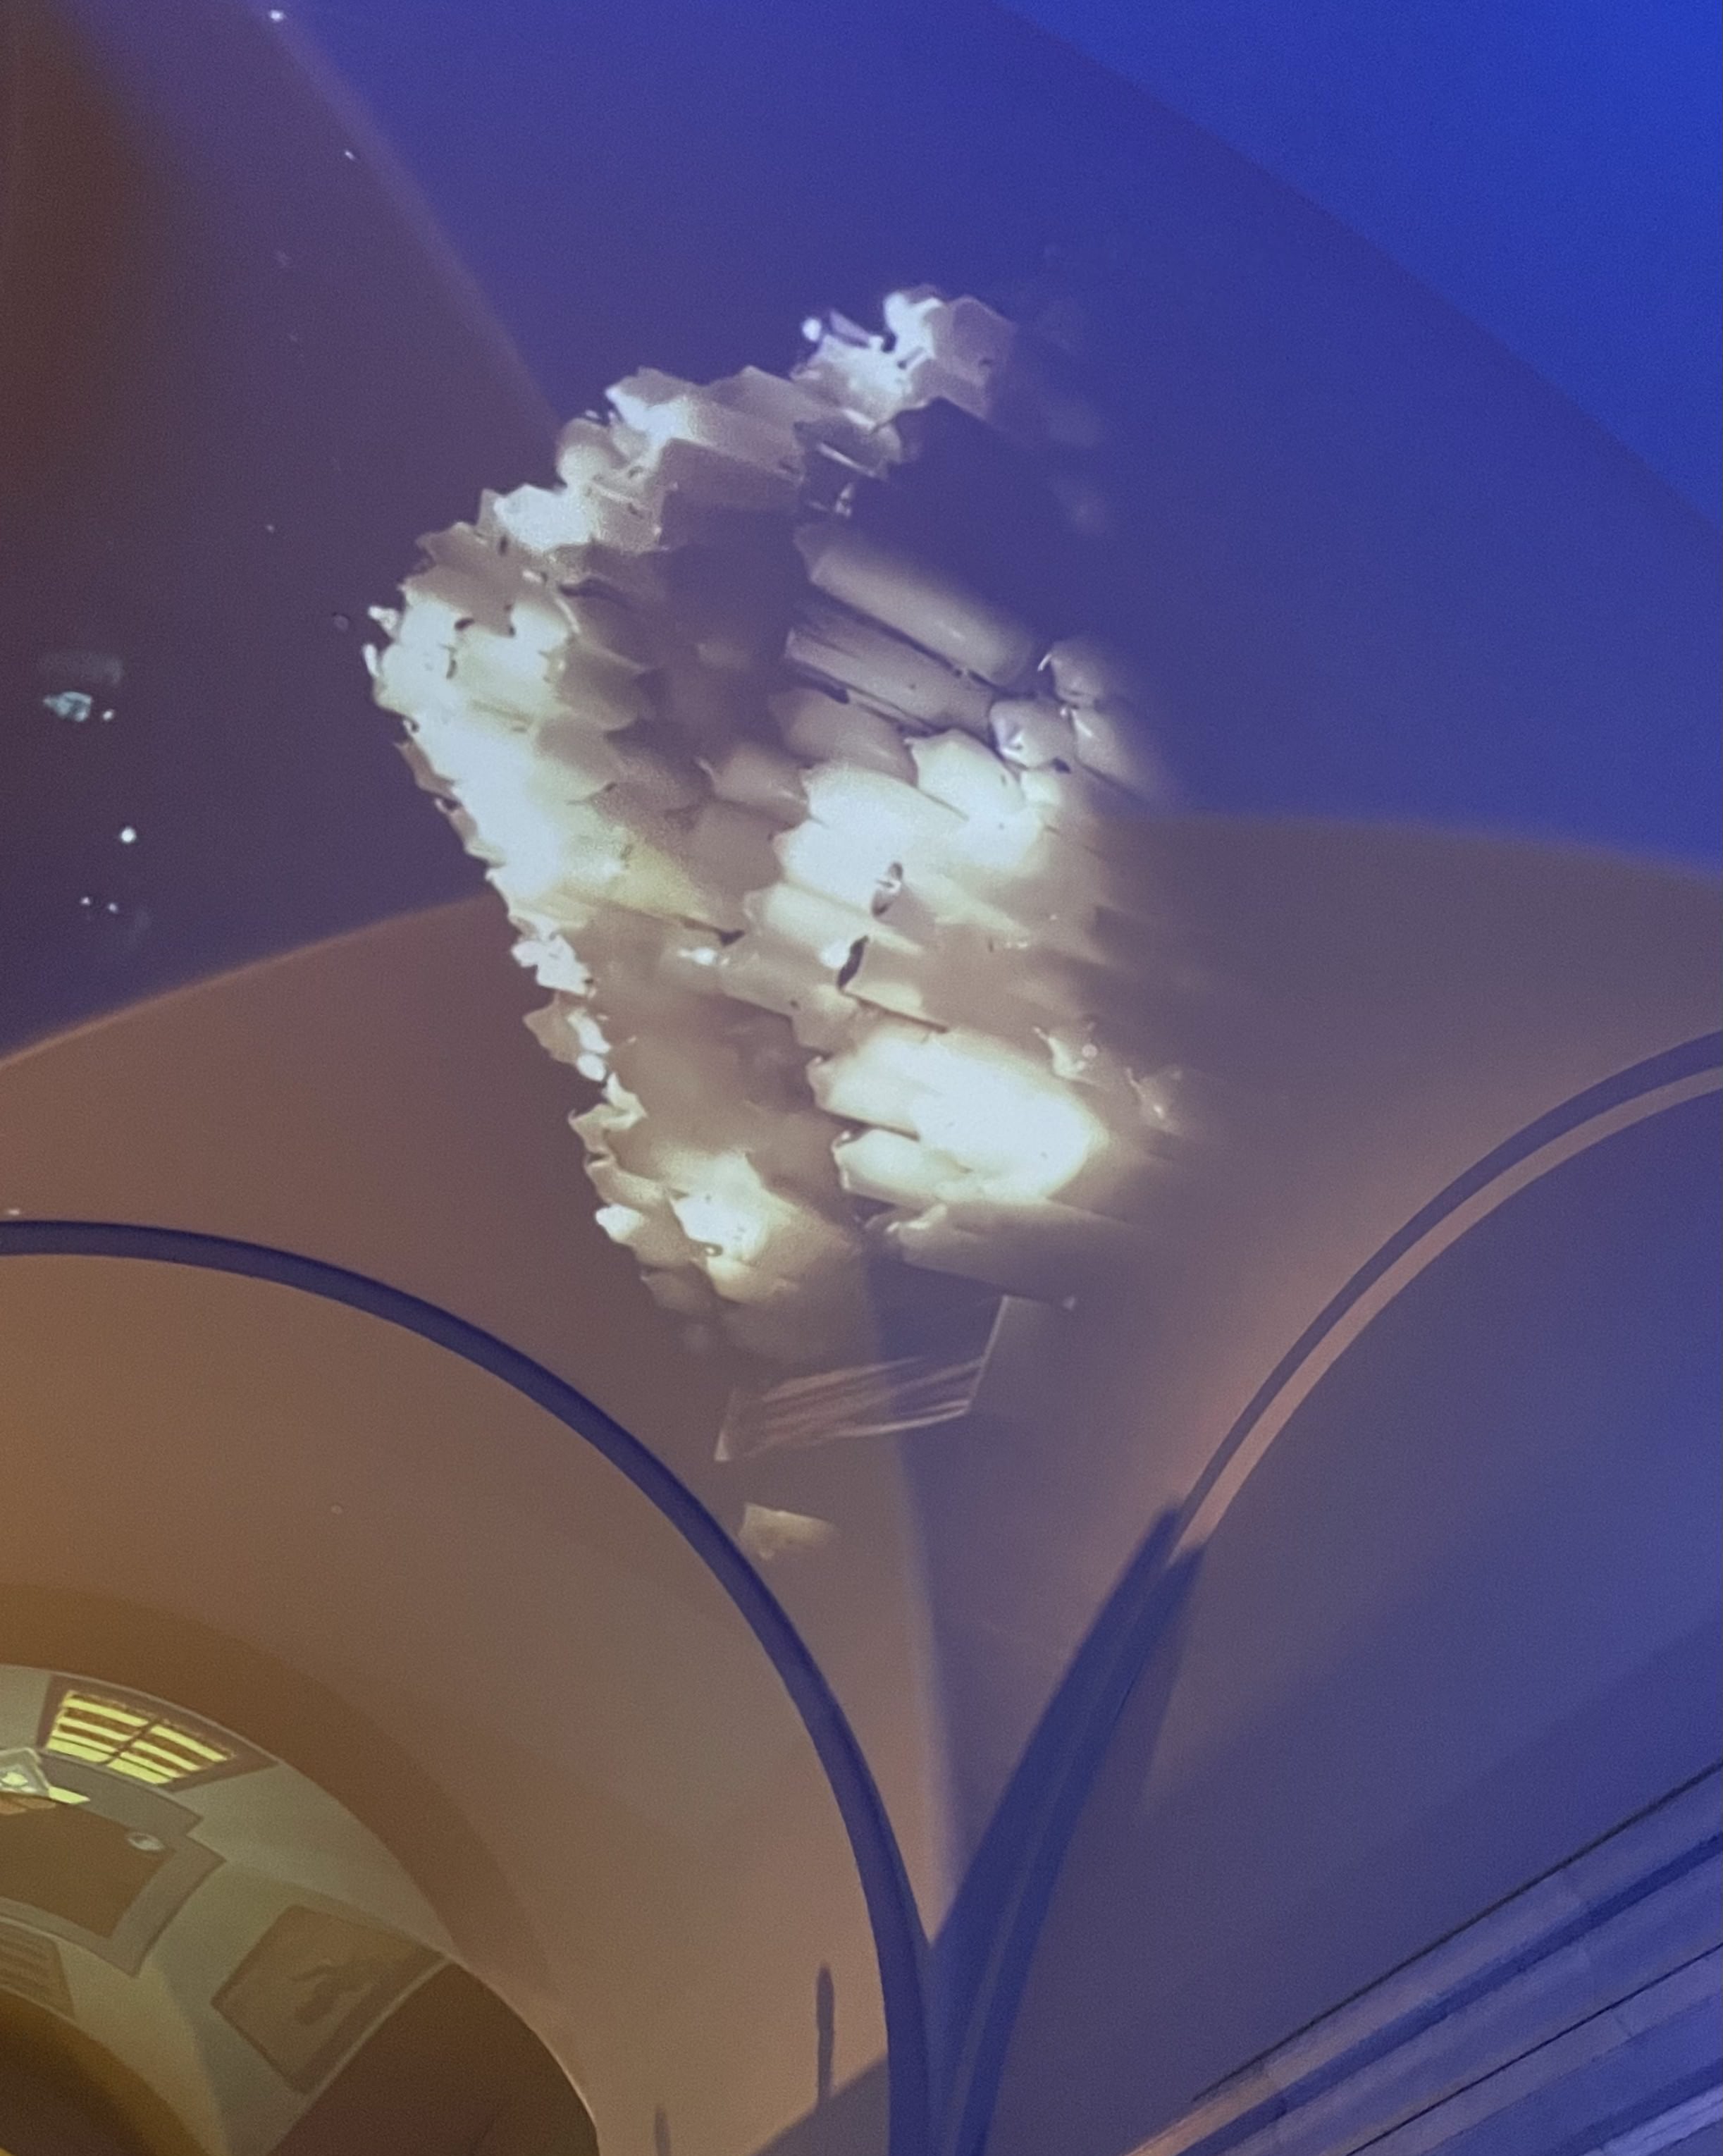
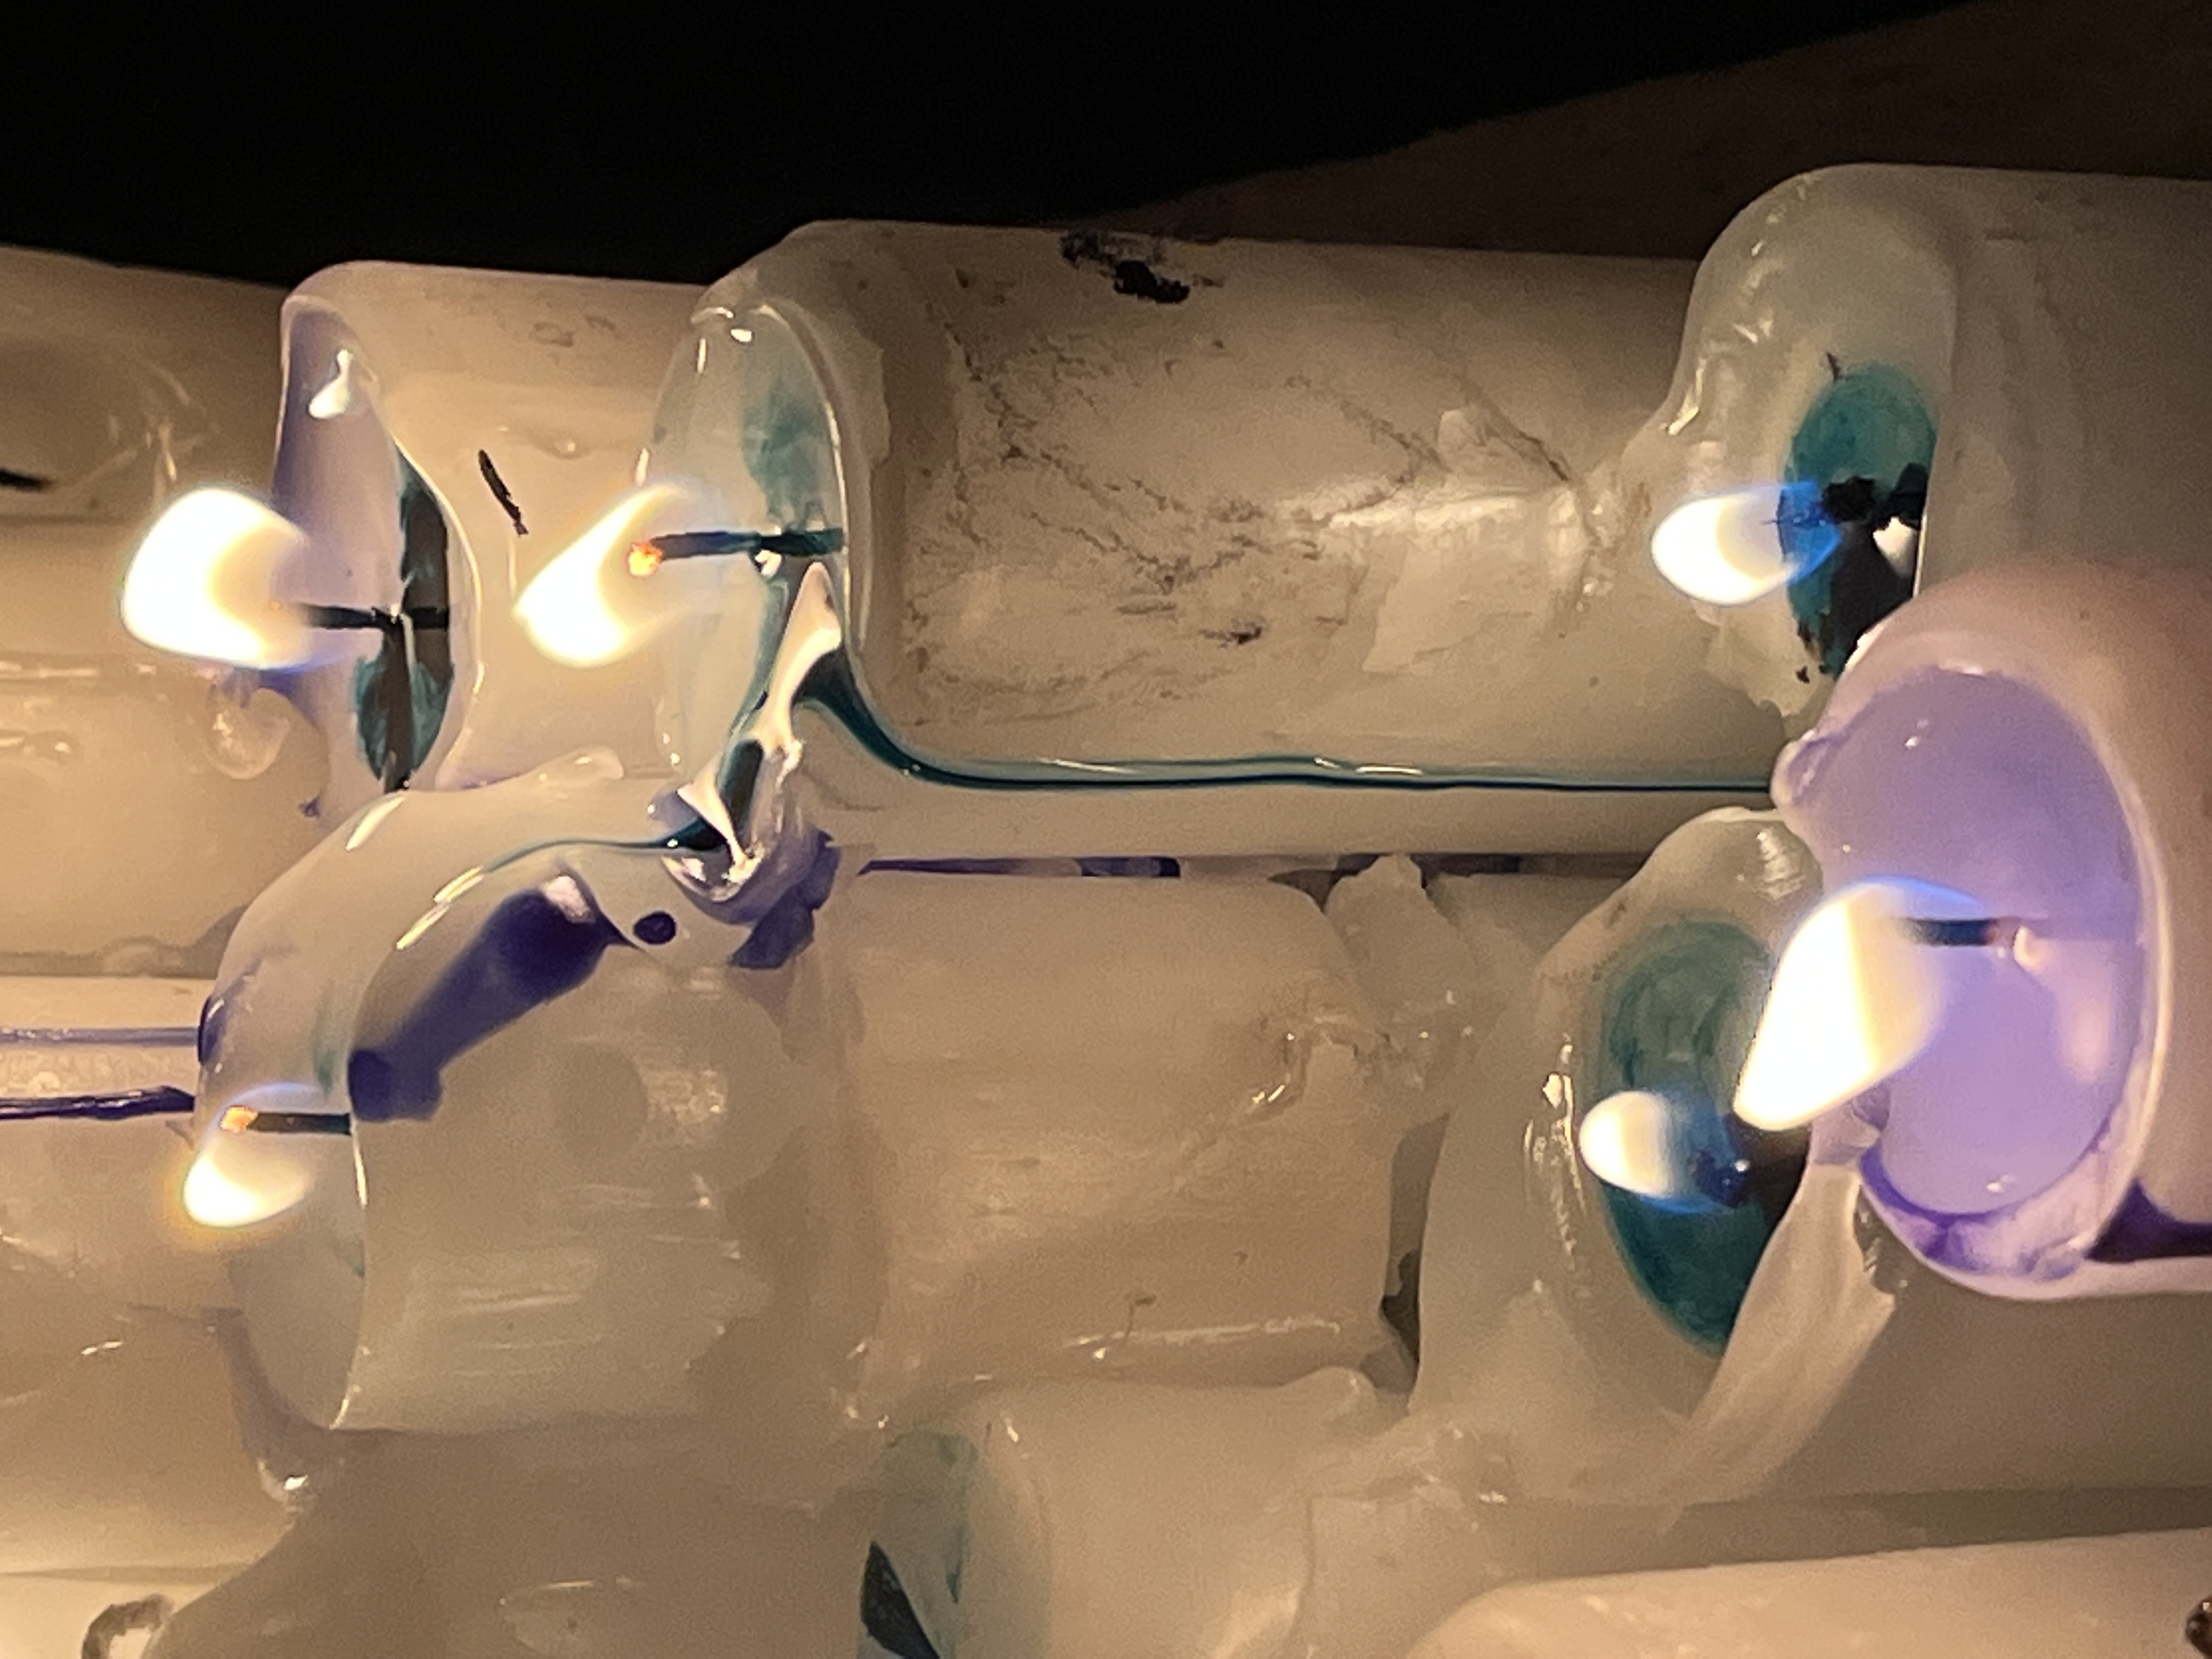
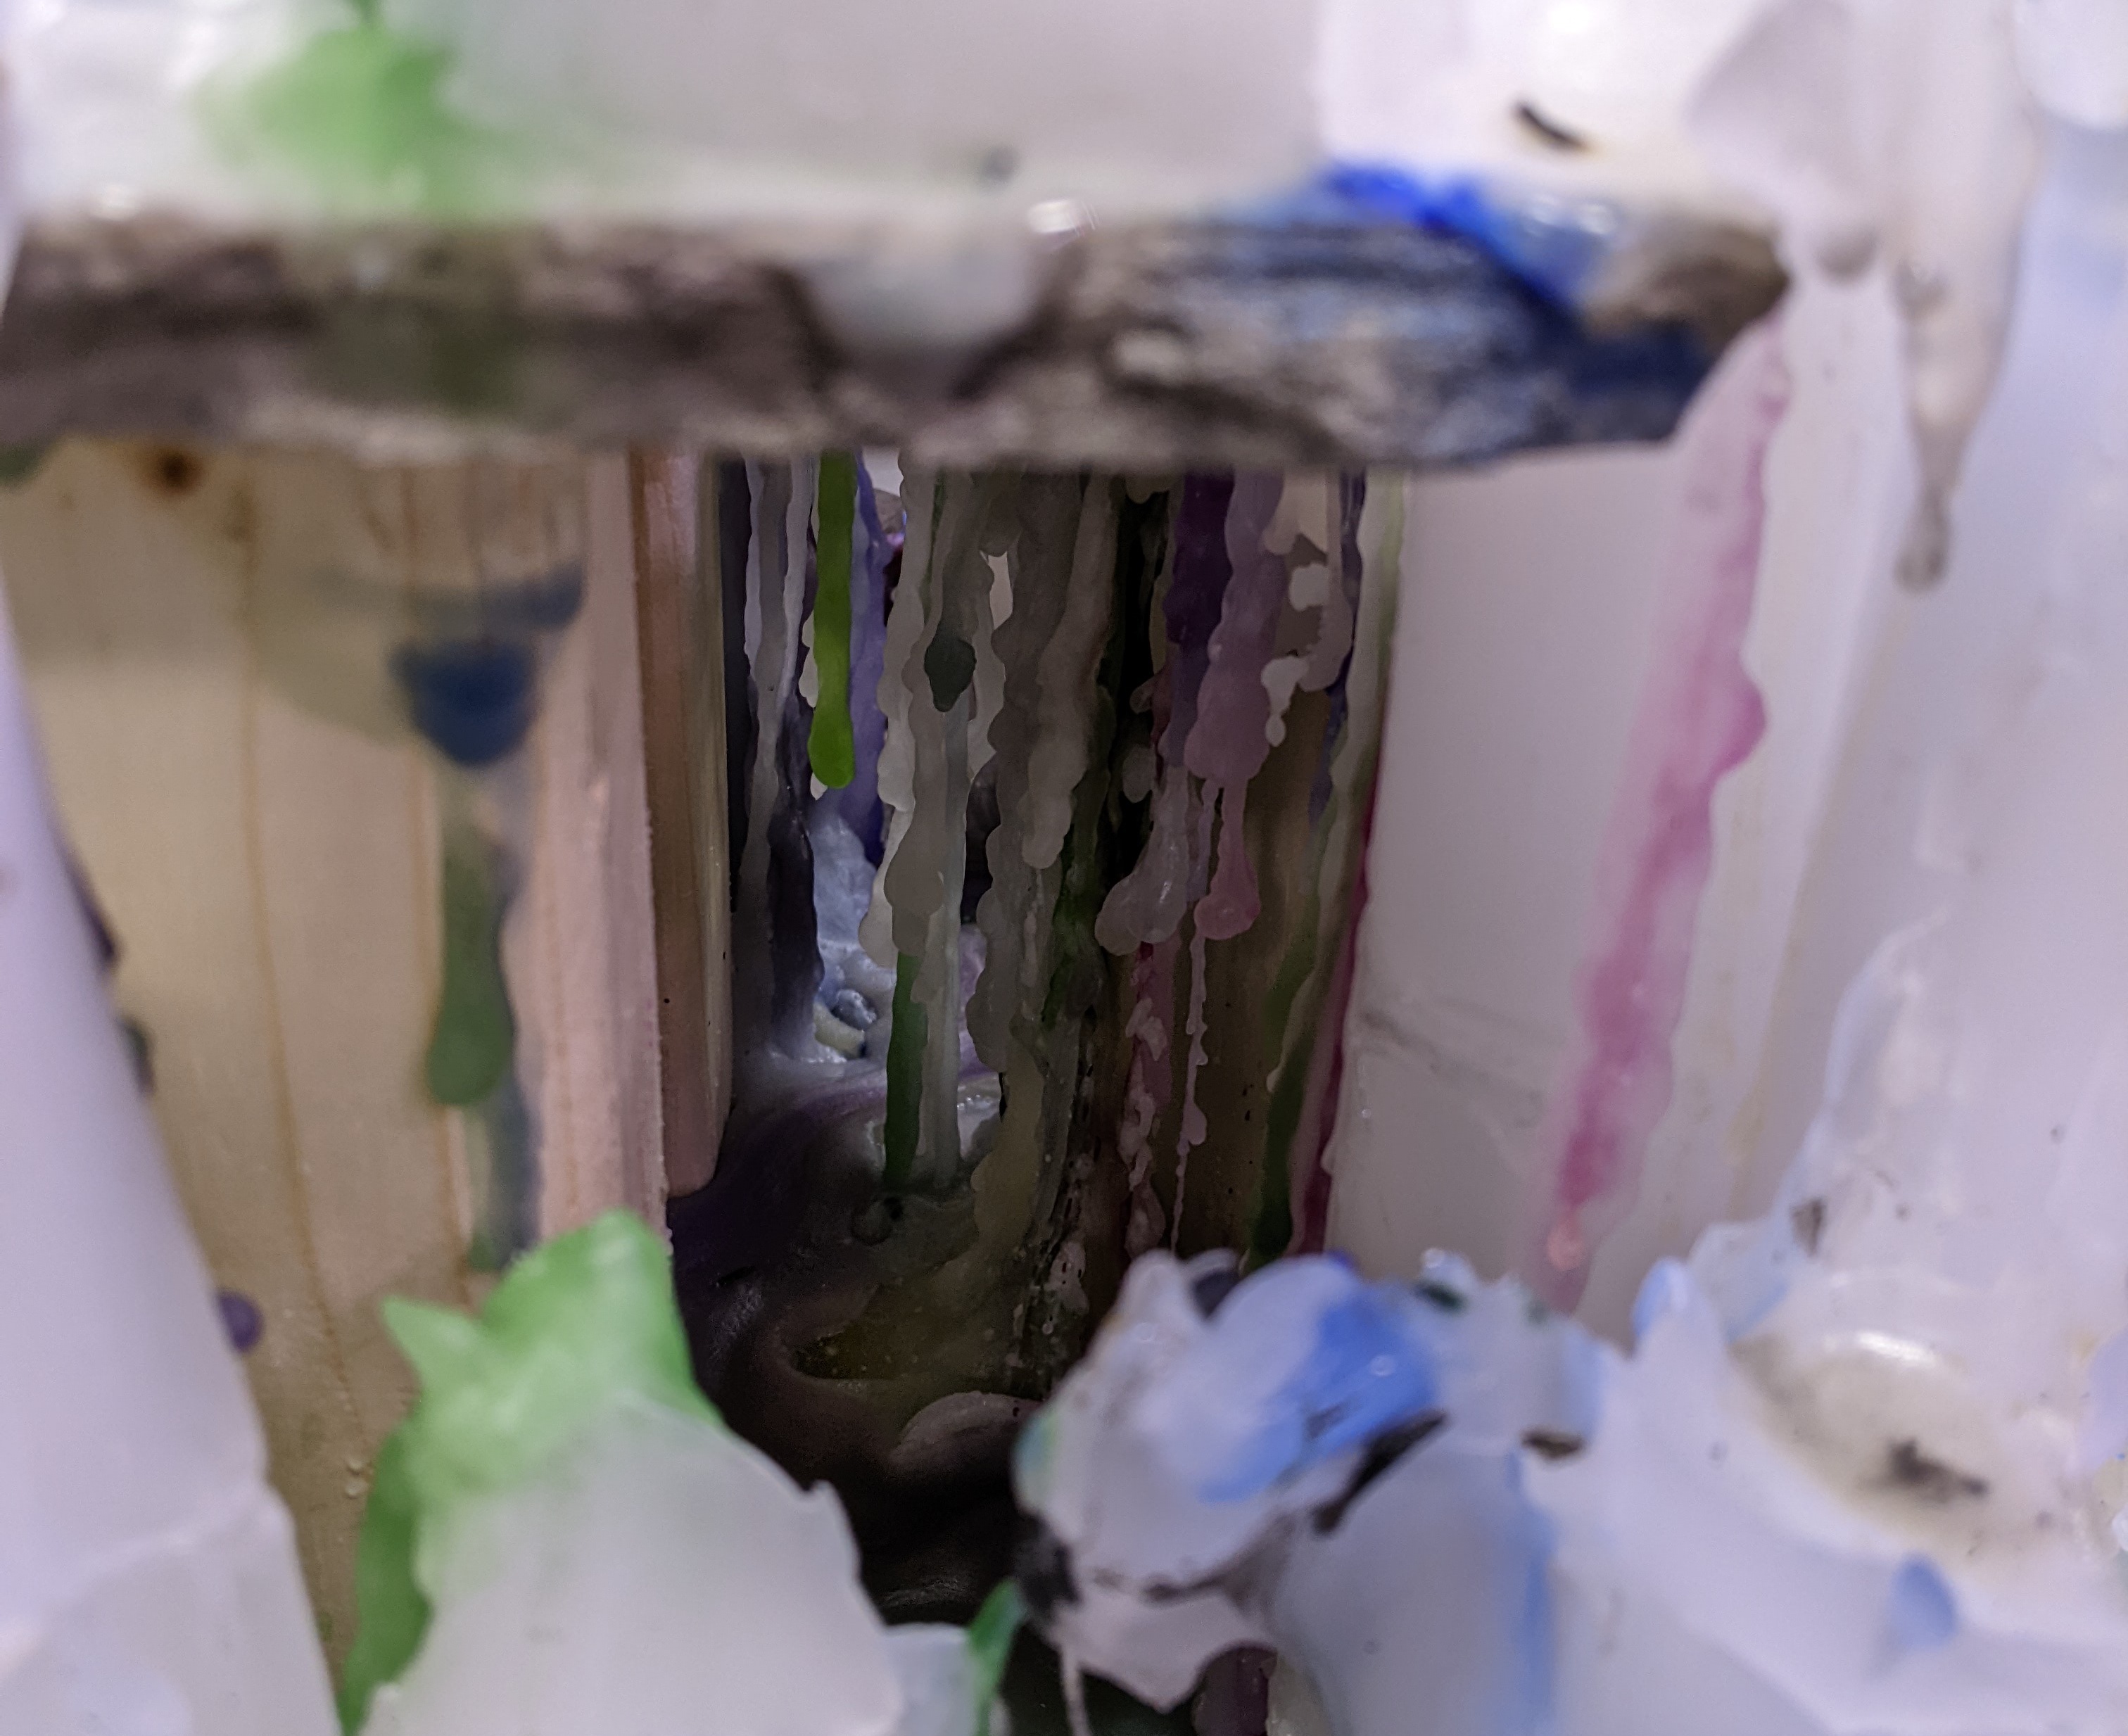
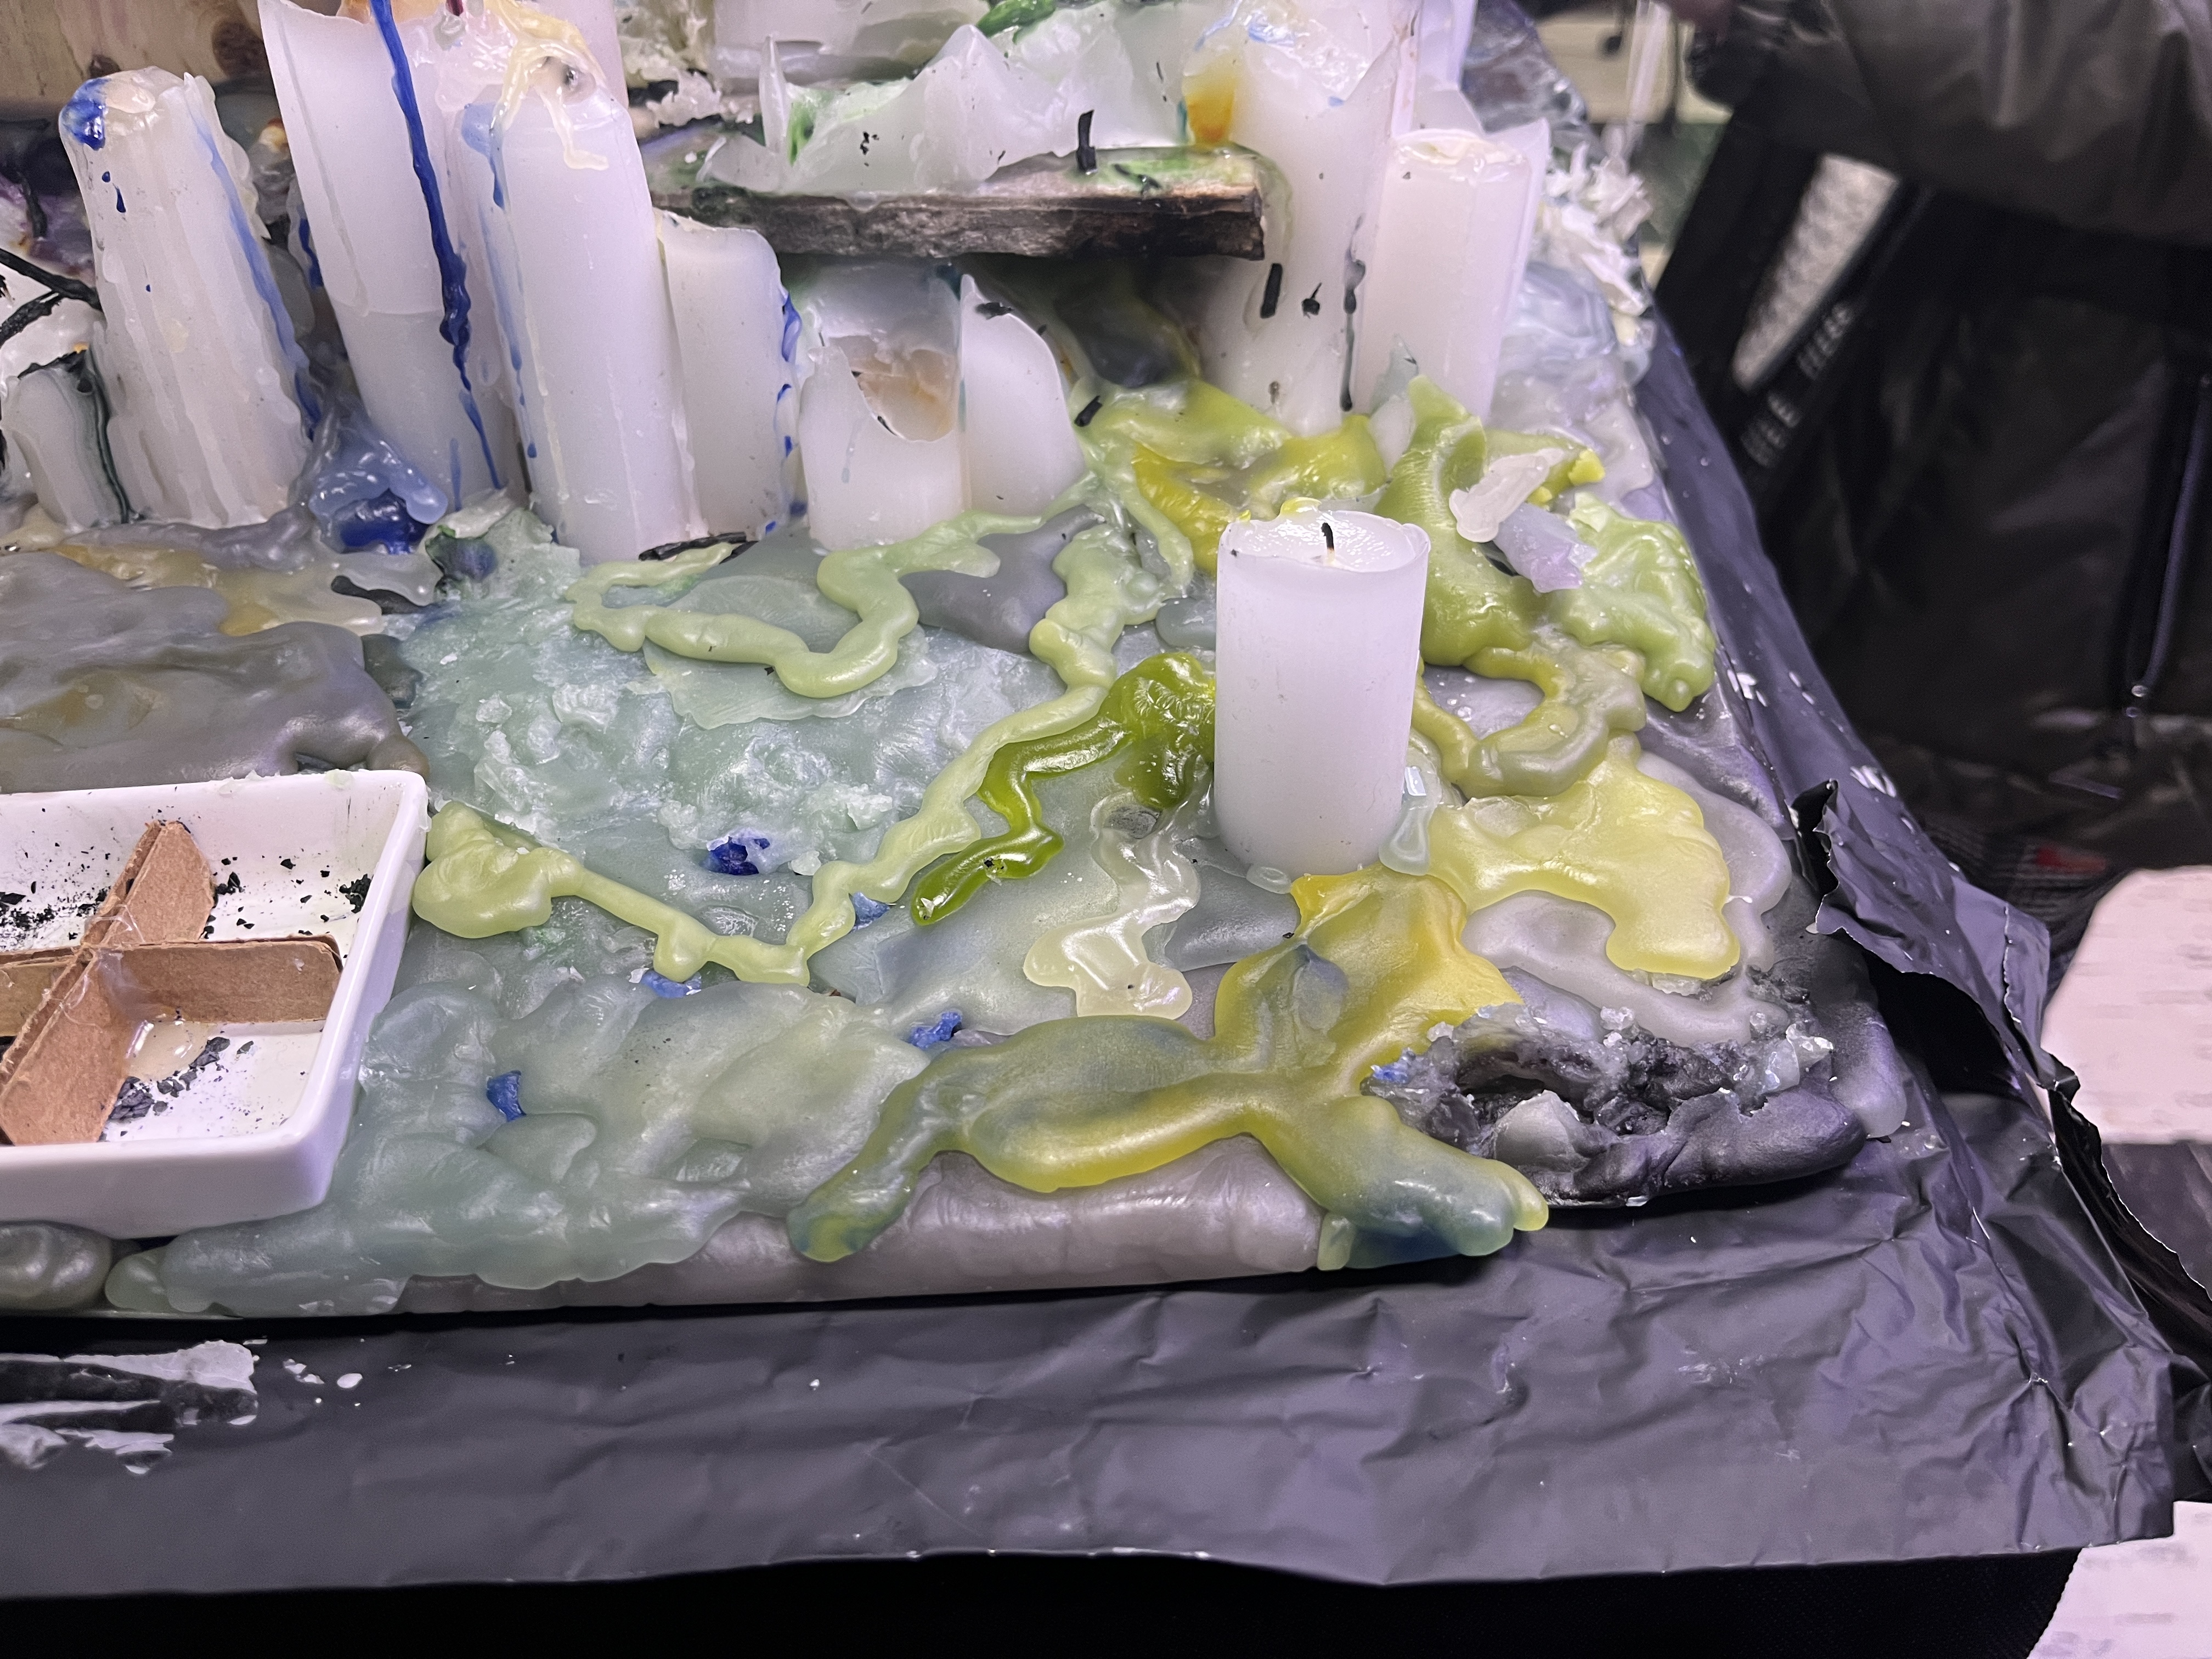
Closeup of one of the candles flowing into another one as it melts
Closeup of the candles with pooled colored wax, and flowing down as the wax melts
Visitors having a great, arson-y time lighting candles and leaving dye chips everywhere.
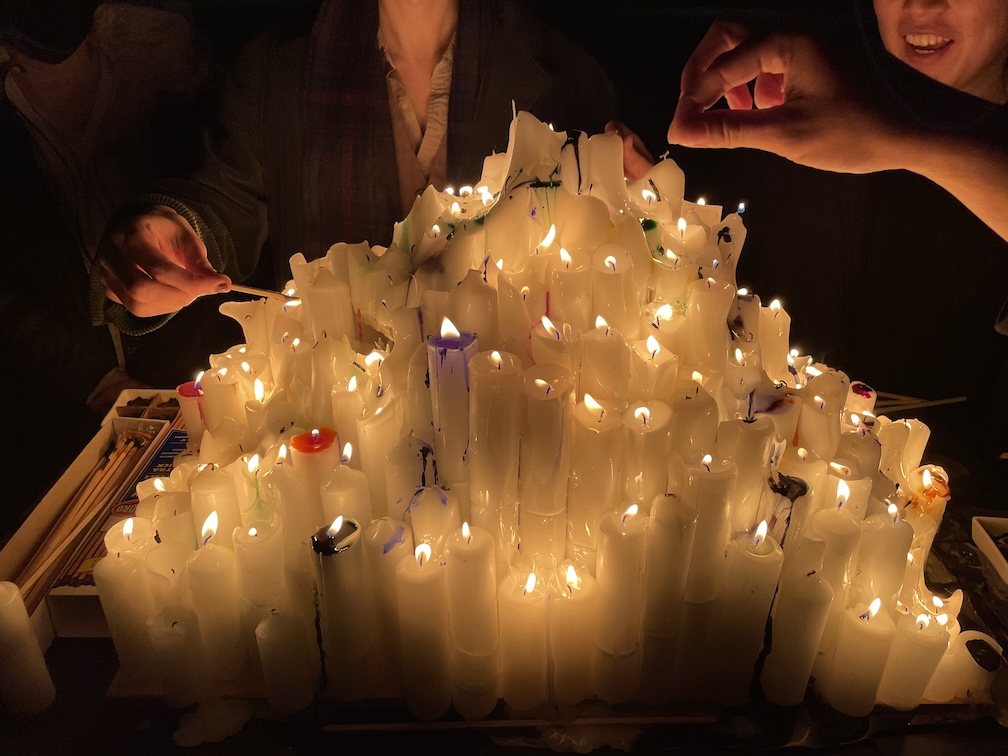
Front shot of candle mountain near the beginning of our exhibit
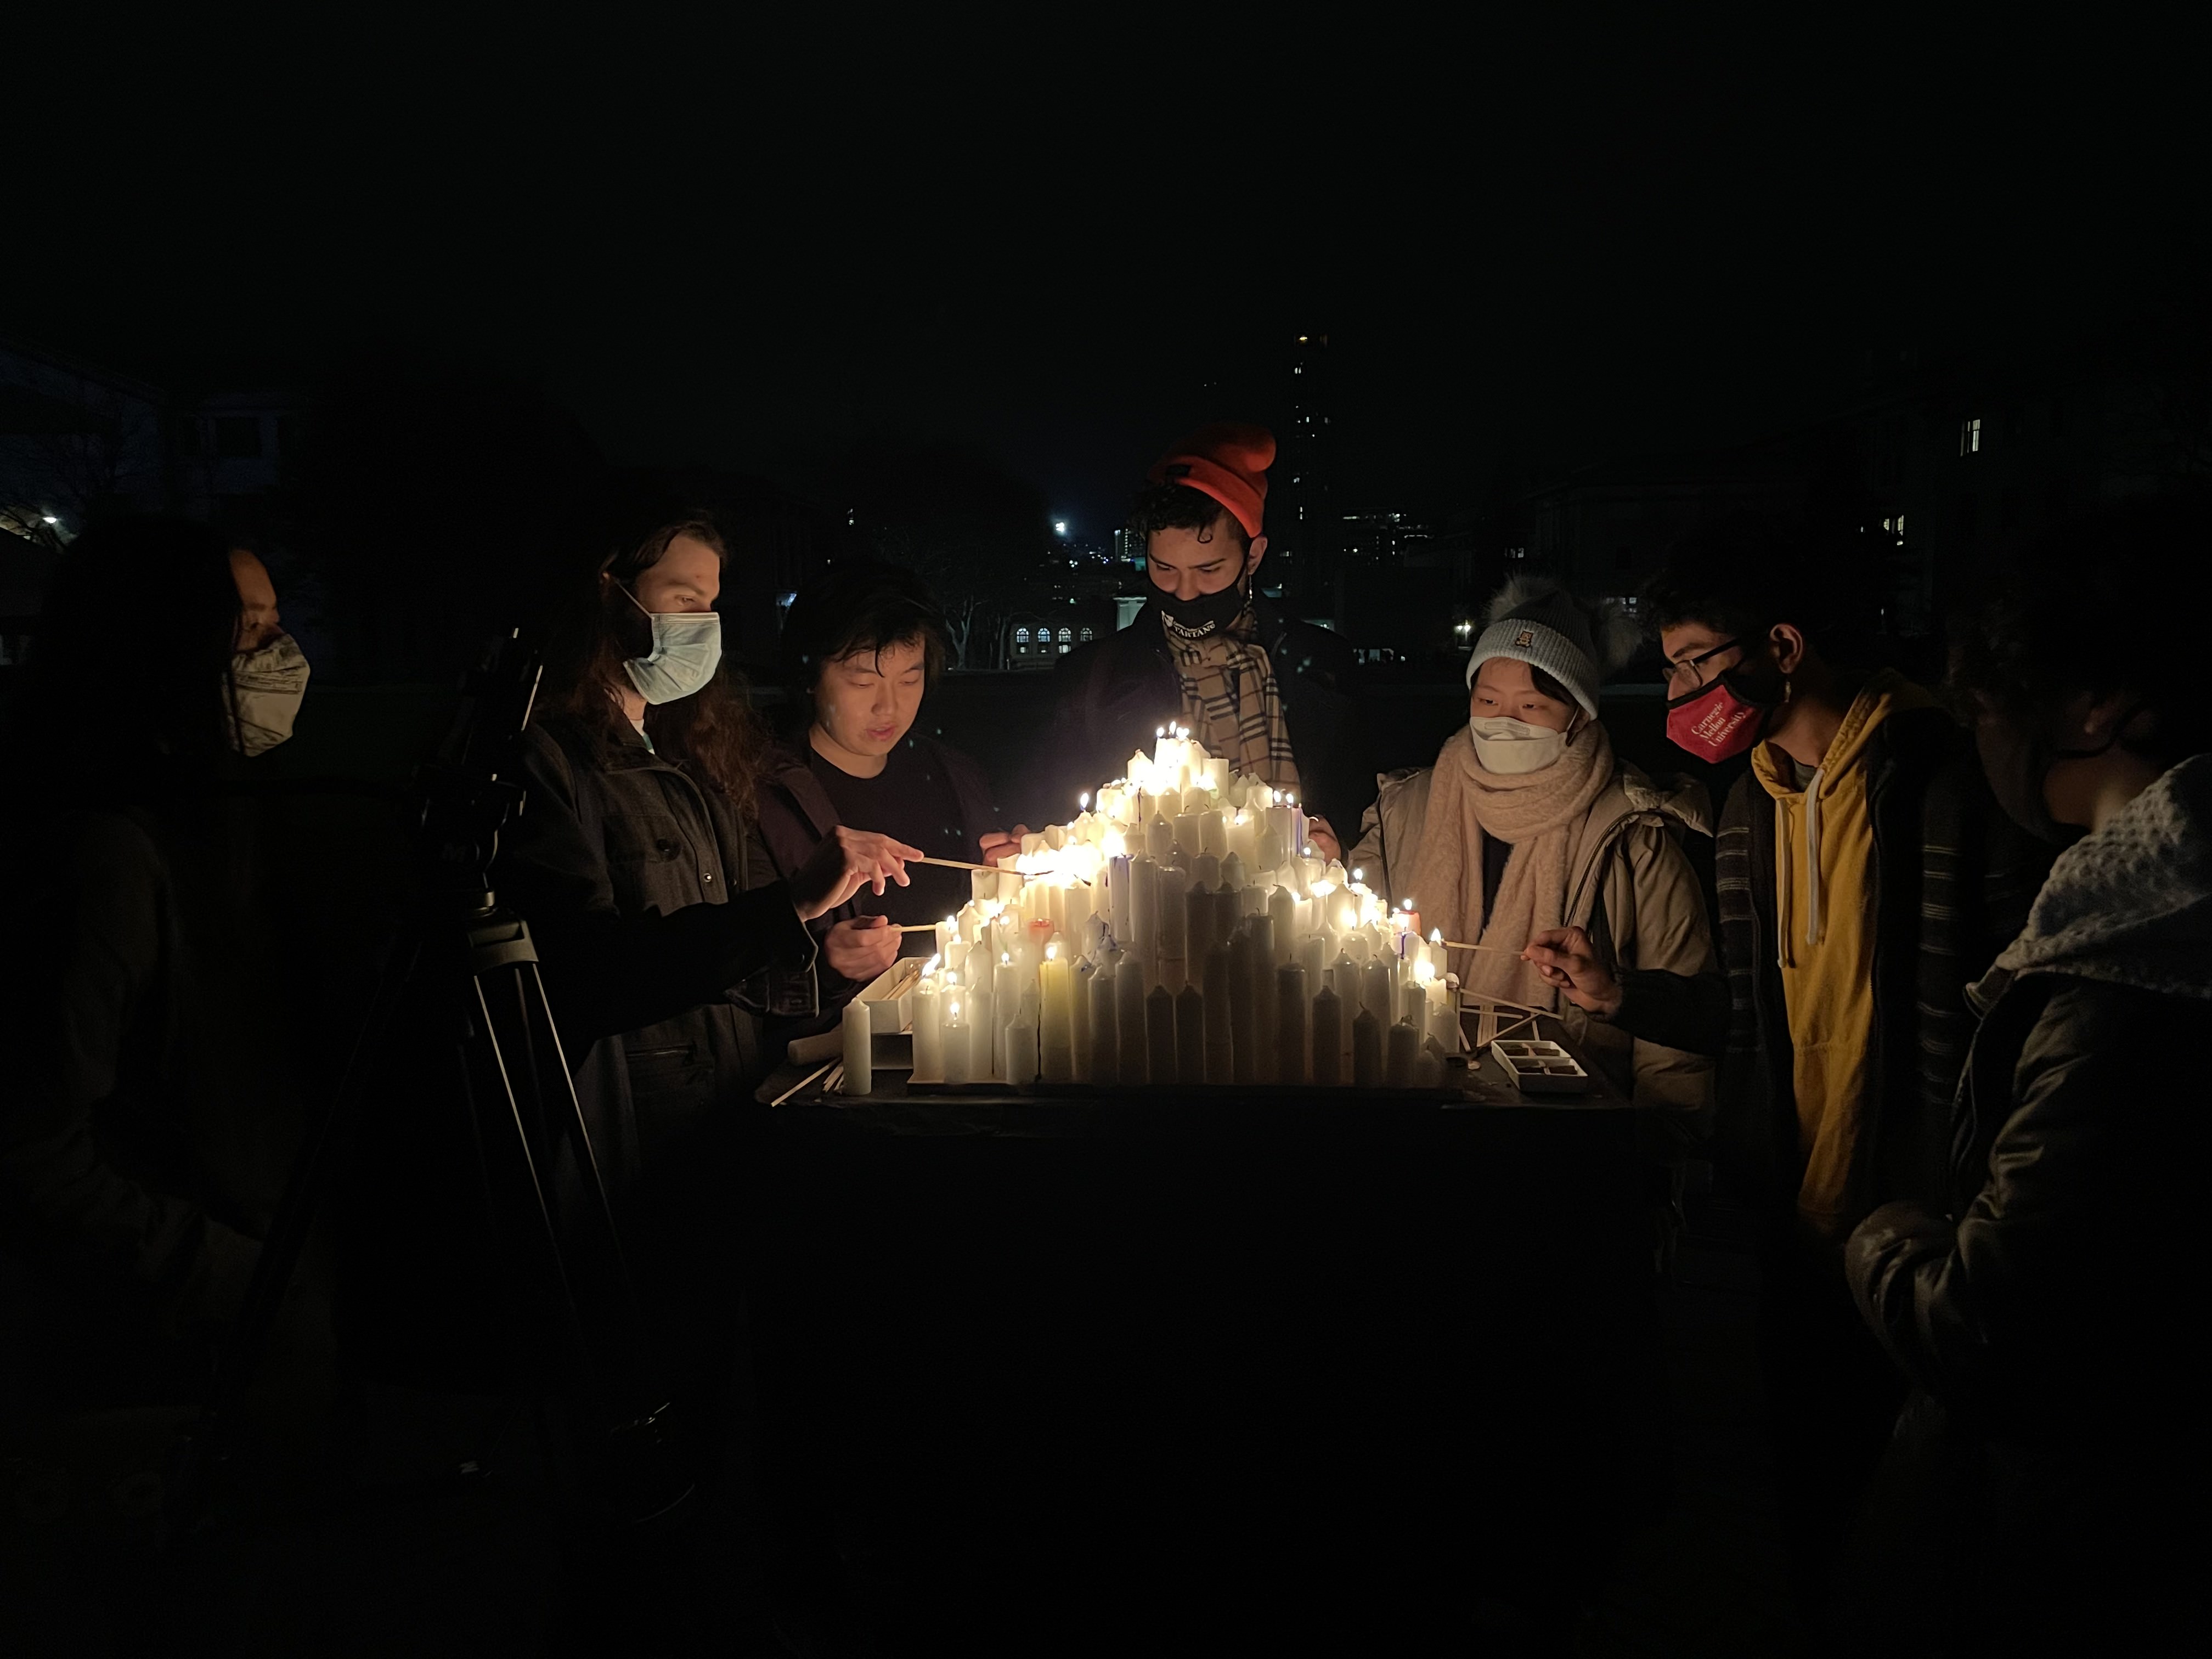
A further away shot of candle mountain with a big crowd of visitors. We were a popular project!
Wax drip
Remember the aluminum platform we had wrapped over the cart earlier? That turned out to be a great thing. When the wax began leaking everywhere, we were able to round up the corners of the cover and contain the wax without dropping it all over the ground. While it did not save Zach’s pants, we later found that the buildup of wax layers created many beautiful colors arranged across different layers, much like a sedimentary rock.
Drippings from the cart hit Zach in the pants.
The Crew behind their waxy creation. Mountain is about halfway through its brief but bright existence
Cleanup
As we wheeled our cart back to the workshop, we reveled in the beautiful colors on the mountain, and all the crazy, winding topography that the wax had formed as it melted and flowed.
Green side of the mountain's base, with the empty wax dye container
A close-up shot of the green side
A bit messier purple side, with plenty of long match handles left in the carnage

The elephant wall, scorched and overrun by a couple of the candles
Front view, with much of the underlying concrete platforms exposed

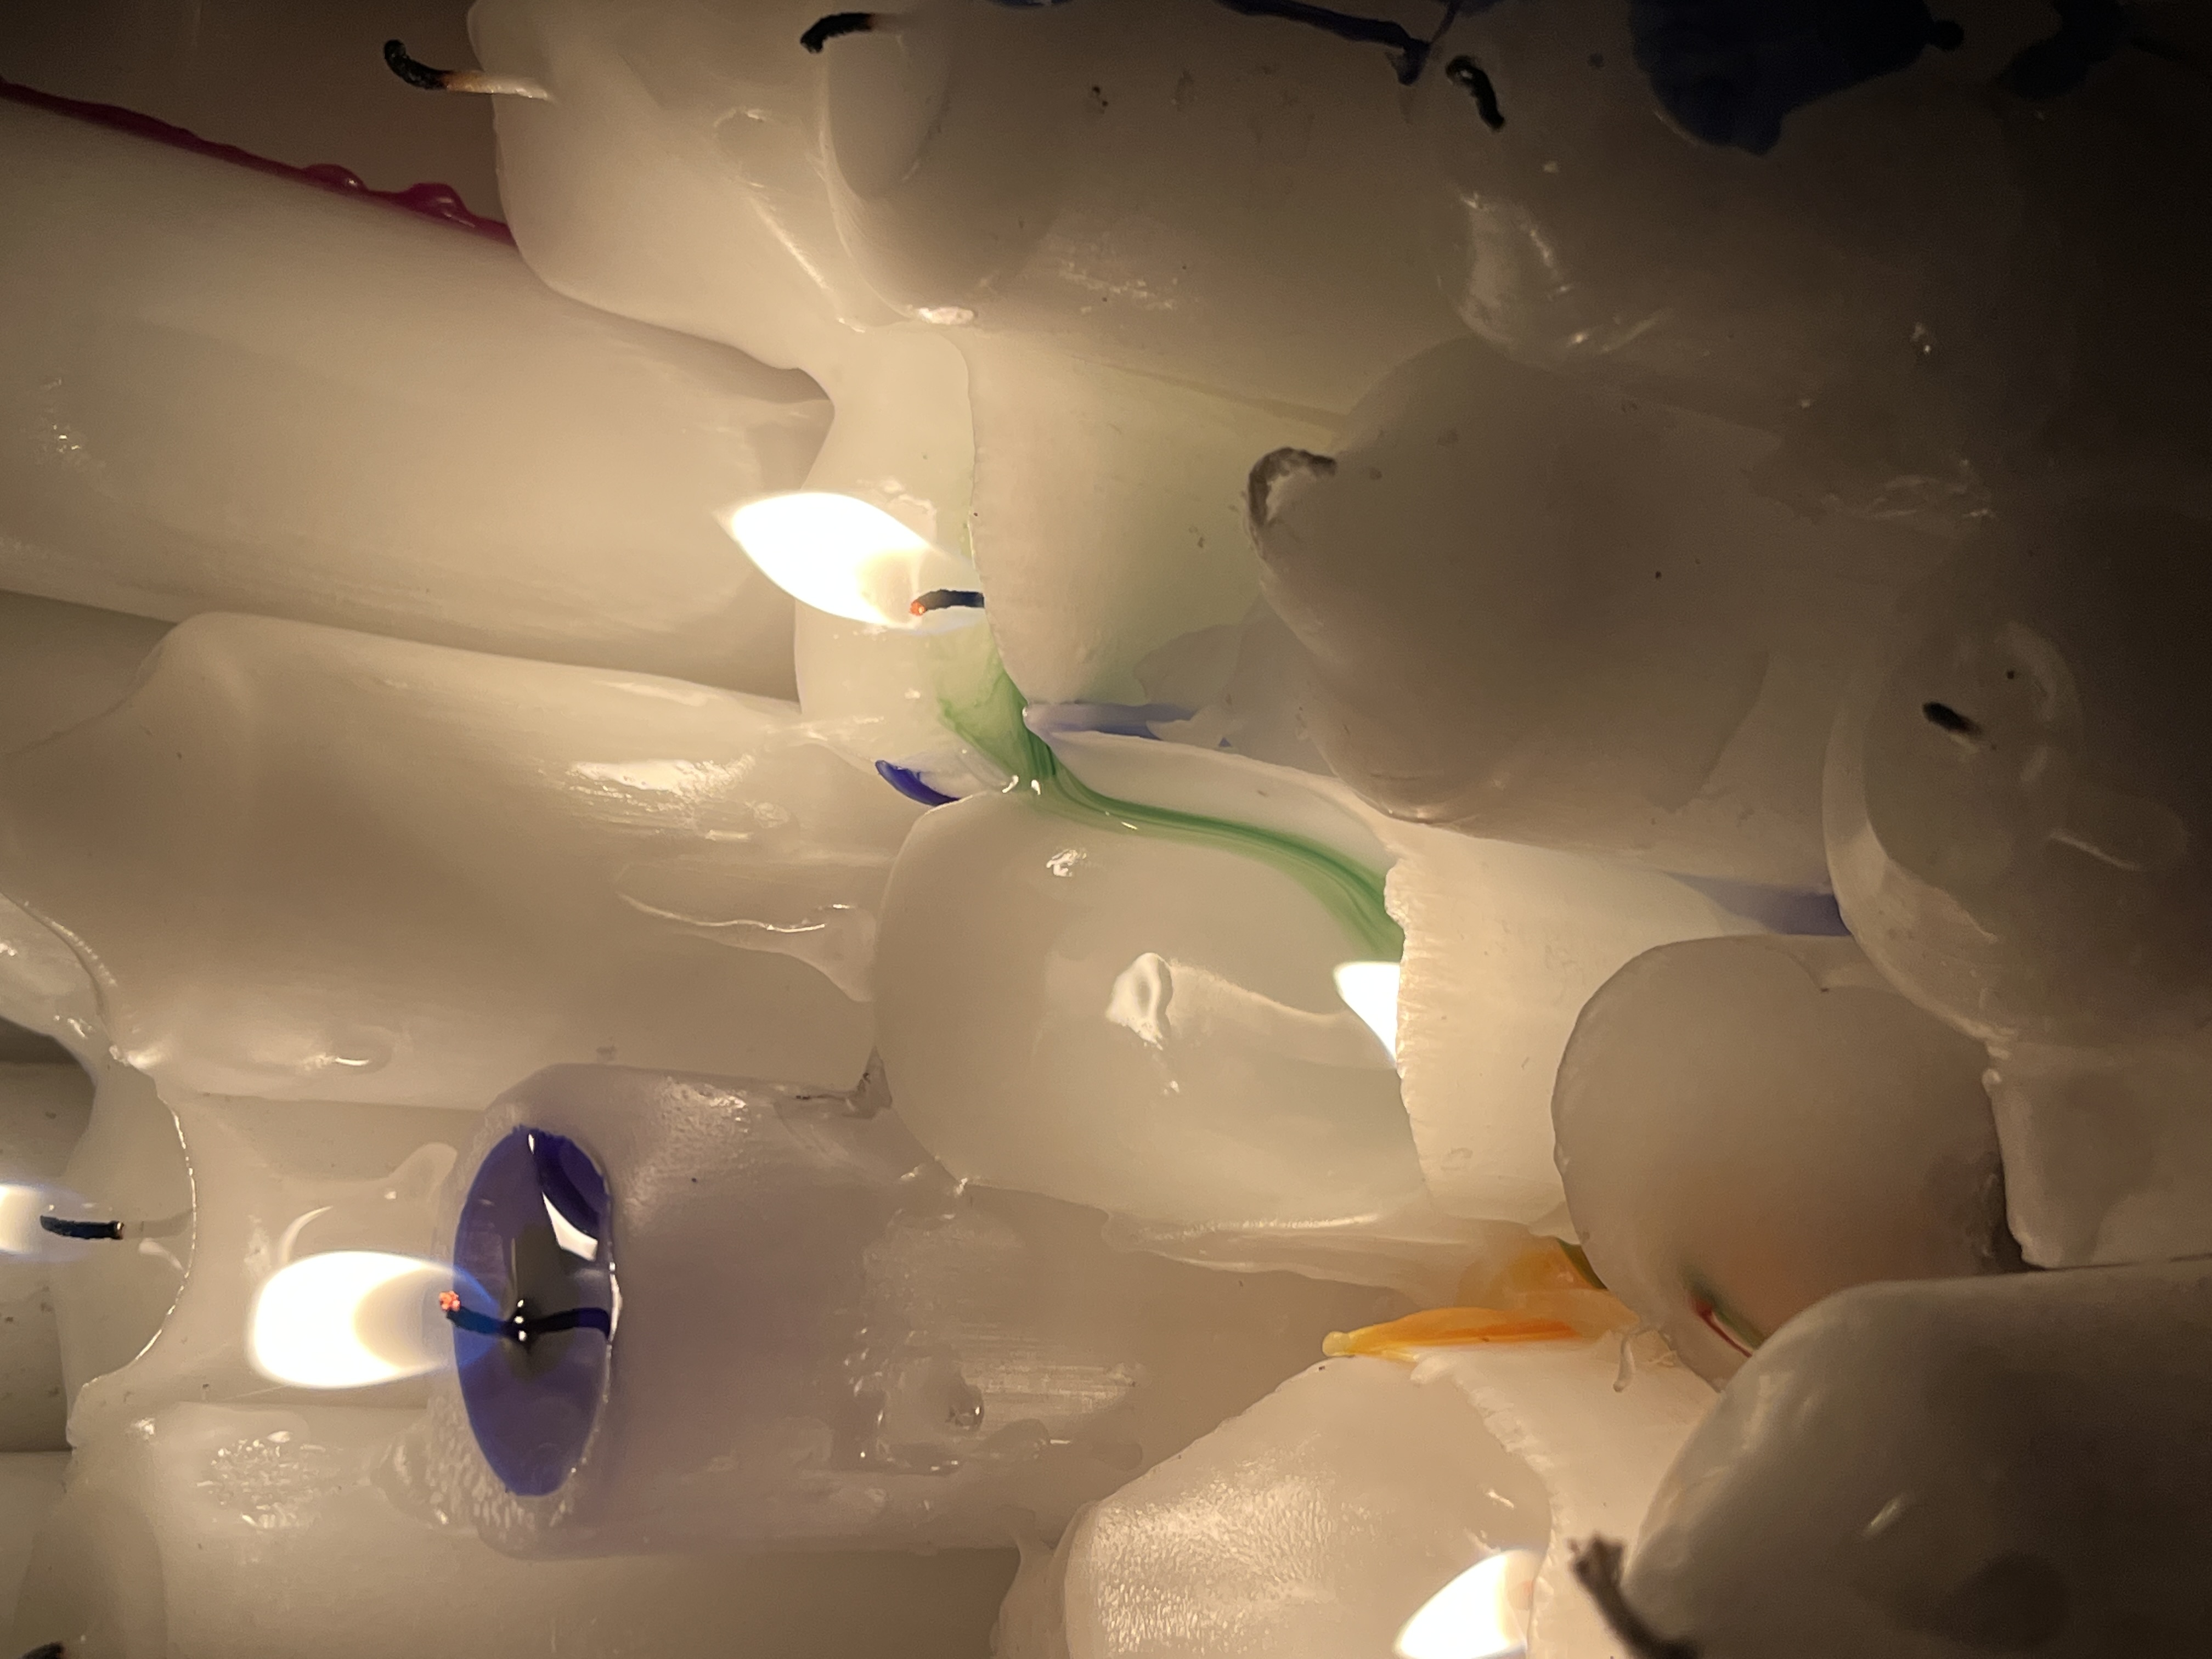
Closeup on the inside. Stalagtites have formed from the waxy trails dripping downwards.
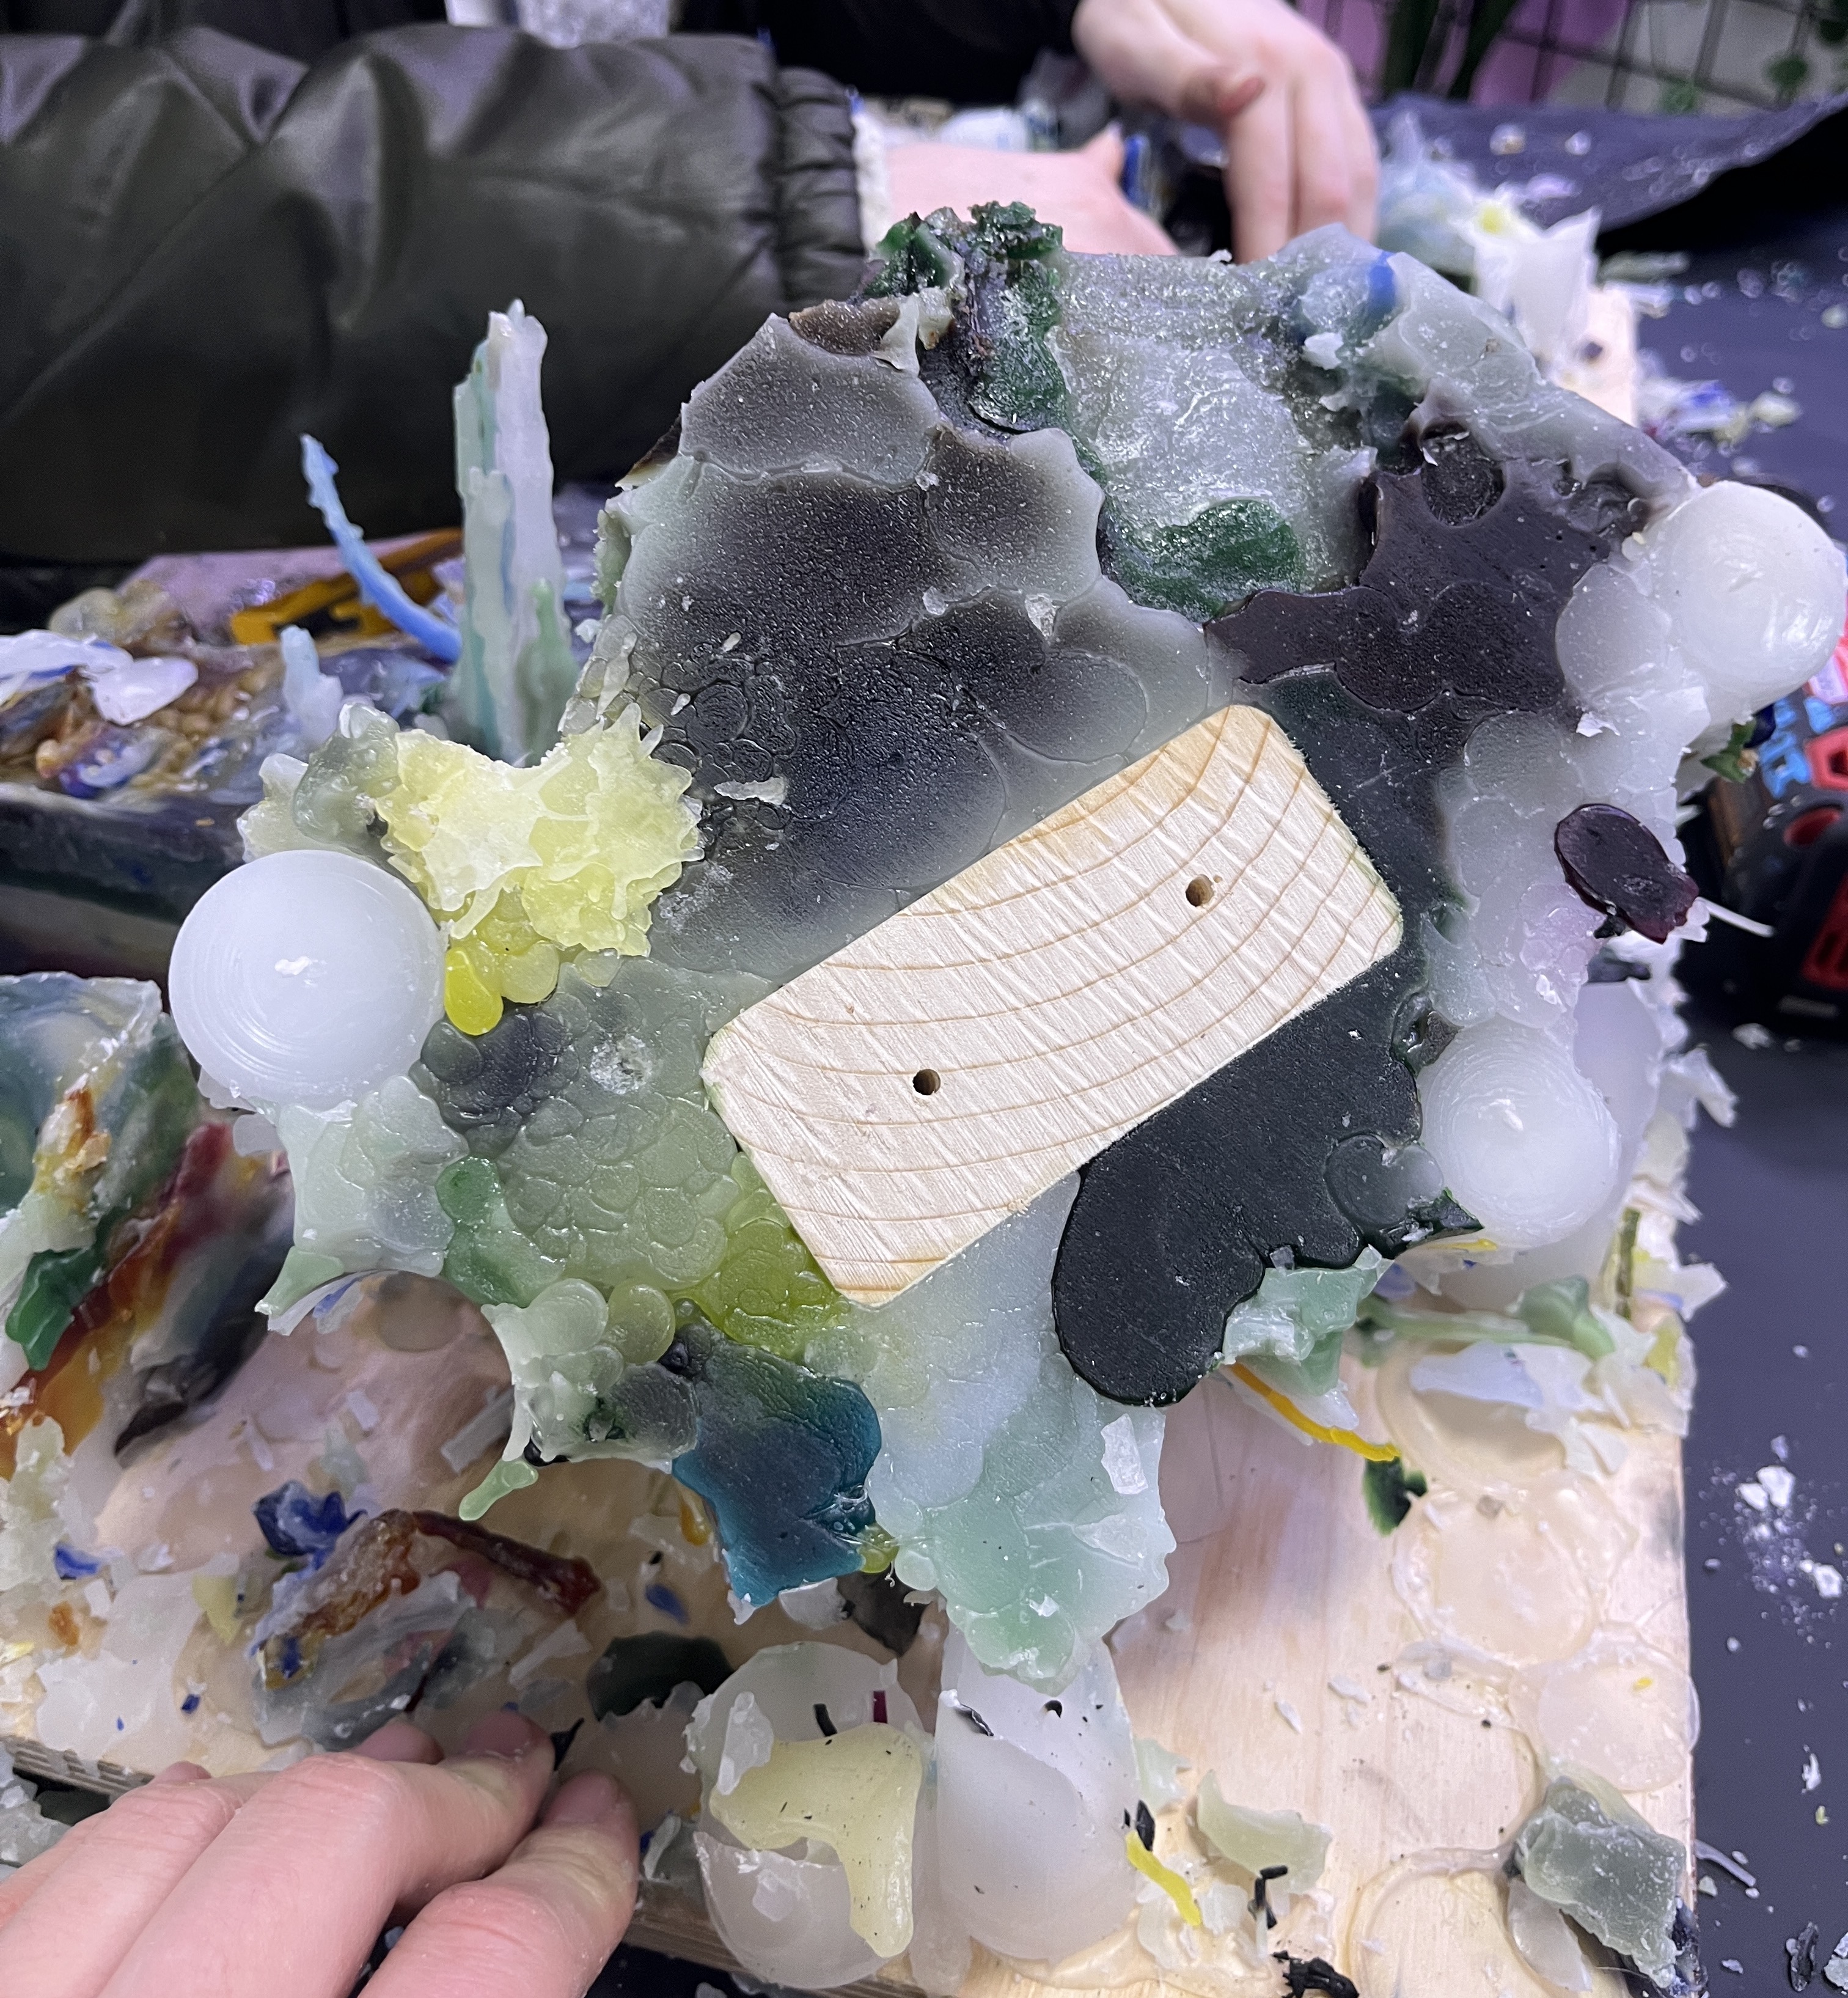
Beautiful Stratigraphy
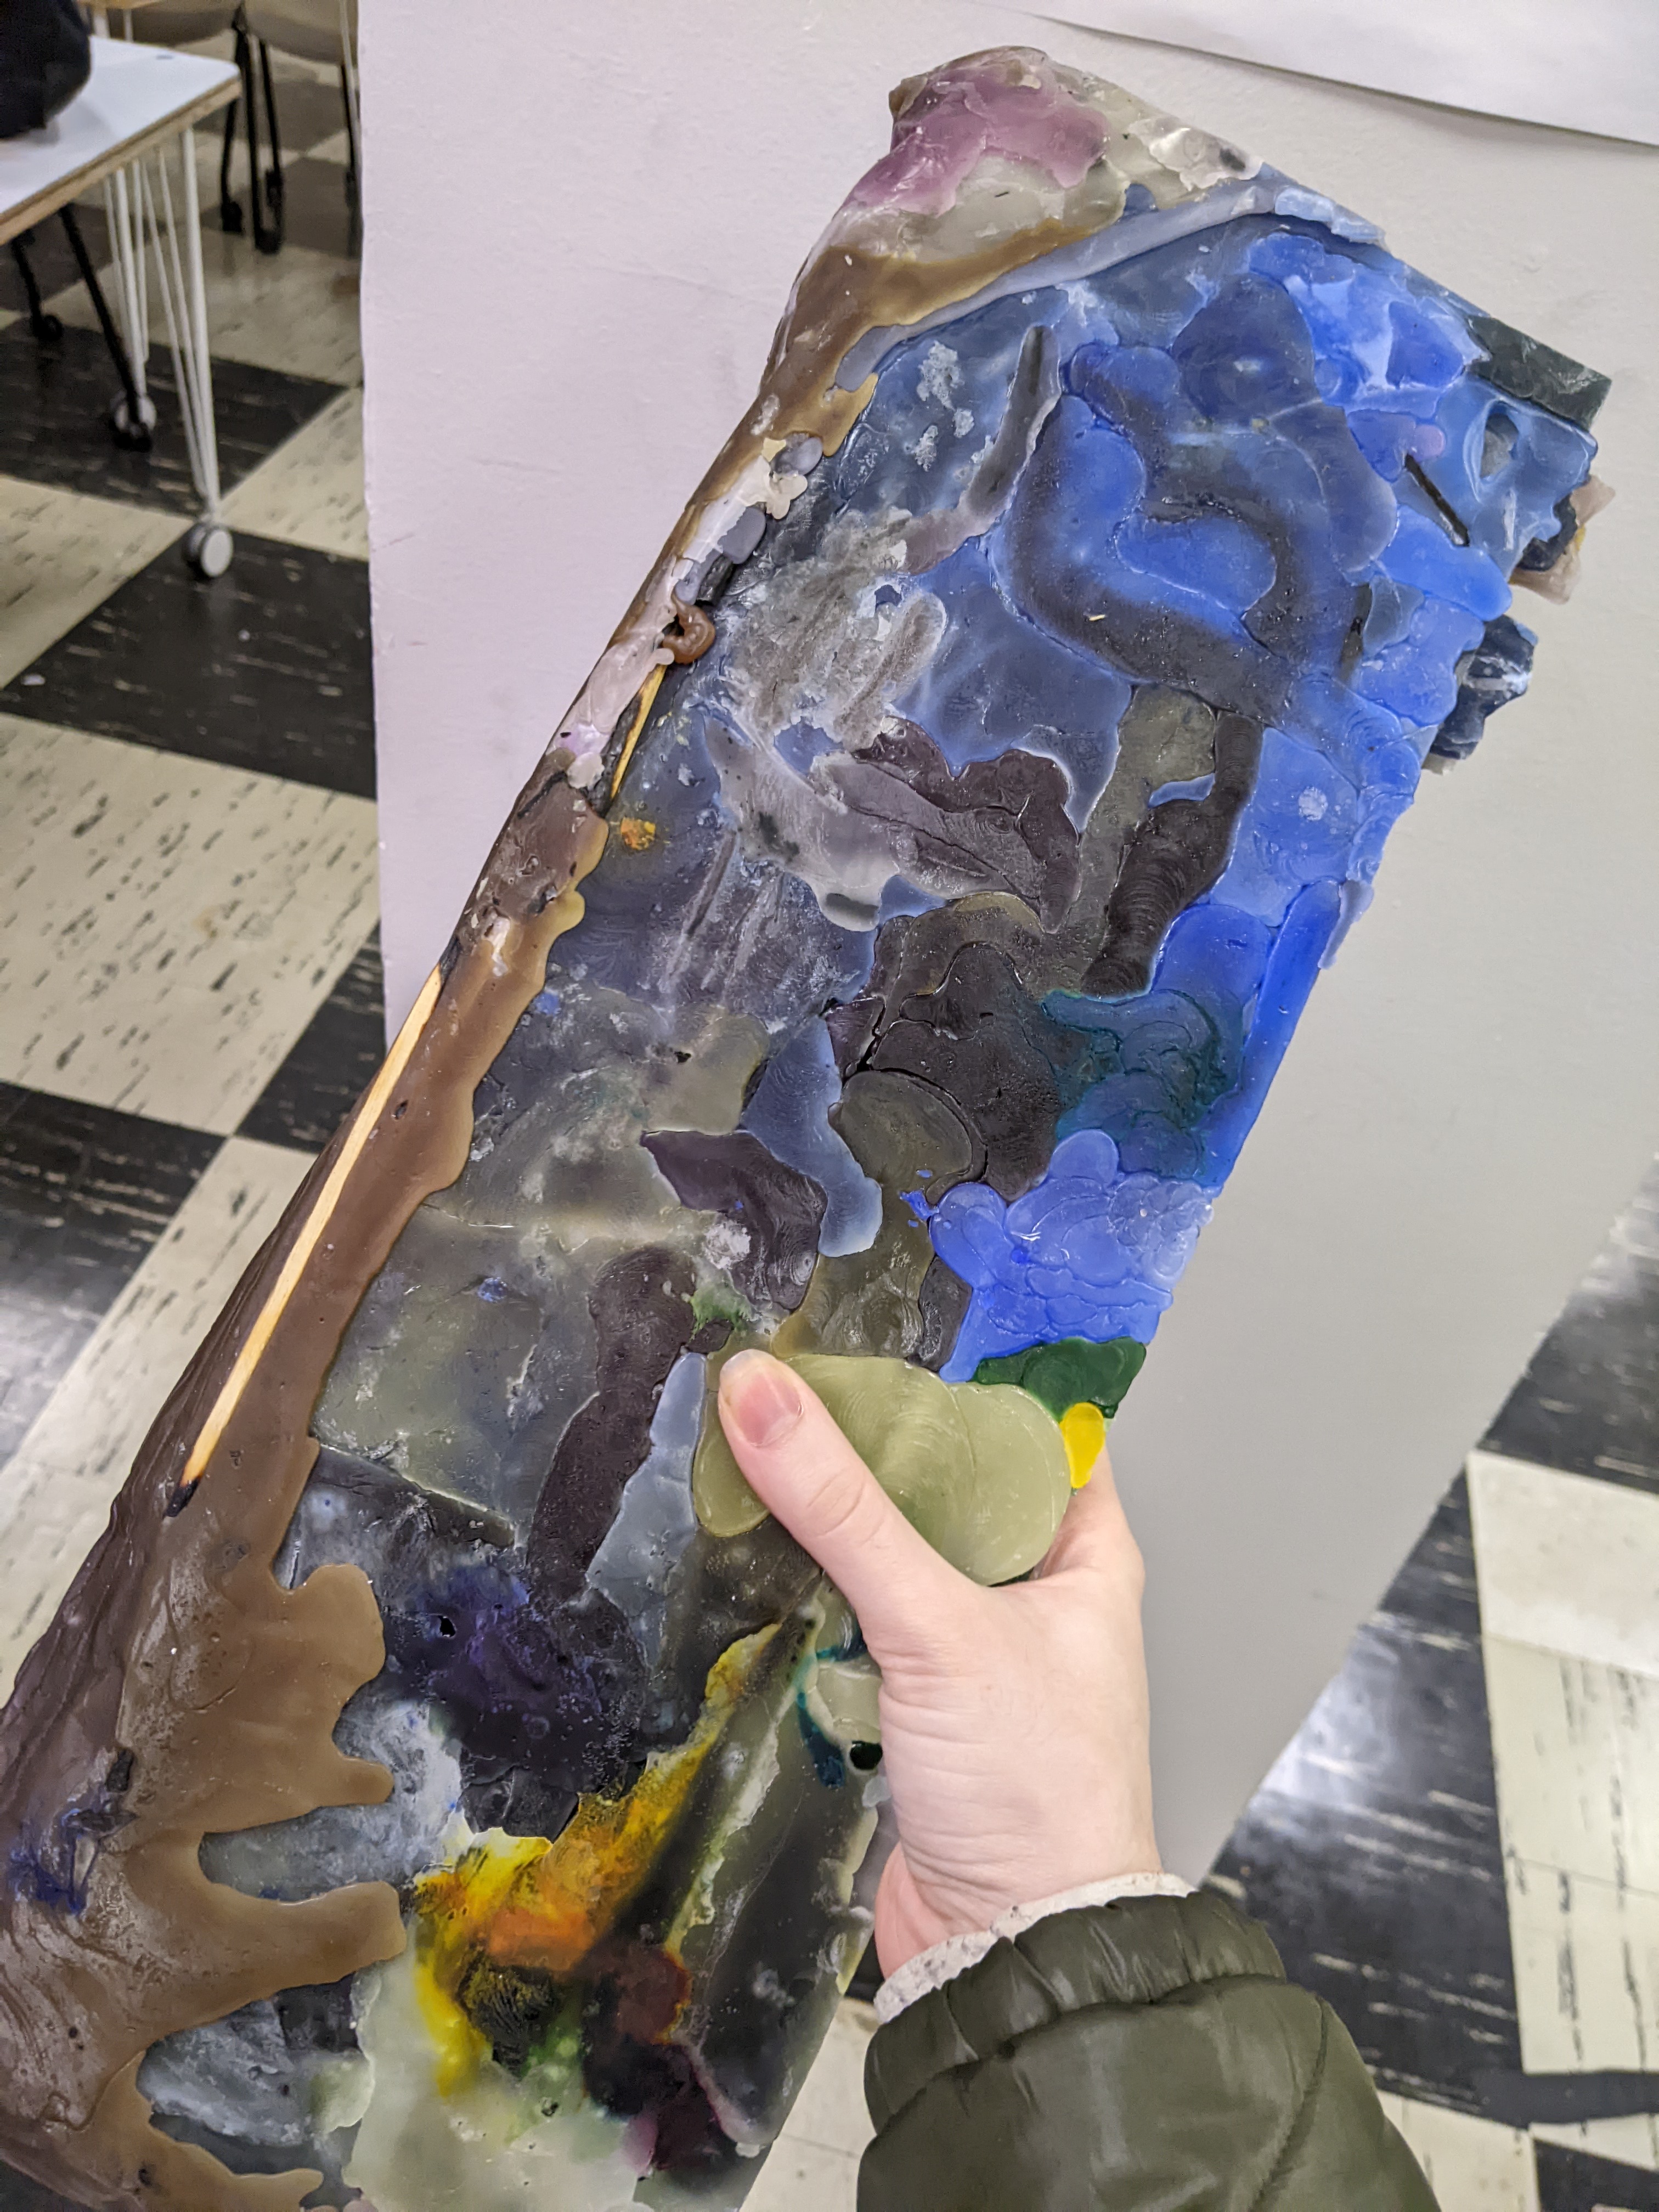
As we began disassembling the mountain's structure, we were really in for a surprise. No visitor had gotten to see it, but as we sliced and unscrewed everything, we exposed these vivid colored sheets. Our melting wax had formed these beautiful splotches and layers deep inside the mountain itself, purely through the audience's organic addition of color onto random candles.
We were all so surprised, and I personally felt incredibly joyous to see that our original project goal of emergent behavior had come about all on its own without any planning on our part. Organic as it should be, and beautiful in its aimlessness.
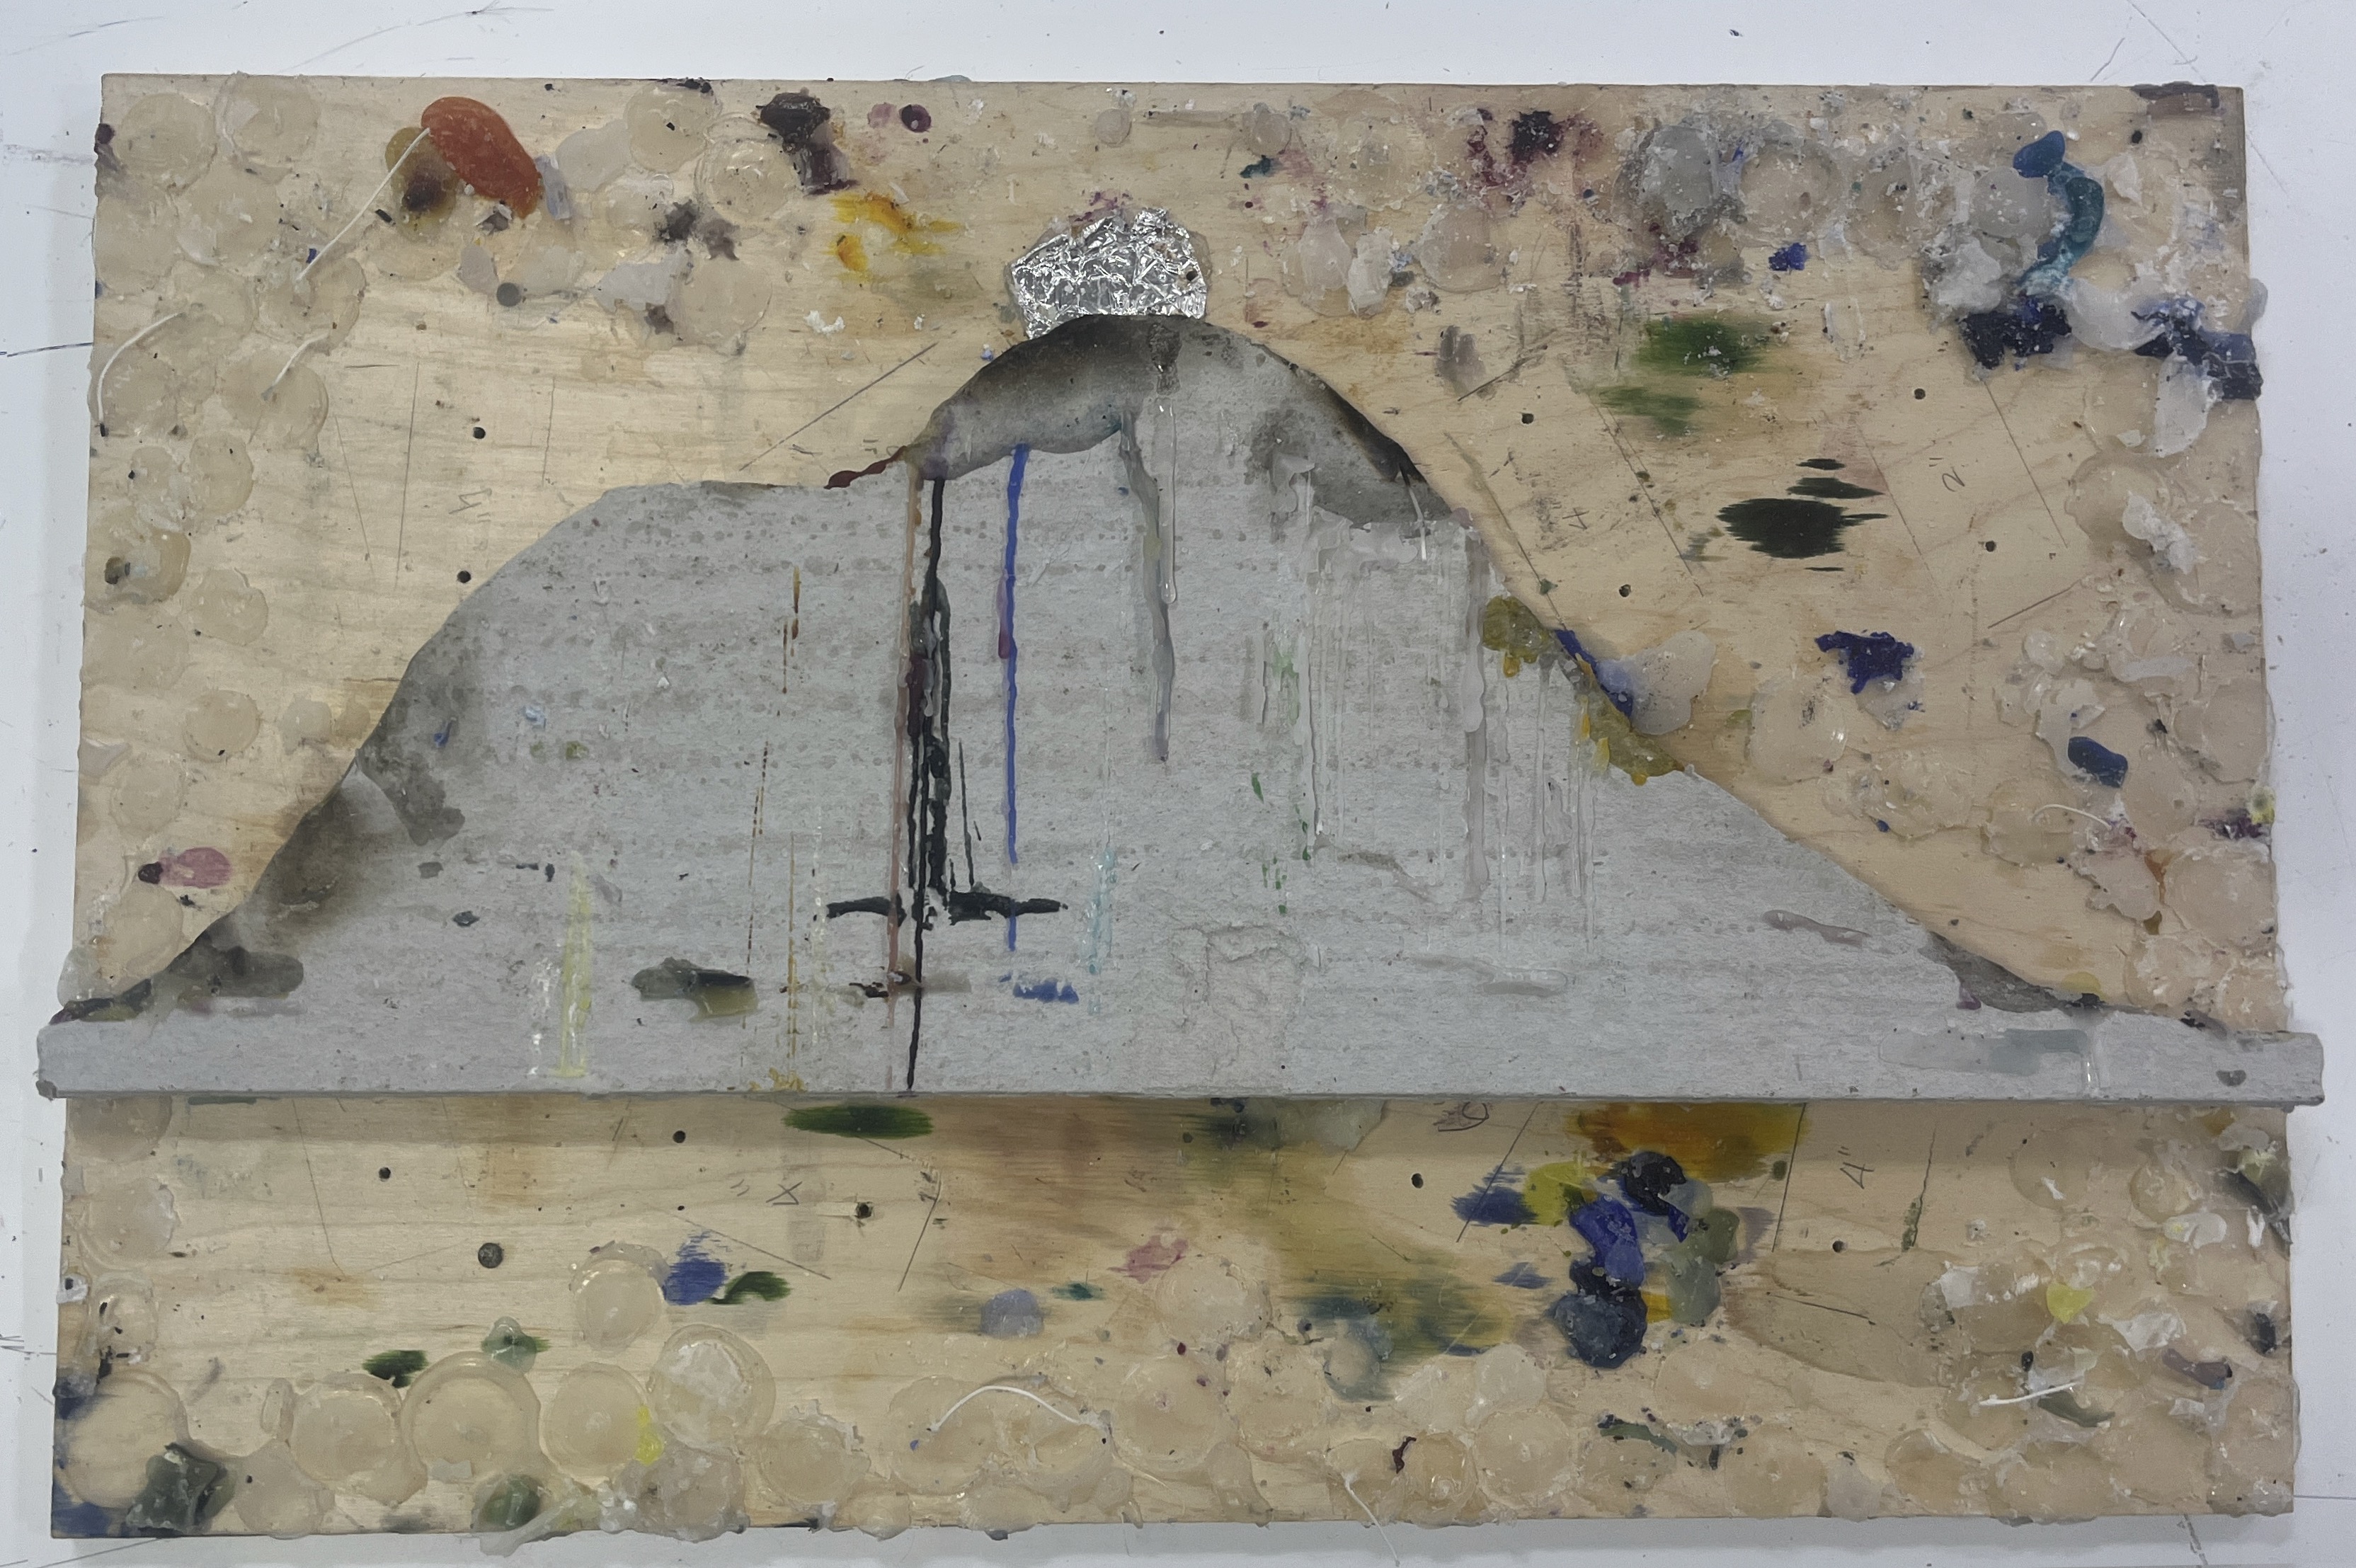
The candle bases with wax filling in gaps, all attached to this central wooden beam
PLACE DYE DISH HERE
Layers of orange, purple, blue, and green are left in cylindrical shapes, hugging candles that are no longer there

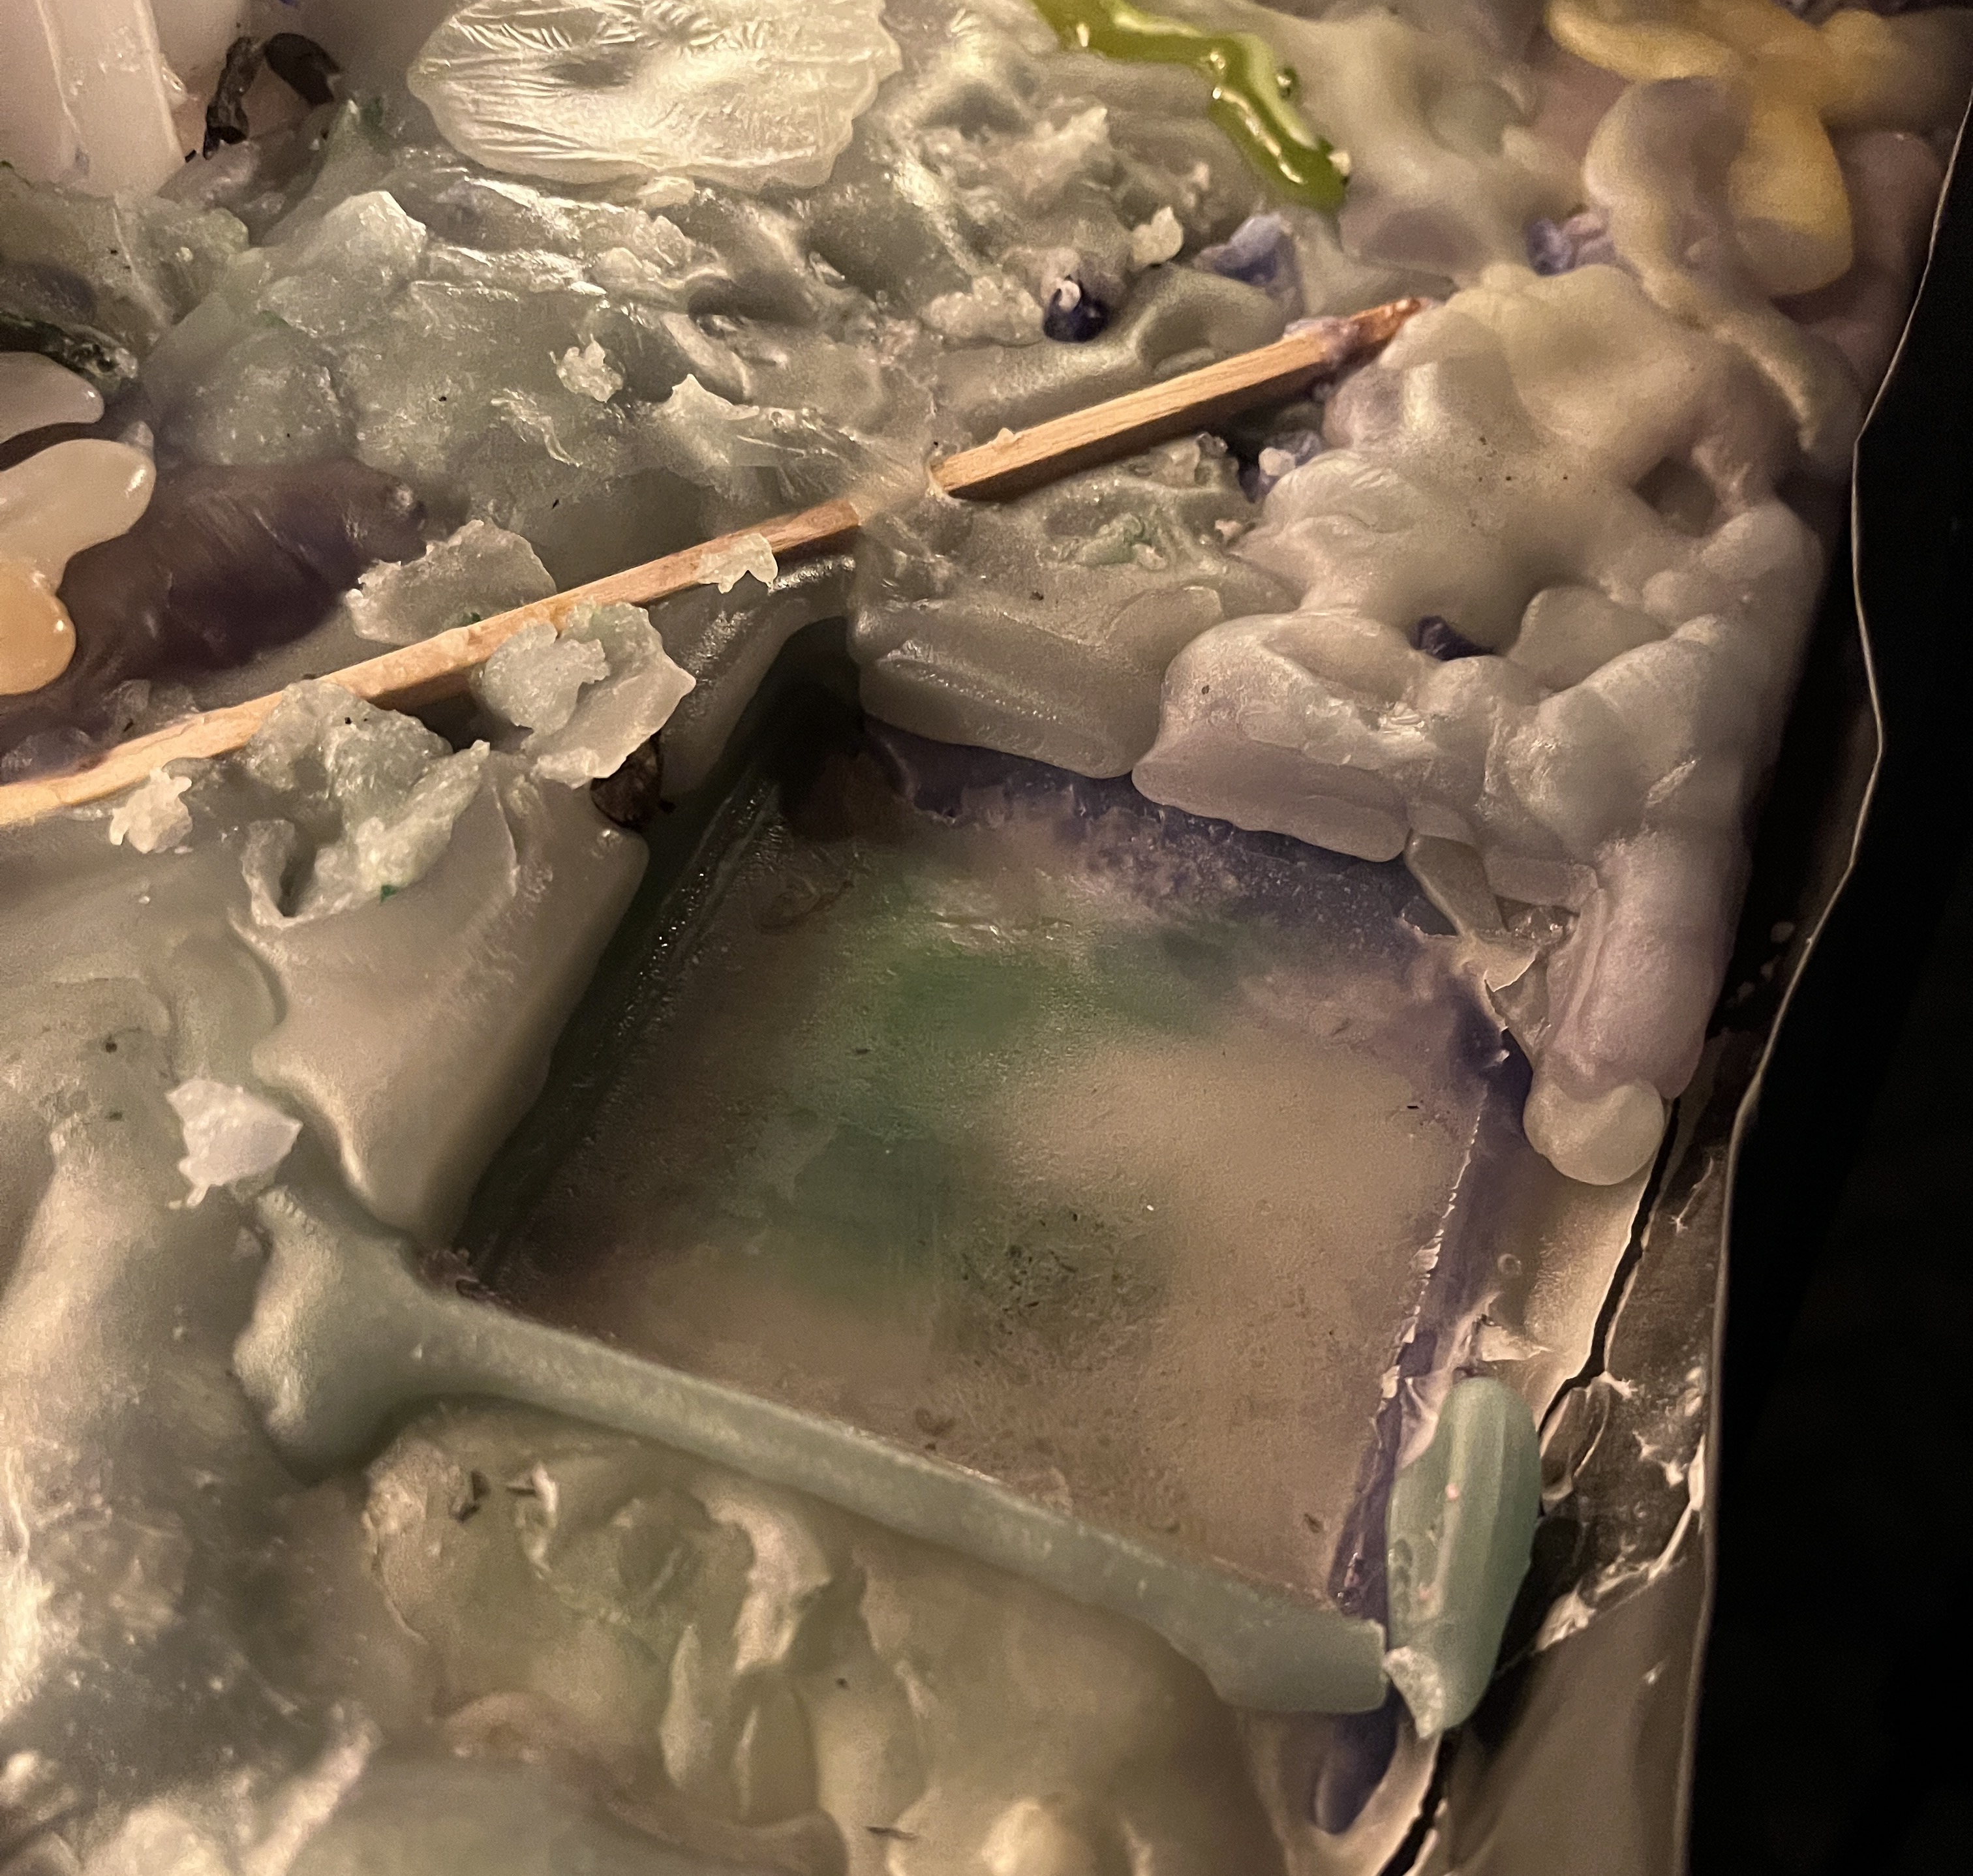
Ridges and texture left by the wax's rapidly cooling surface, puffed up by the more molten wax below

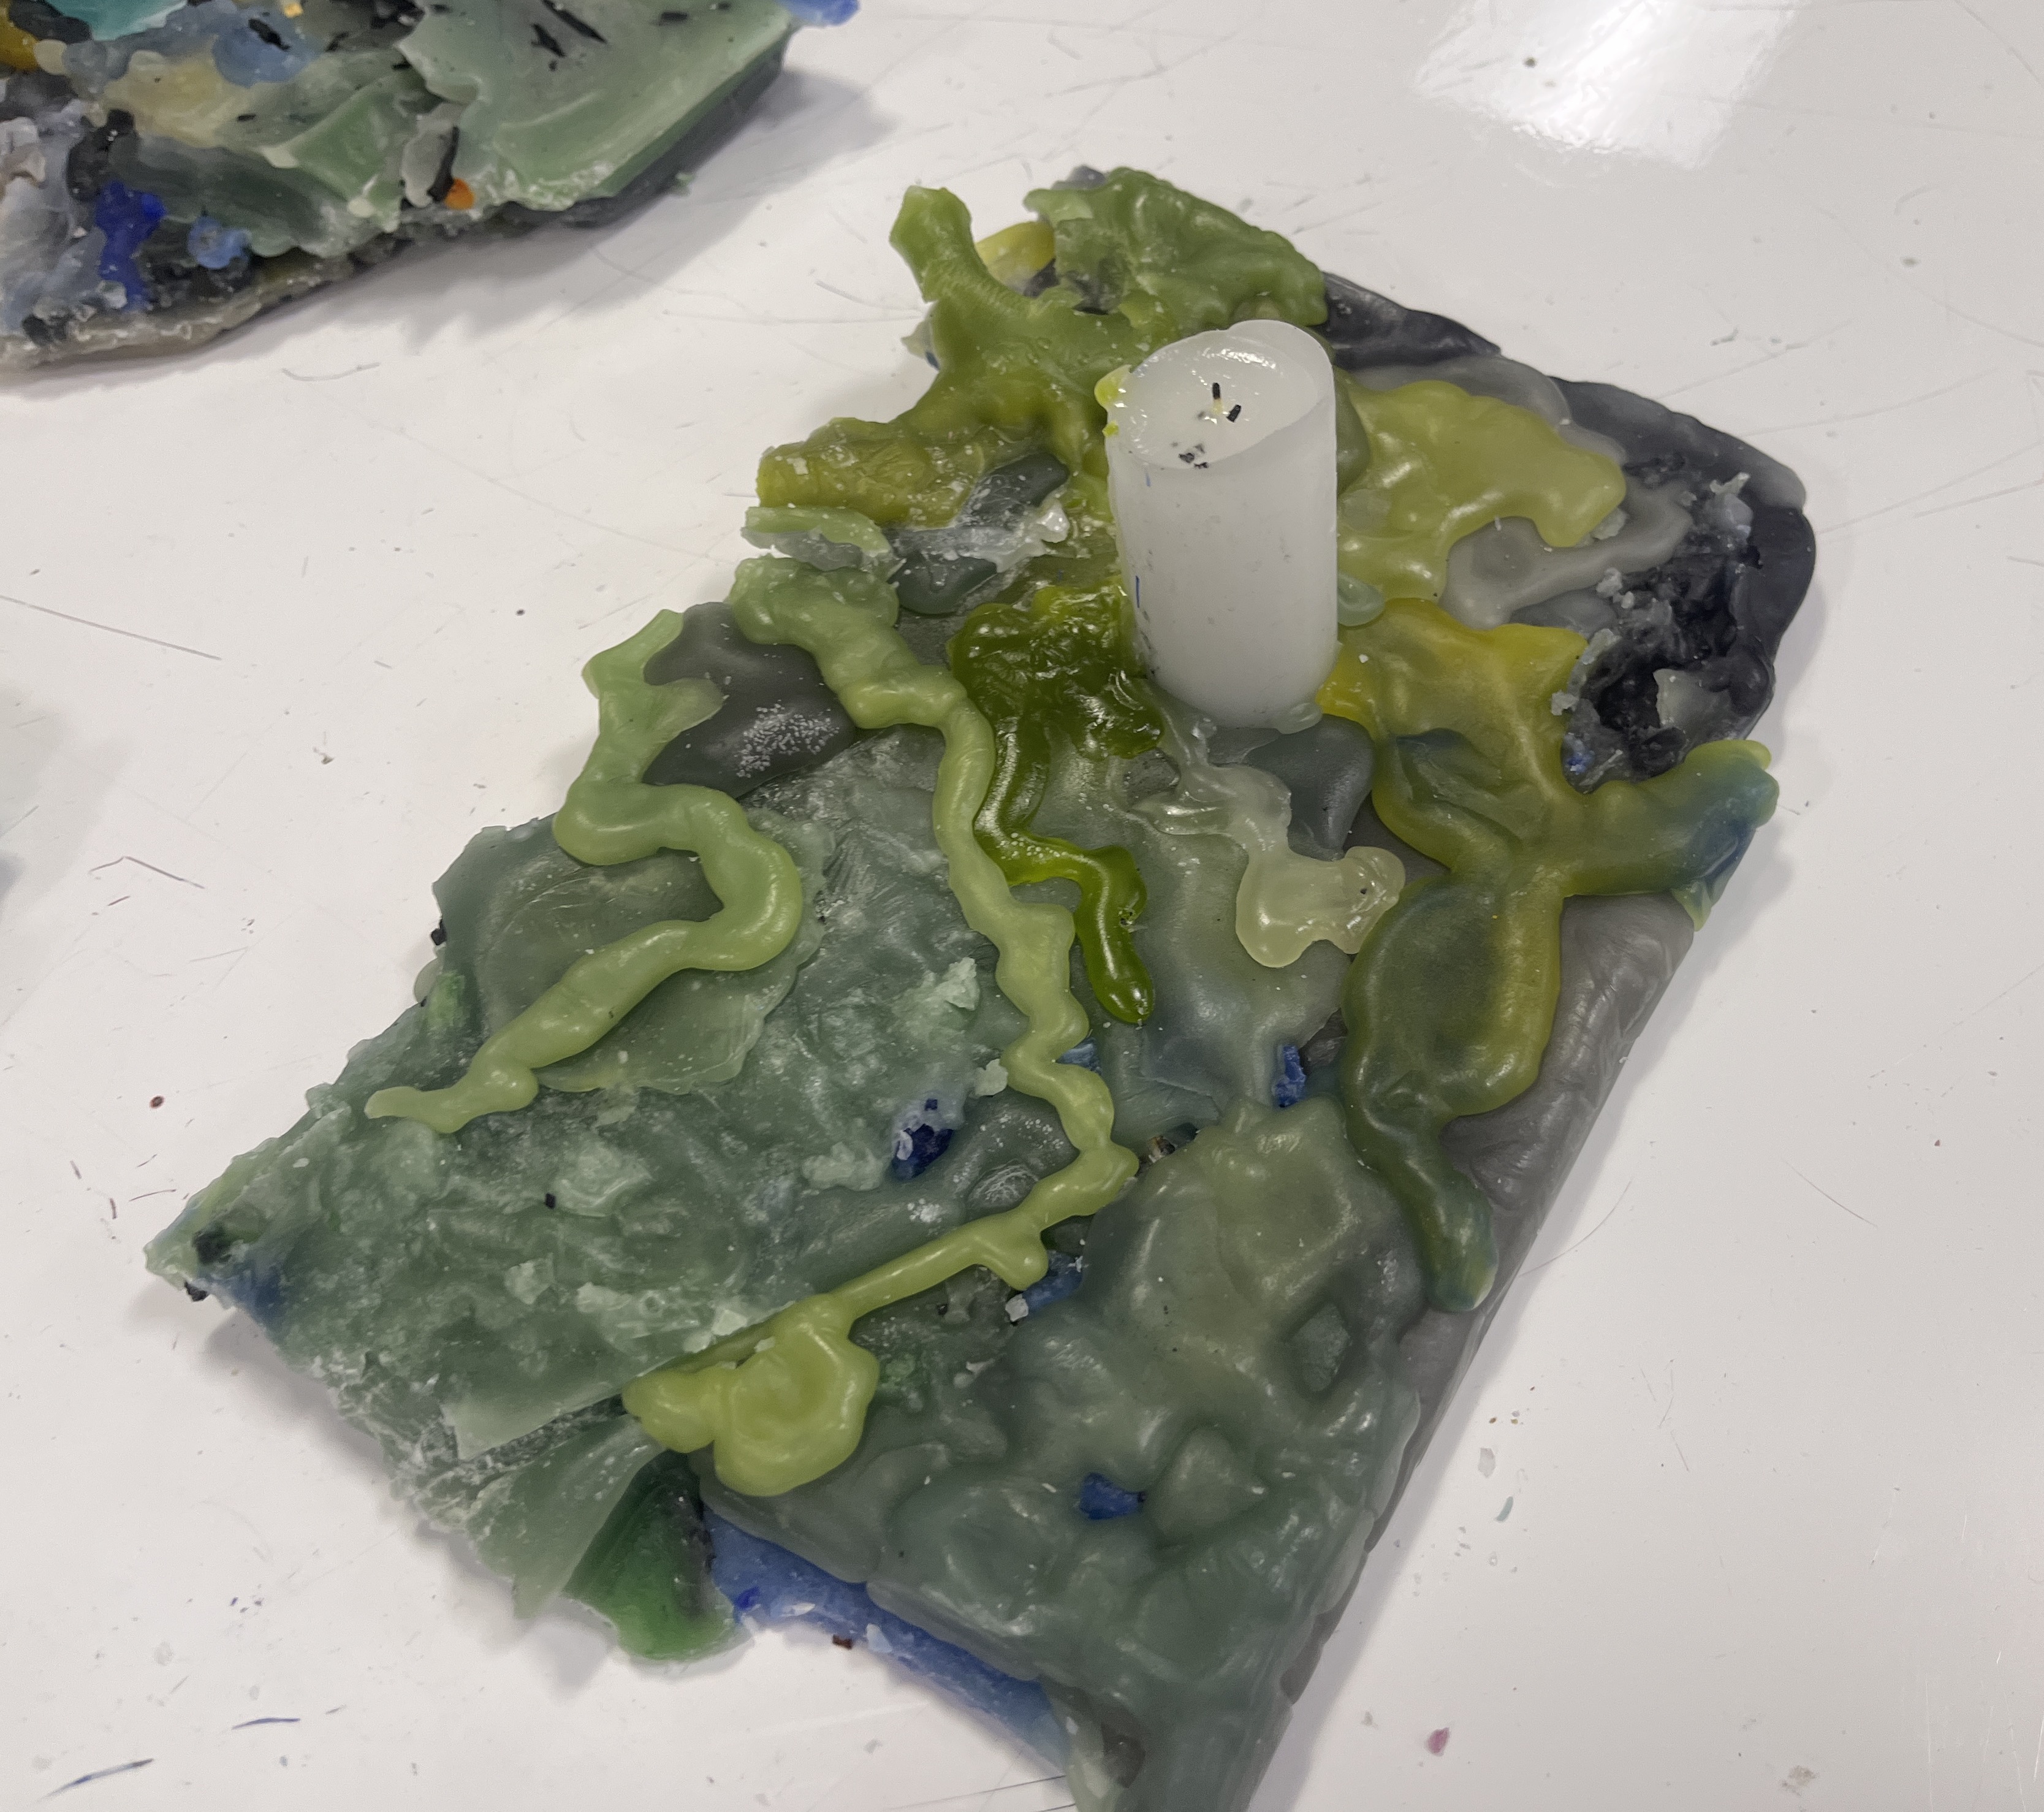
A lighthouse of a single stray candle amidst sprawling tendrils of green
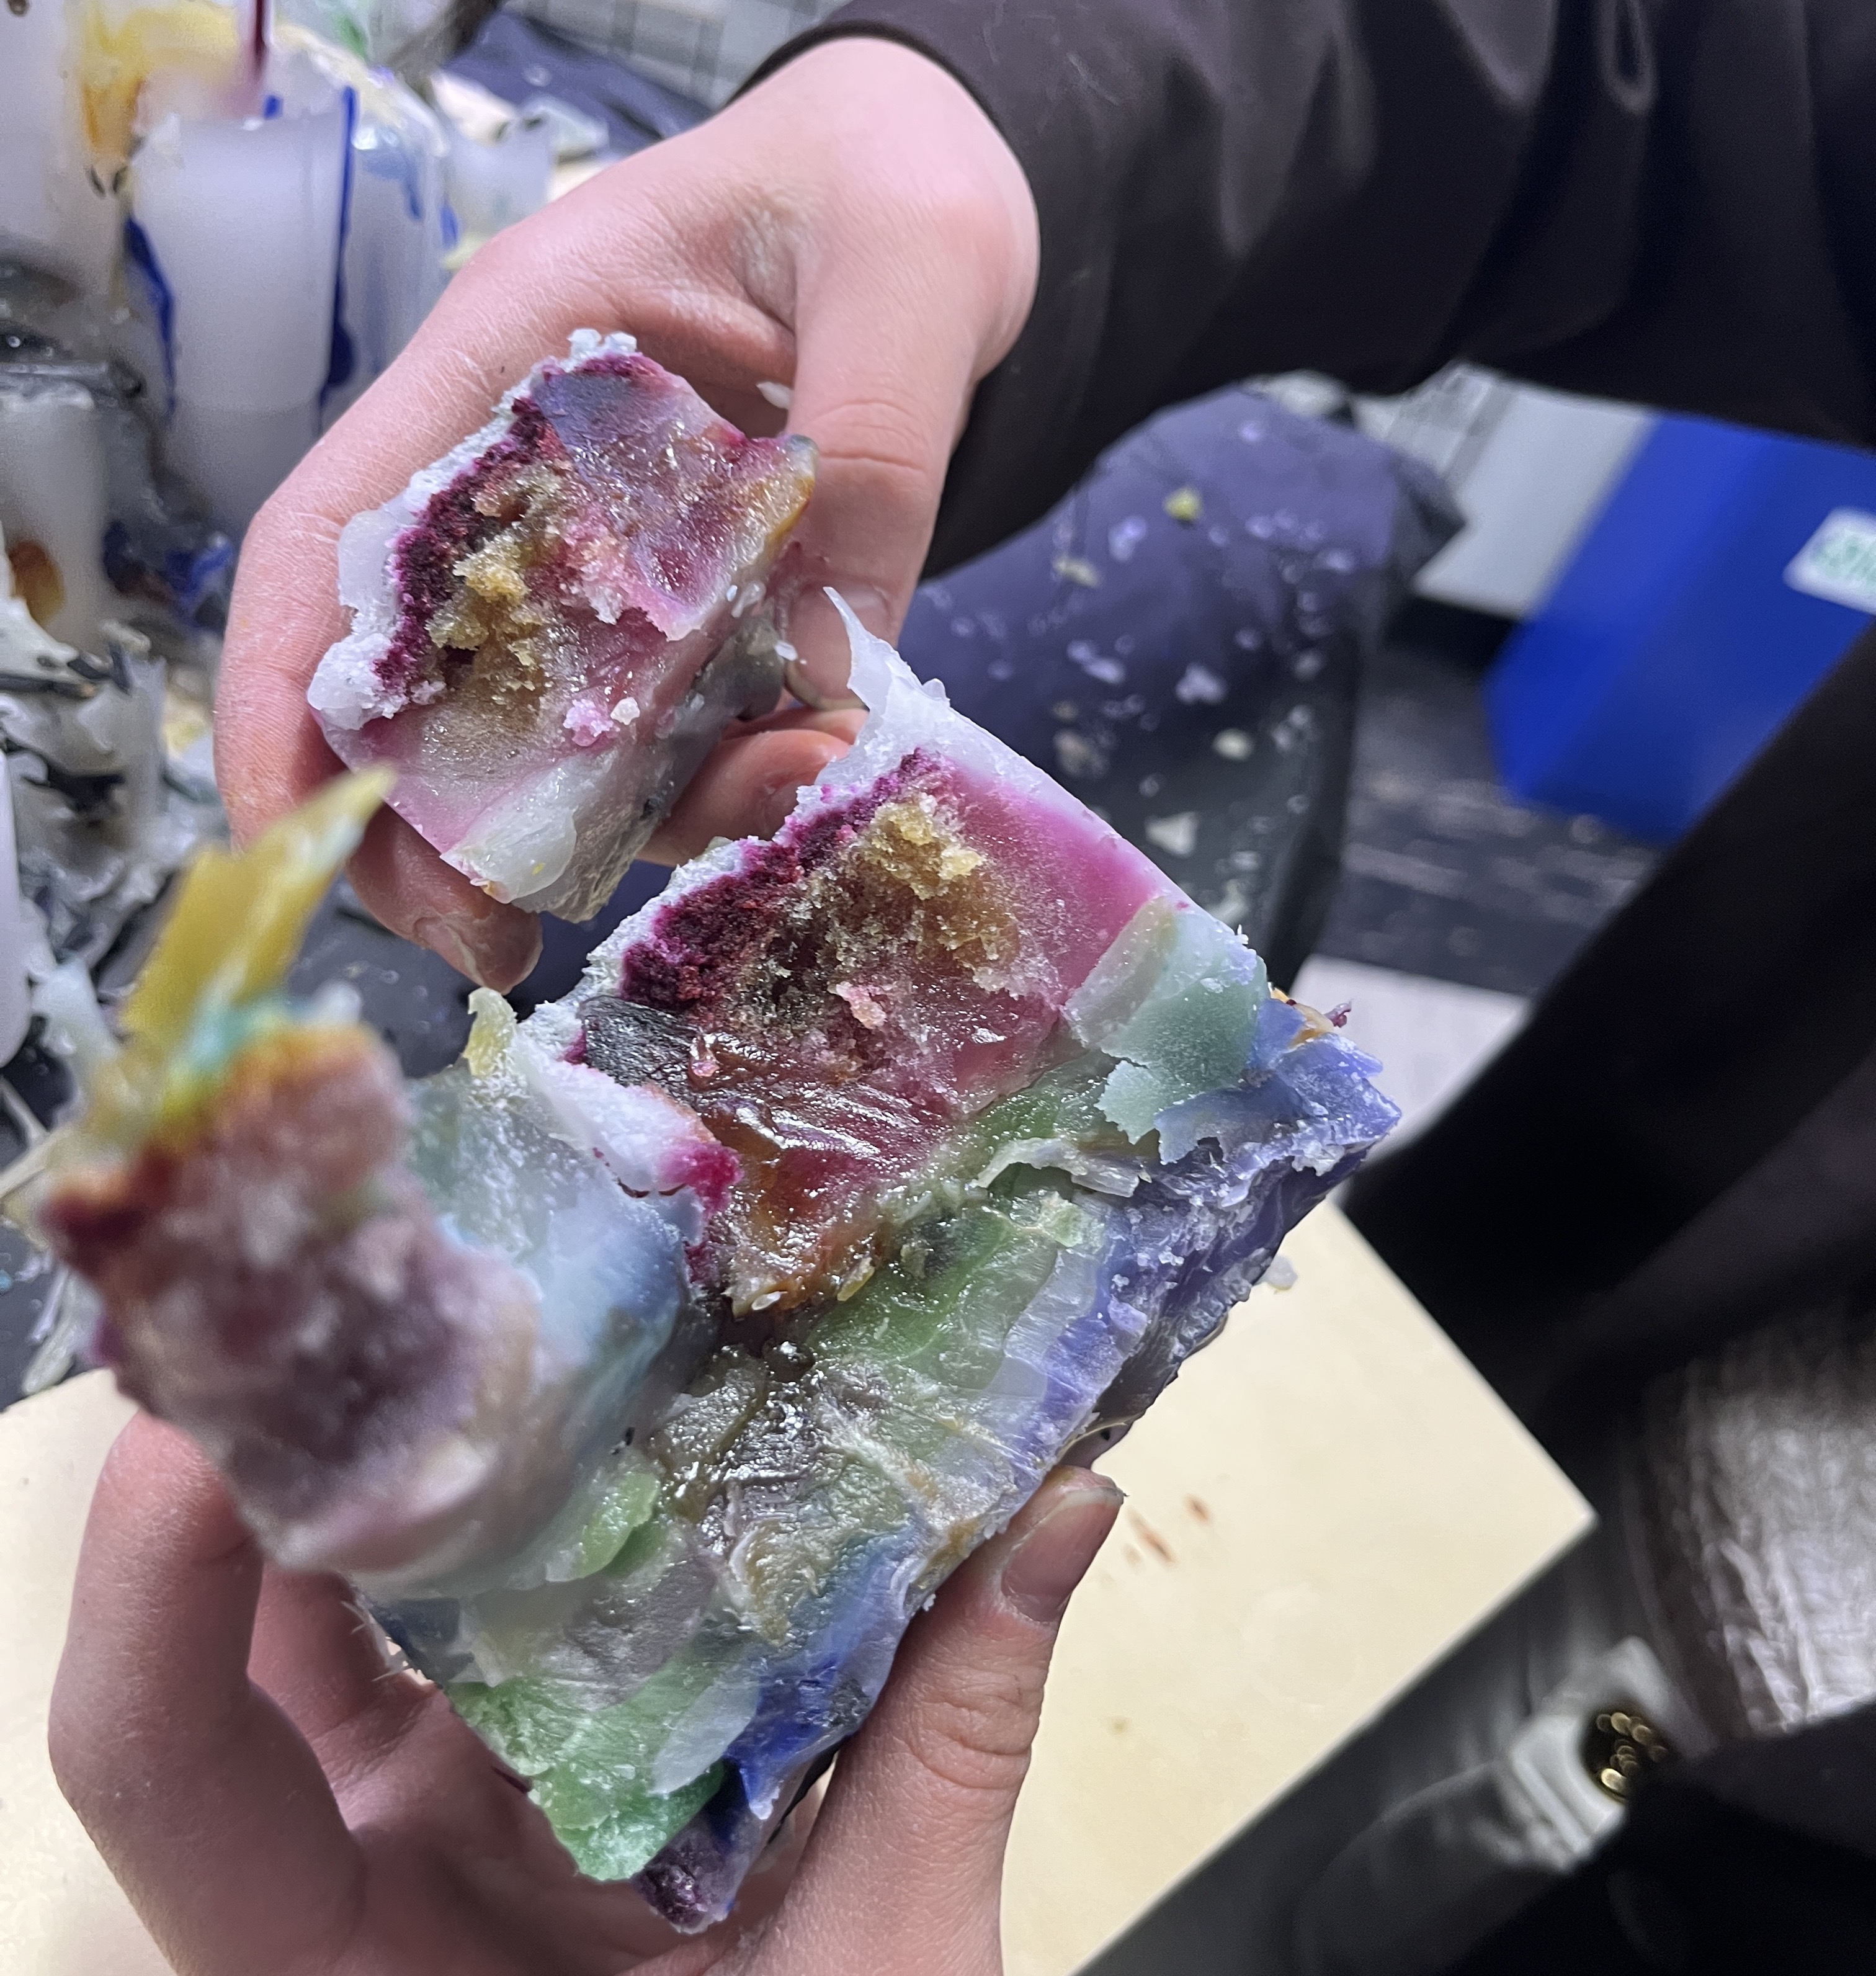
Post-Disassembly Archaeology
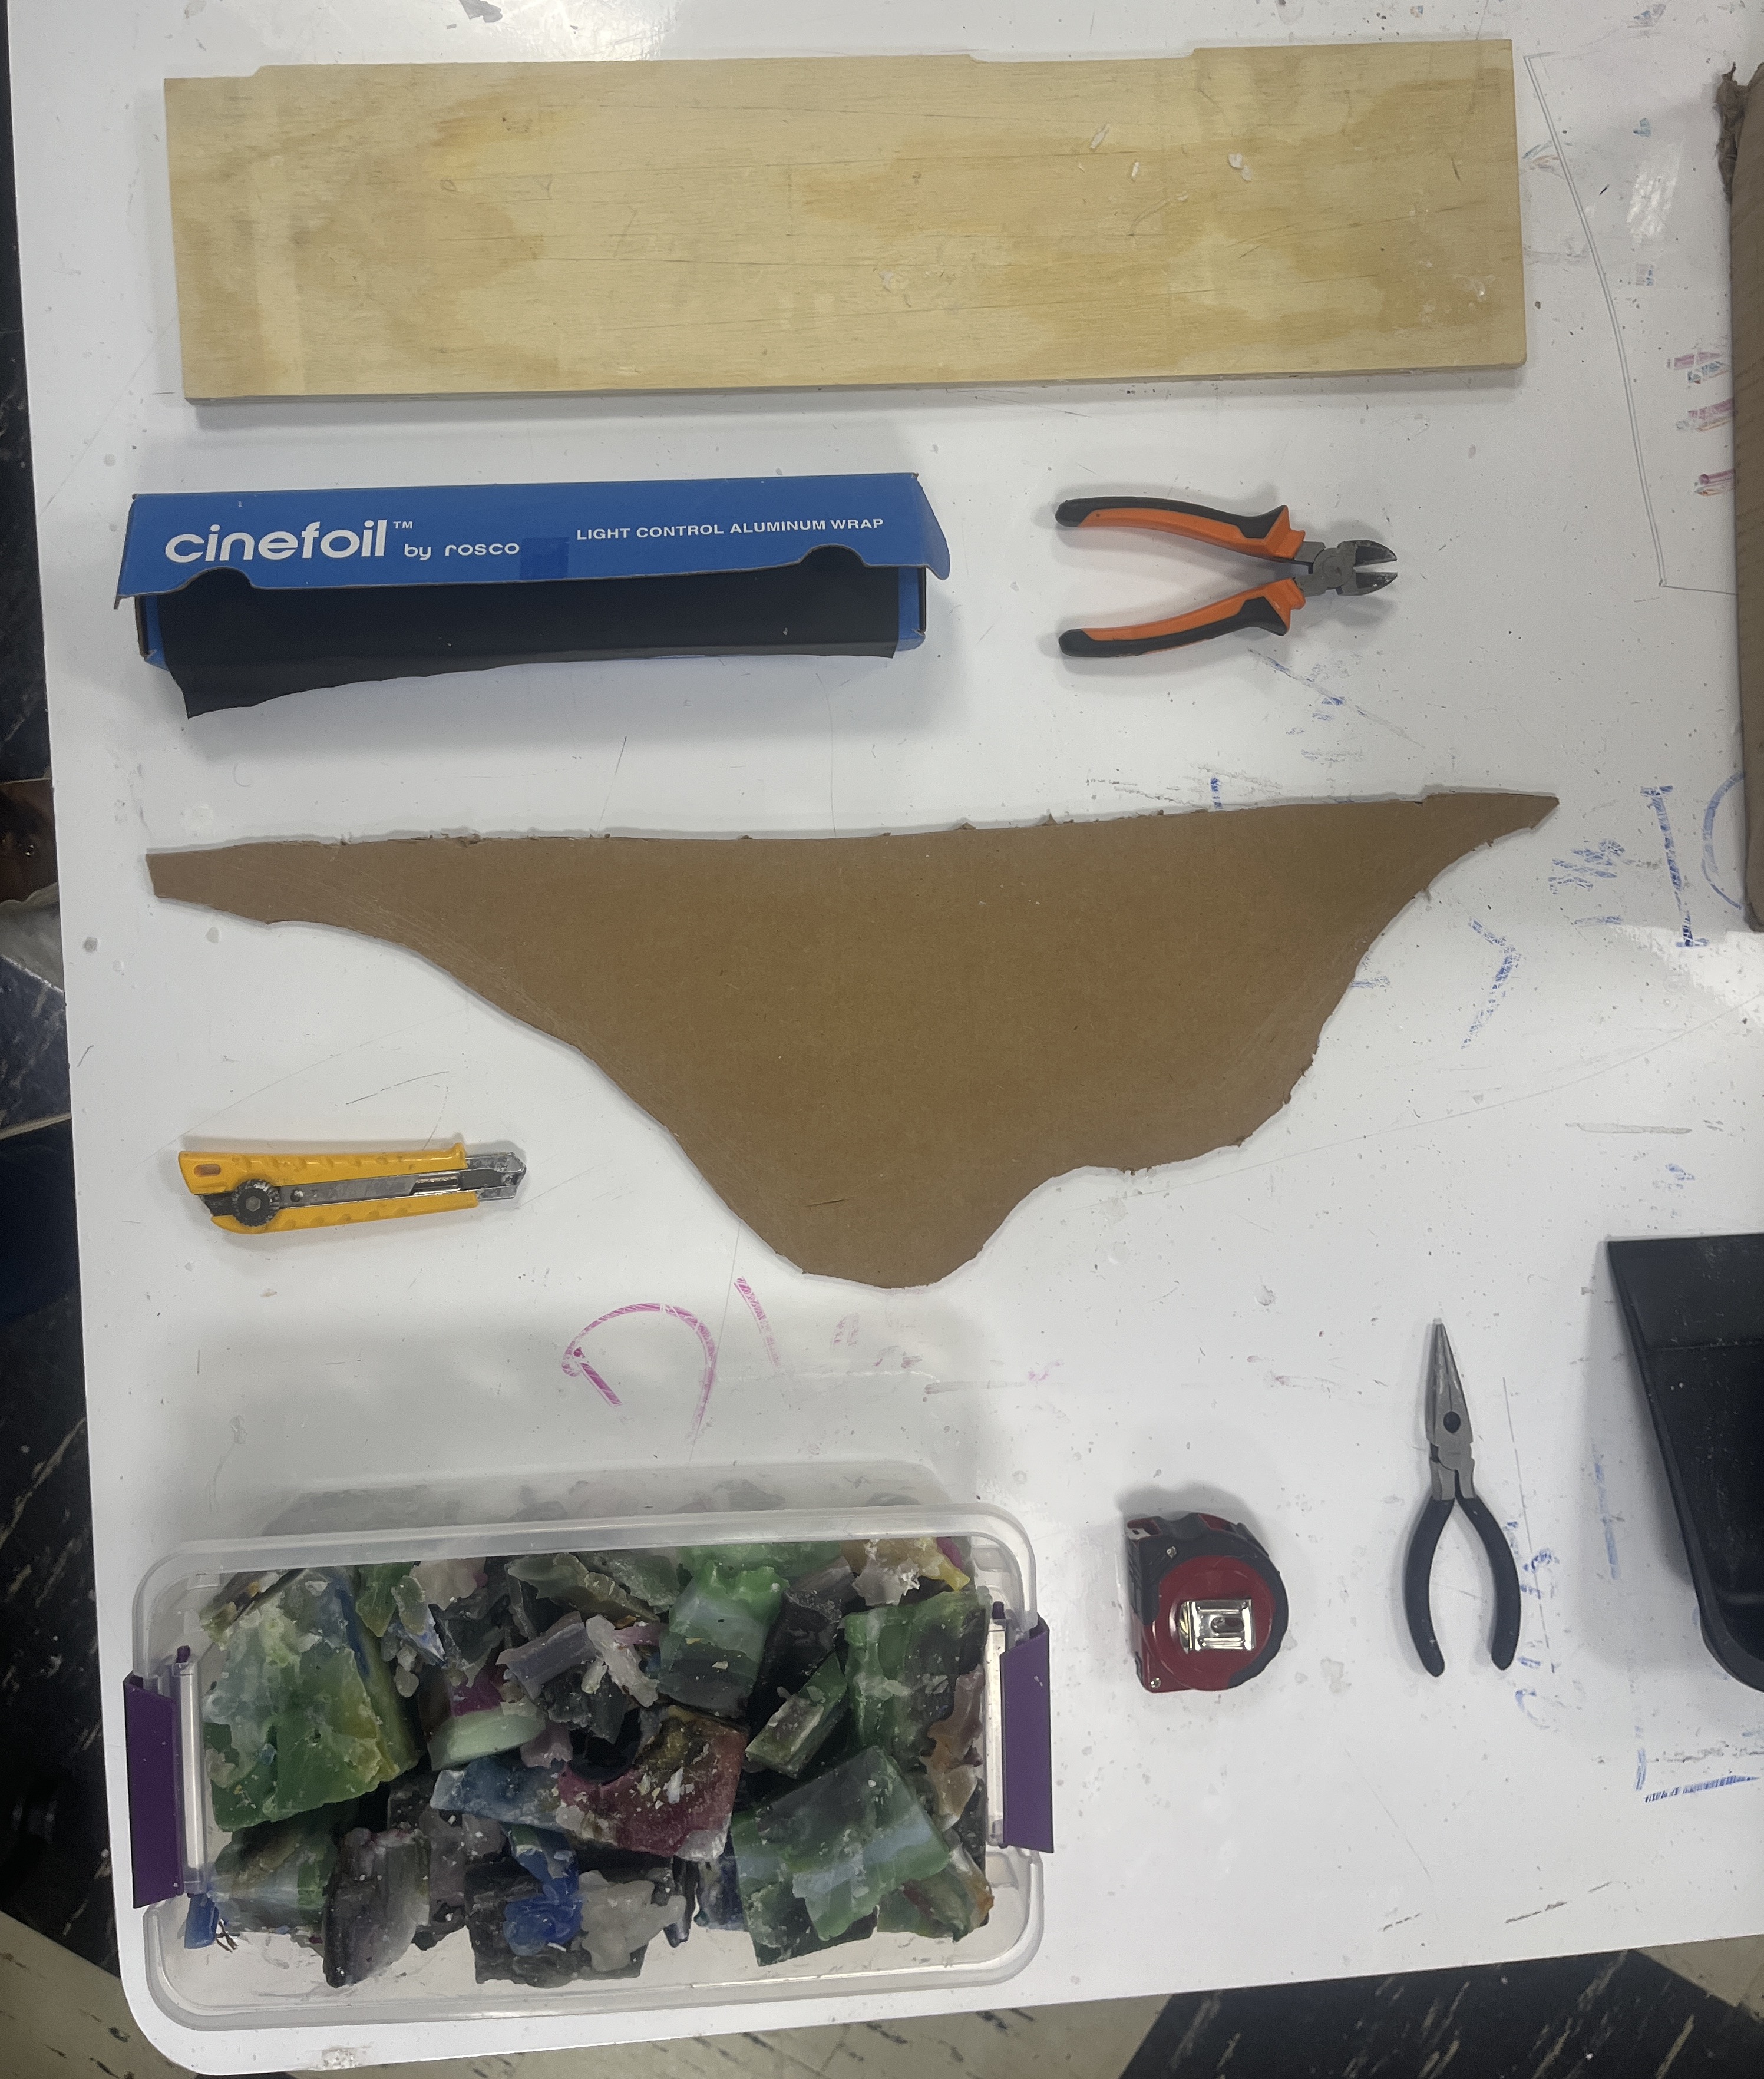
In elementary school, I always wanted to be an archaeologist. I loved digging up stuff with rocks and sticks, and finding other cool scraps in the ground. I knew that cataloguing played a bit role in the daily life of an archaeologist, so I kept many samples of rocks. Some had iron inclusions, a few smooth marble, others grey and sharp. This process felt the same way.
We took big chunks of wax and extracted pieces that looked interesting. I took way more photos than my teammates, but I'm assuming that's because this is my first public art endeavor, and they are jaded from doing it a lot.
Beyond the first inch, the wax still hurt to touch, and felt soft under my hands. Big blocks were moldable like putty.
Tools you'll need: cardboard cutter, sample bin, black aluminum foil. ABK IYKYK
The side wall placed flat on the base board after all the wax has been removed. Wood stains and hot glue are the only evidence that candles once stood here proudly
Select pieces volume 1. Large chunks from the edges (rounded corners) give an idea of the waxy puzzle that once occupied the land
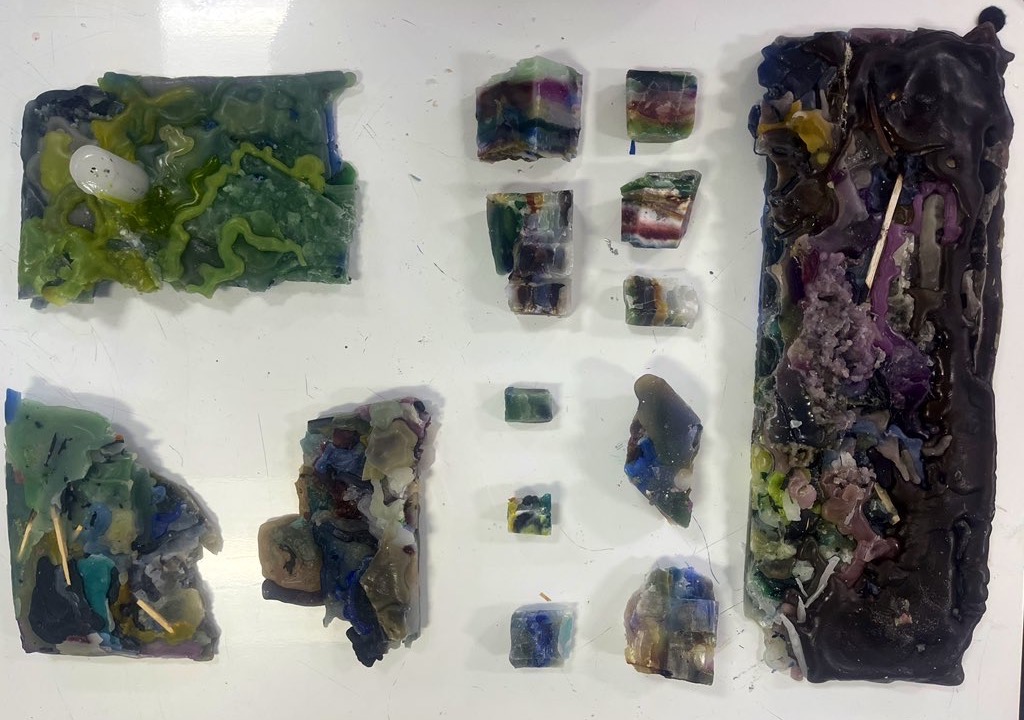
Closeup on the smaller pieces. Big fan of these, some looked like food while others just displayed a nice lineup of color
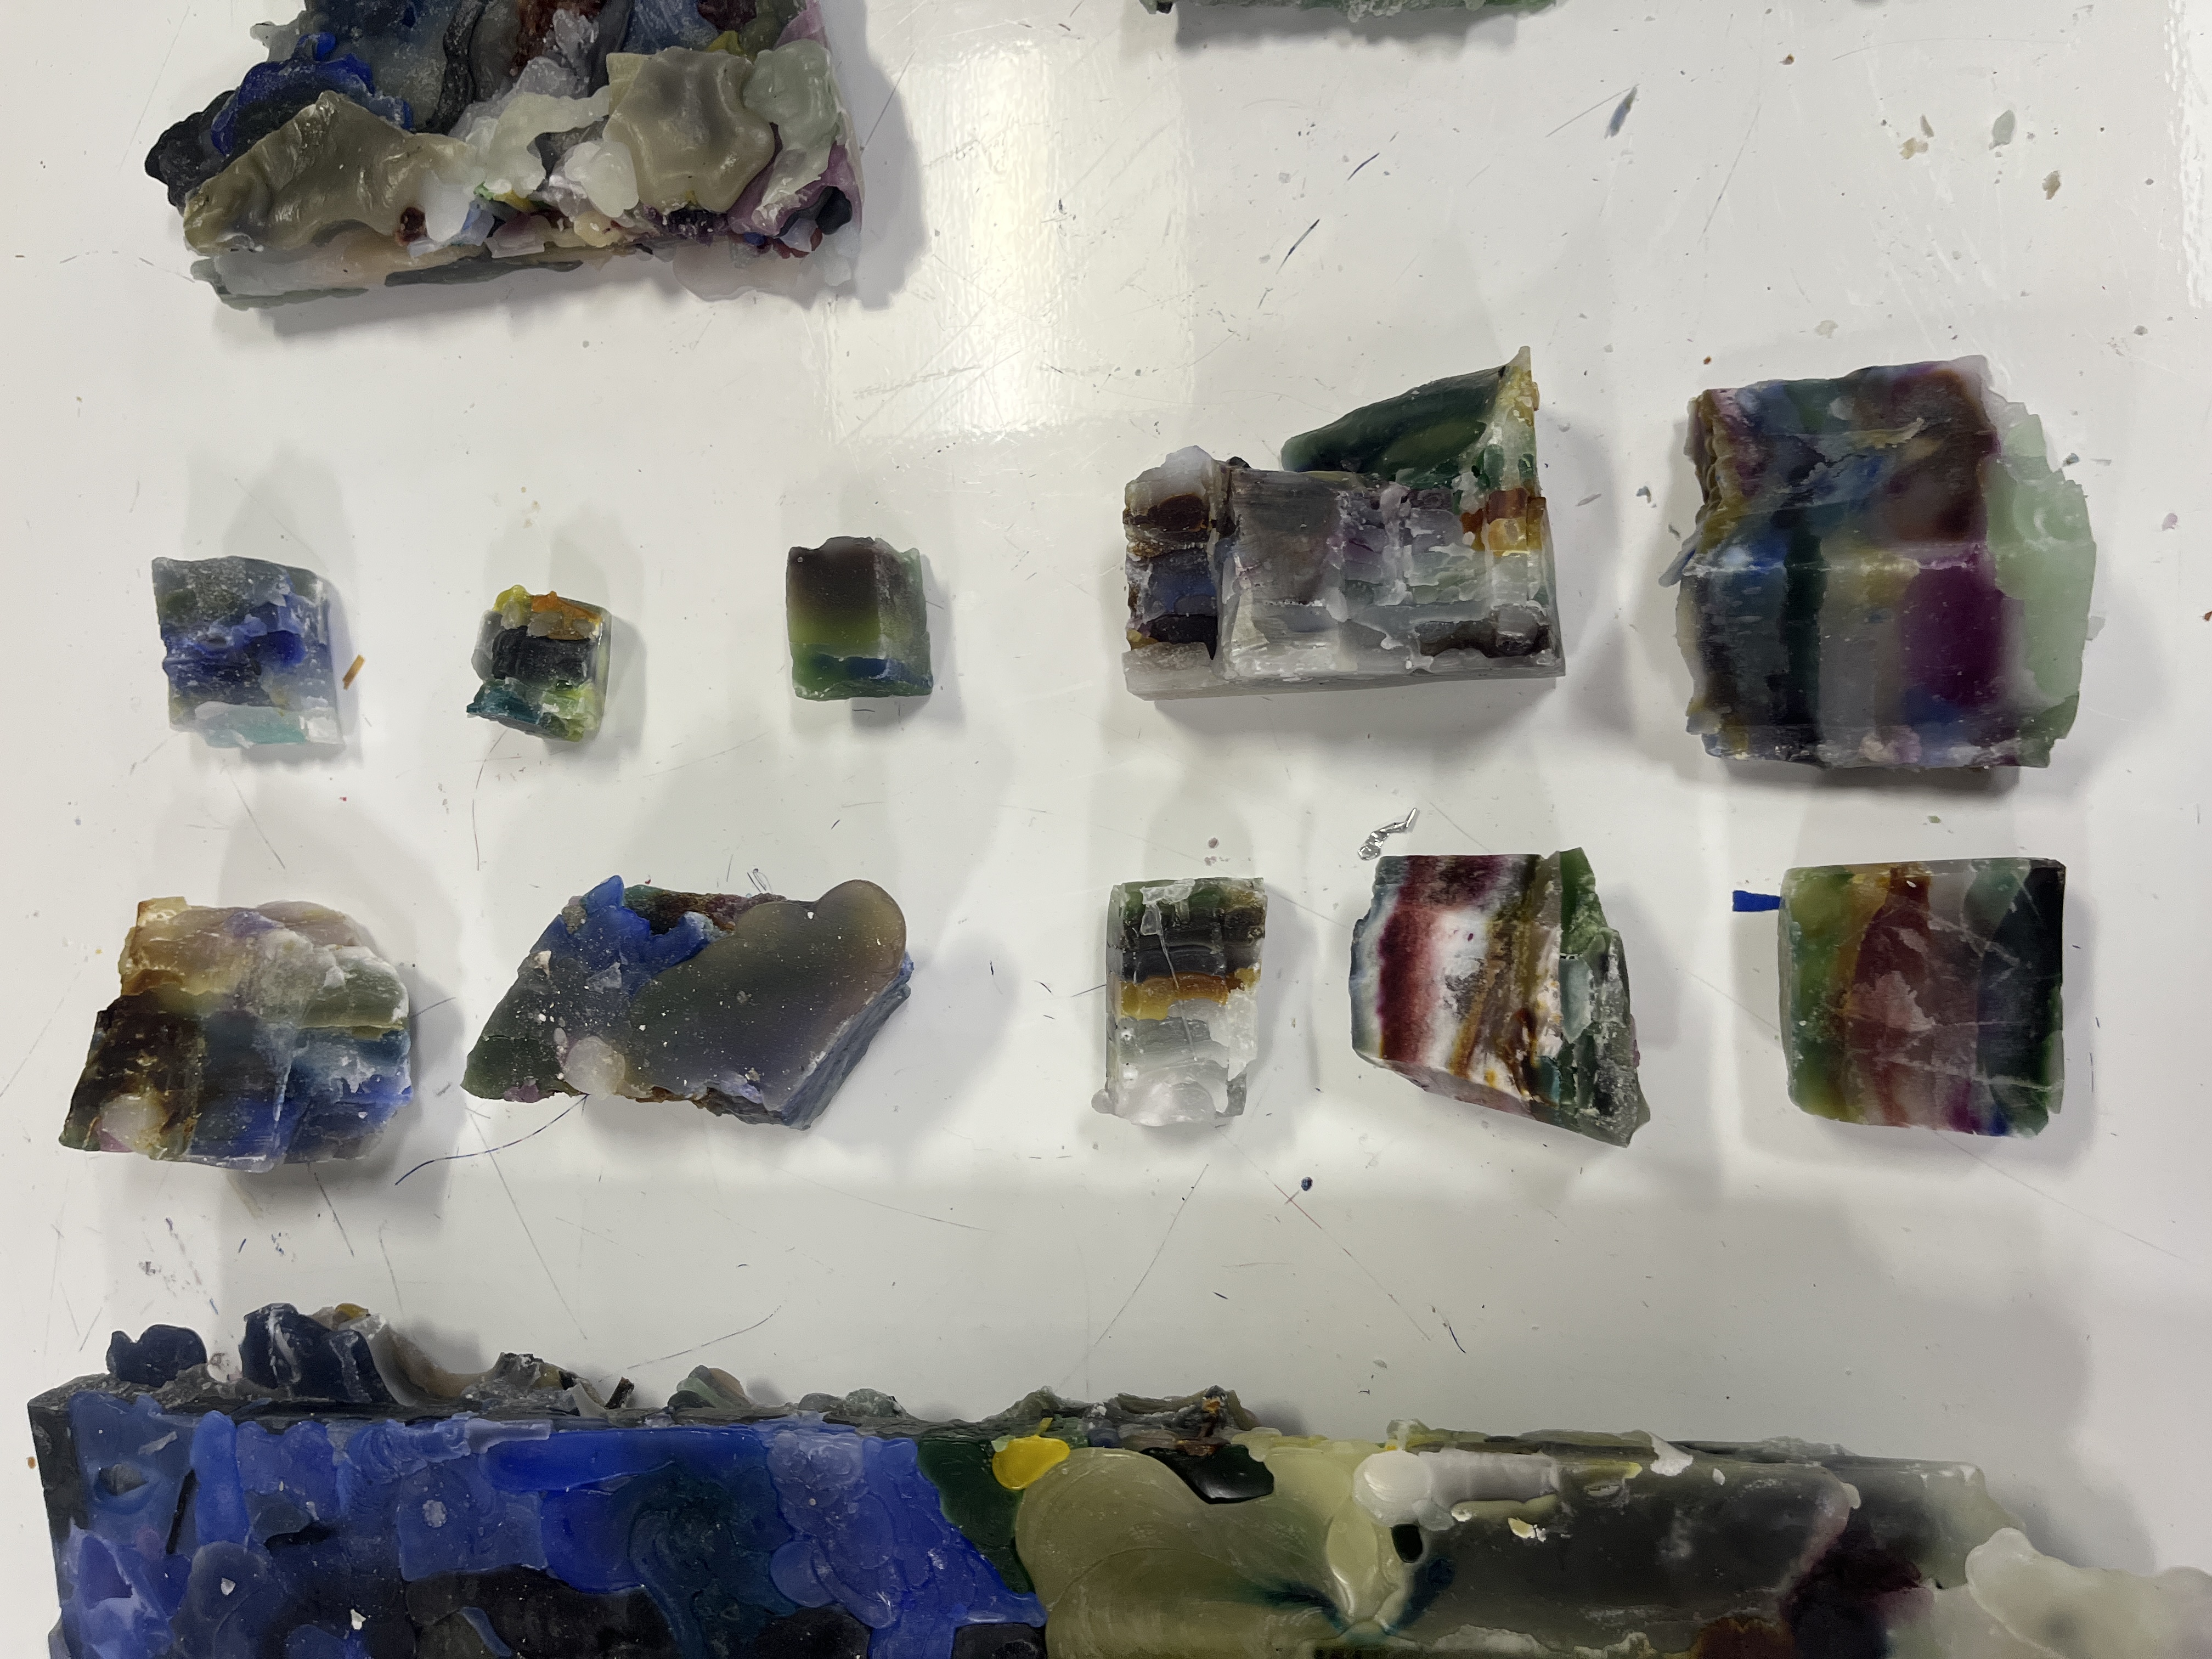
A few chunks resembled food, this brown and red bit looking like a slice of raspberry cake
Underside of the purple bit, with a lot of shades of blue in one patch.
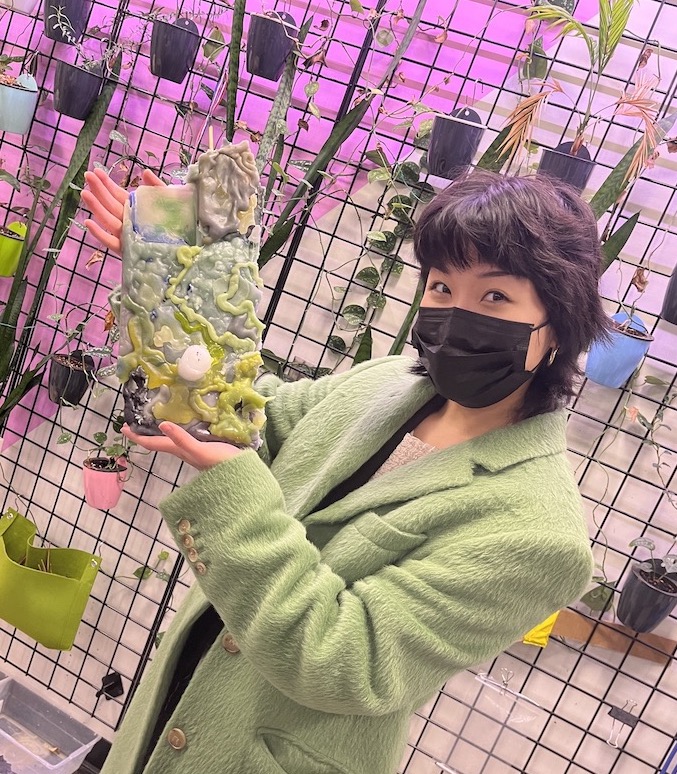
Green Lighthouse (2022), wax and wick and wood
Overall, a thing of great beauty that I'm glad to have brought to people's lives. A great night, great pictures, and a great quantity of random, beautiful bits of wax coming from the collective action of everyone in the audience that night.