Setting up Electric Tables v0.2
Published April 22, 2022
Hello everyone! I've recently been thinking about how much time I spend on my computer, and I've gotten gotten into activity logging so I can reflect on the countless hours spent on here. There are other tools out there, but many are manual and many are paid, and I just can't be bothered with either.
Browser as a Memex
Screenshot from my Timing dashboard, back in my period of riches
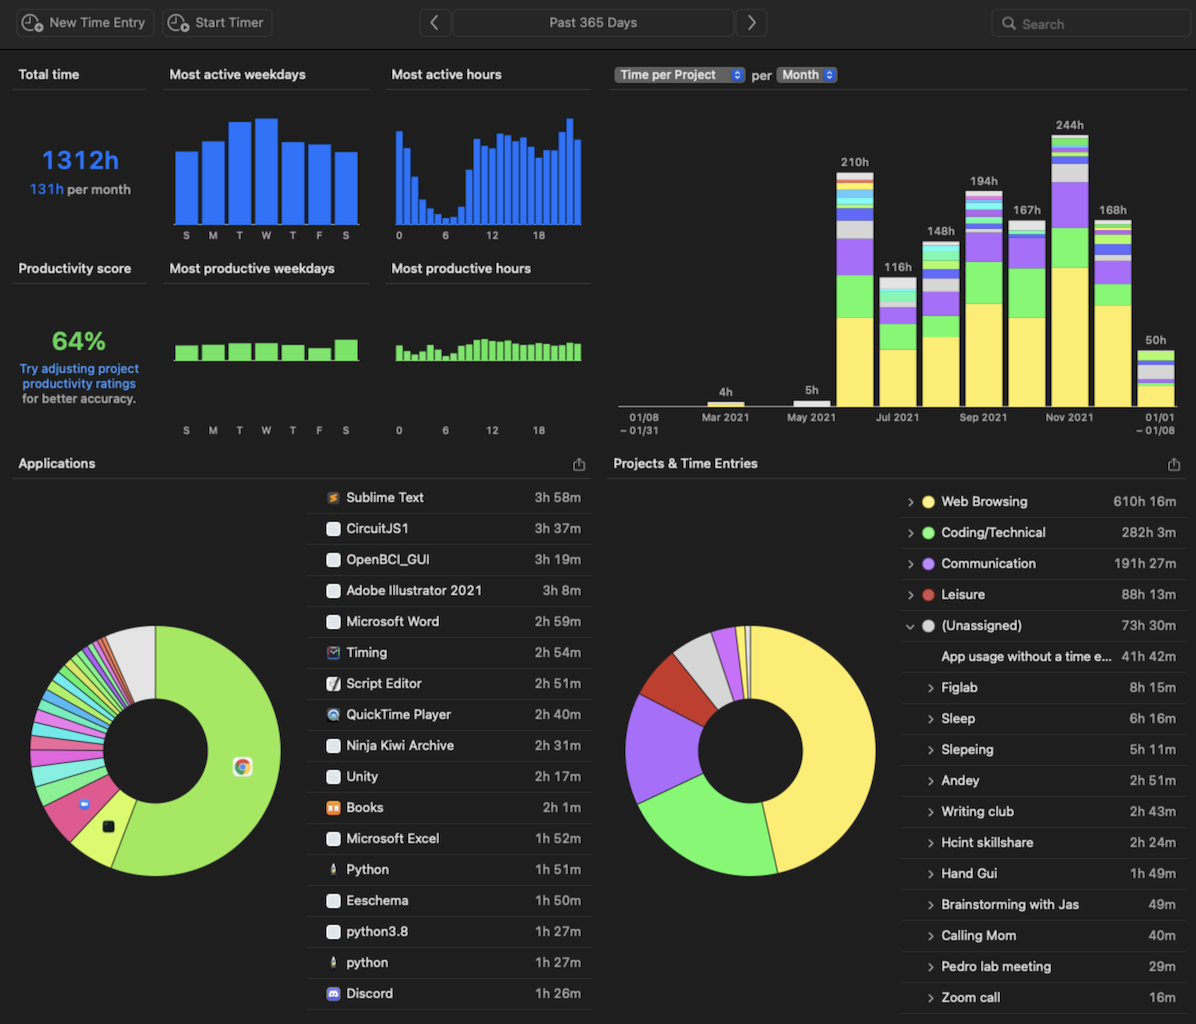
Over half of all my computer activity happens in the browser, so I've decided to start with indexing browser activity automatically.
Tom Critchlow recently released this great bookmarklet tool he calls Electric Tables, which template matches onto author names, titles, dates, and more to index a website as a row in a spreadsheet. Previously, this used the browser's localStorage, but it has since moved to Google Sheets.
I think this is a great development, and wanted to set up Electric Tables myself. The gist that Tom posted with the code had instructions for each step of the way, but silly coder I am, I ran into some trouble setting it up. This post is to clarify what exactly needs to be done so future Andy (and others!) can have less trouble in the future.
If you're reading this, thanks Tom!
Let's begin!
So, theres three things to set up: the Google Script, the Google Sheet, and the Javascript bookmarklet.
Google Script
Go to script.google.com and sign in, then click "New project" in the top left. It should take you to this blank page
Blank Google Script
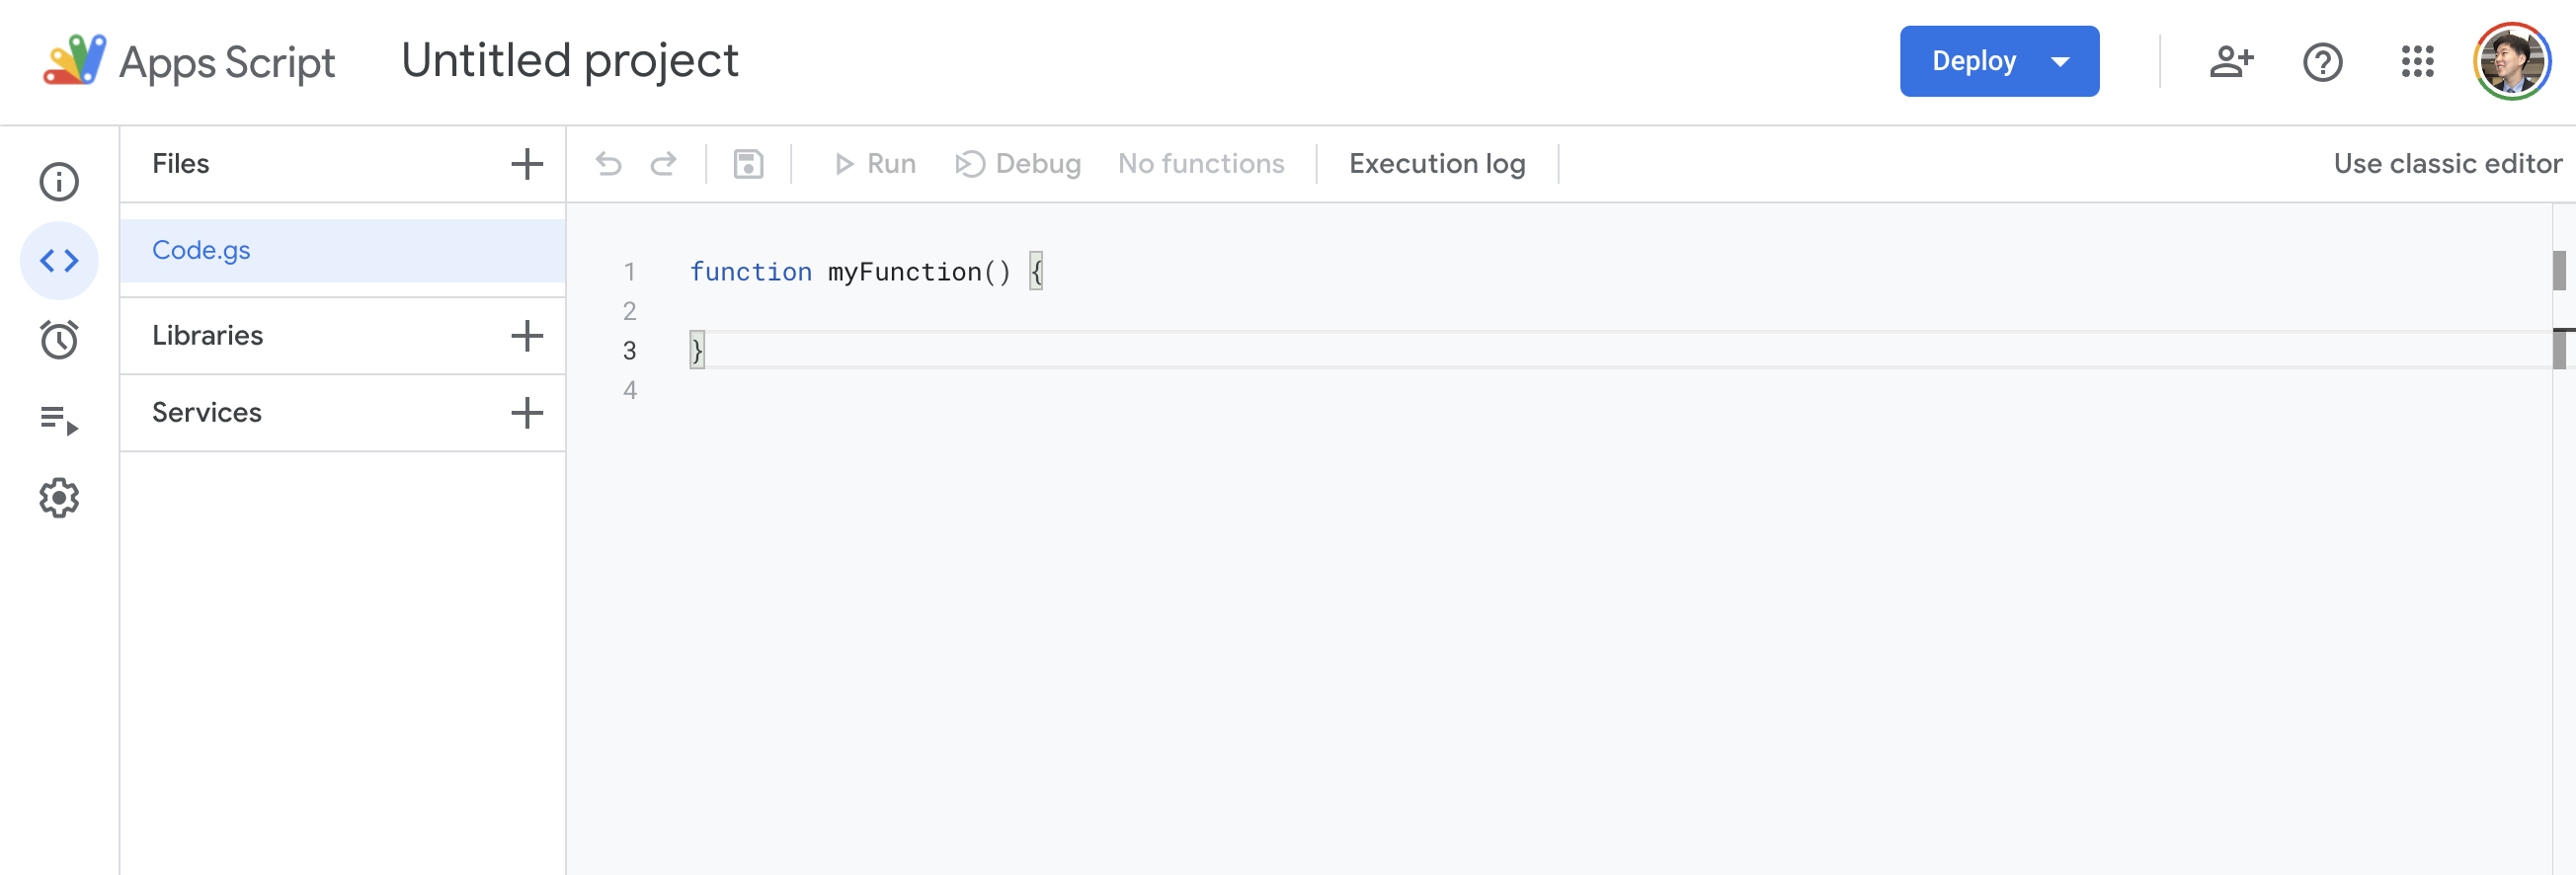
Name your project, then paste in the code from Tom's gist under electrict-tables-v0.2.gs. Feel free to delete the starter myFunction.
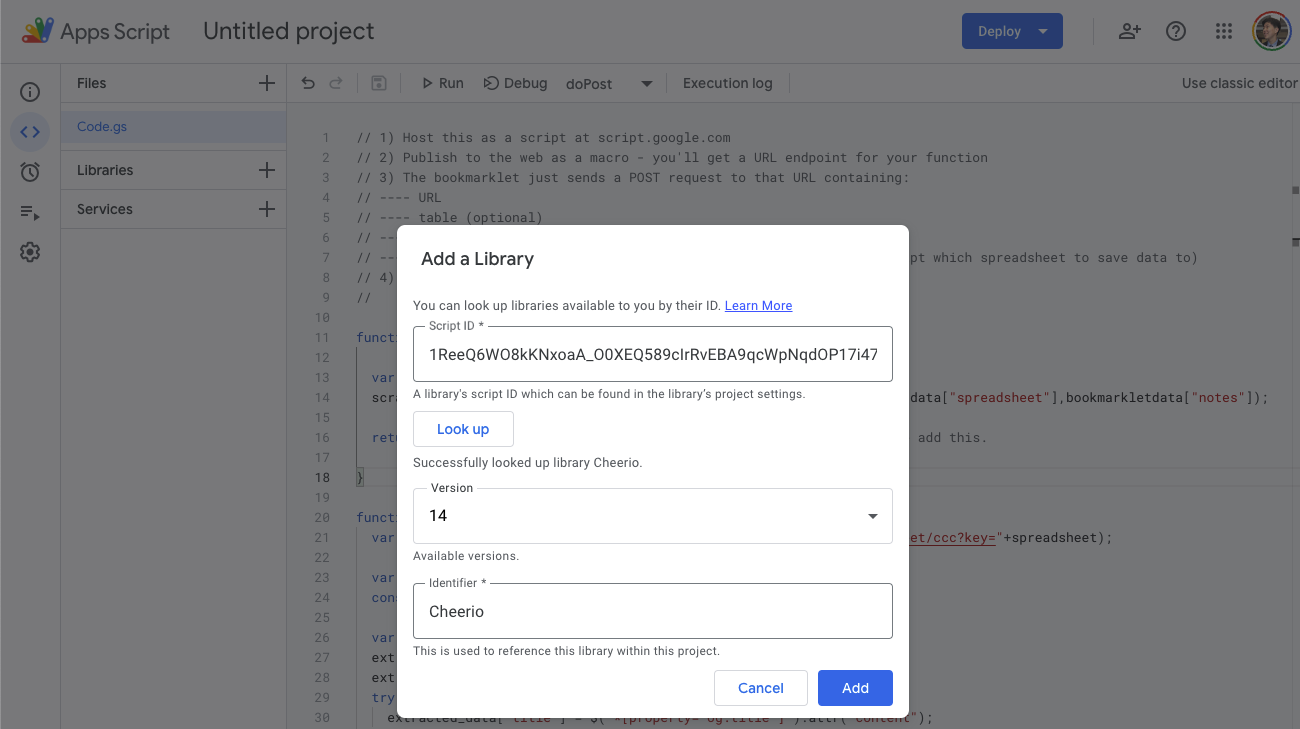
We need to add a dependency called Cheerio which scrapes the text from websites. Hit the plus icon next to "Libraries" on the left panel, and include Cheerio by looking up the Script ID: 1ReeQ6WO8kKNxoaA_O0XEQ589cIrRvEBA9qcWpNqdOP17i47u6N9M5Xh0. Hit "Add" to include it.
Google Script with code, looking up Cheerio successfully
Now we just gotta publish it to the web. Click "Deploy -> New deployment", and select "Web app" as the type. I don't think the type matters for functionality, and you can leave the options as default.
When you click deploy, you'll get a permissions popup screen. Since only you can run this script, it's safe to allow it to edit your spreadsheets, so go ahead and give it permission.
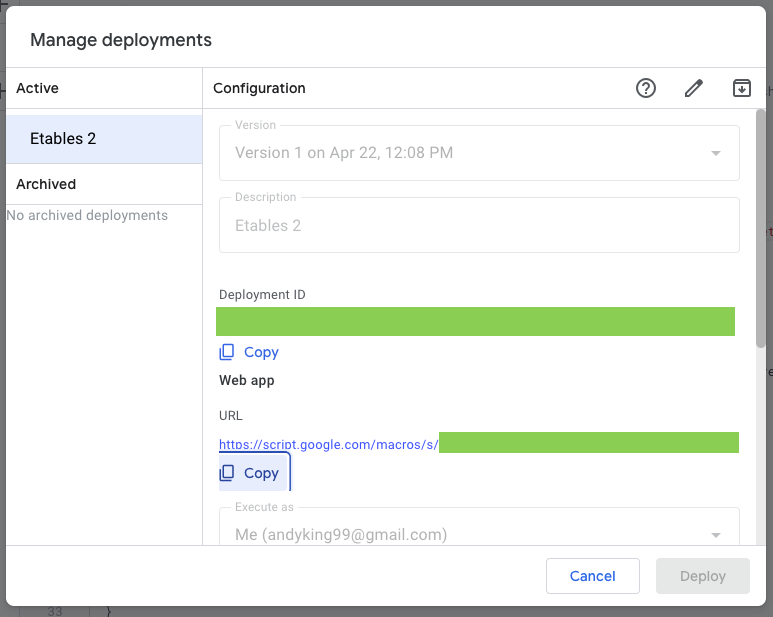
If you go to Deploy->Manage deployments, you can grab the Web app URL. We'll need this for our bookmarklet.
Our script's API endpoint URL
Google Sheet
Create a new Google Sheet, making sure it's under the same Google account as your script. We're going to add headers to the file so added rows are properly formatted. The column names are case-sensitive!
A properly set up Google Sheet
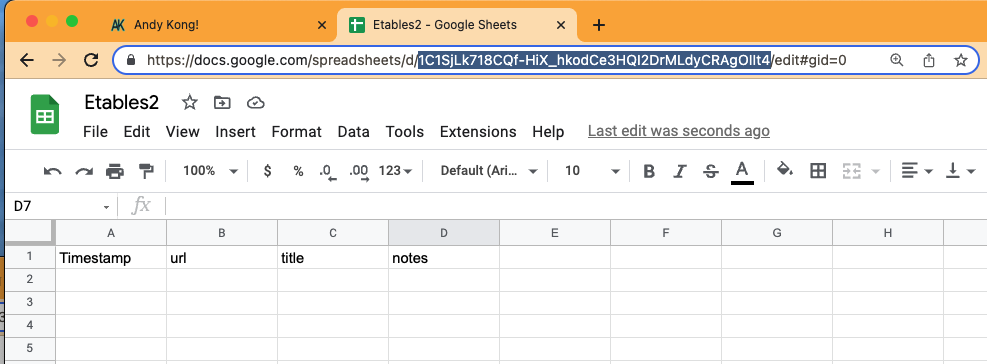
I've also highlighted the Sheet ID in the URL. We only need this bit for the bookmarklet, not the whole thing.
Bookmarklet
Last step, the actual trigger for adding pages to Electric Tables. Open your favorite text editor, and paste in bookmarklet.js from Tom's gist.
You only need to add the macro URL from step 1 (should look like "script.google.com/macros/s/....../exec") and the spreadsheet ID (should look like AodN89ua98dWL12O1oidRTa... and be really long)
Then head over to a bookmarklet generator and copy in your edited bookmarklet.js. Hit "Run Code" to test it out, and the Electric Tables menu should pop up in the top right of your screen. Add a note, then click "Submit".
Bookmarklet page getting indexed
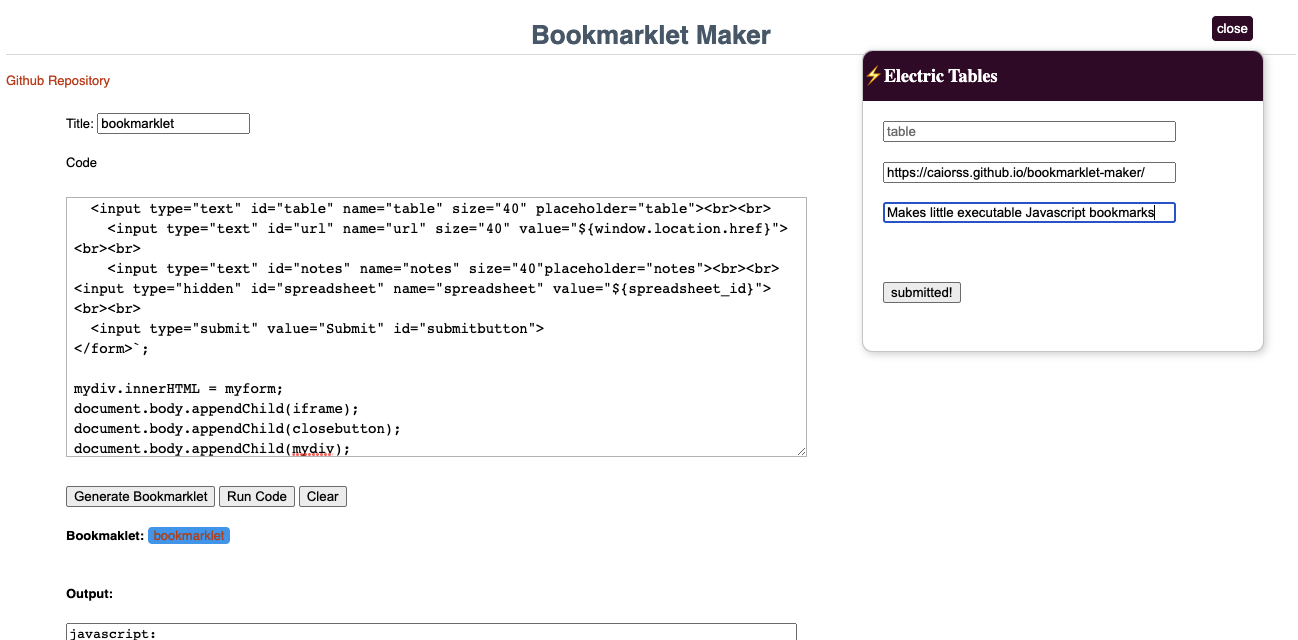
Tab over to your Google Sheets page, and you should see a new row with the bookmarklet site and your note appear after a second.
Successful Electric Tables entry!
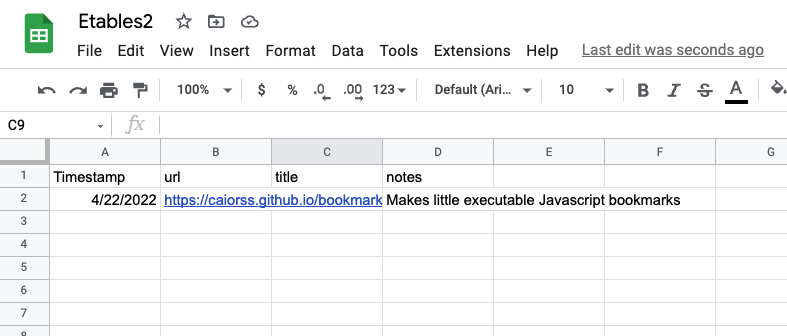
Celebrate! Now you can just drag the bookmarklet button onto your bookmarks bar to make a button for it. You can also create a bookmark, then for the URL paste in the "Output" Javascript function.
Adding bookmarklet manually

Wrapping Up
So, you should have a nifty little bookmark sitting in your bookmarks bar that catalogues interesting pages you find for later, and it's all stored on Google's big boy servers! No need to remember it all yourself anymore (as if you were doing that before 😜)
Electric Tables bookmarklet

Happy searching!